
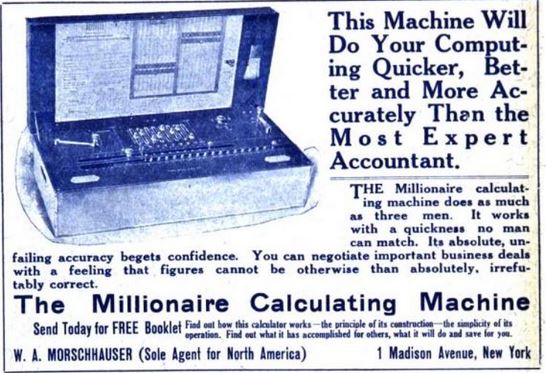
Overview
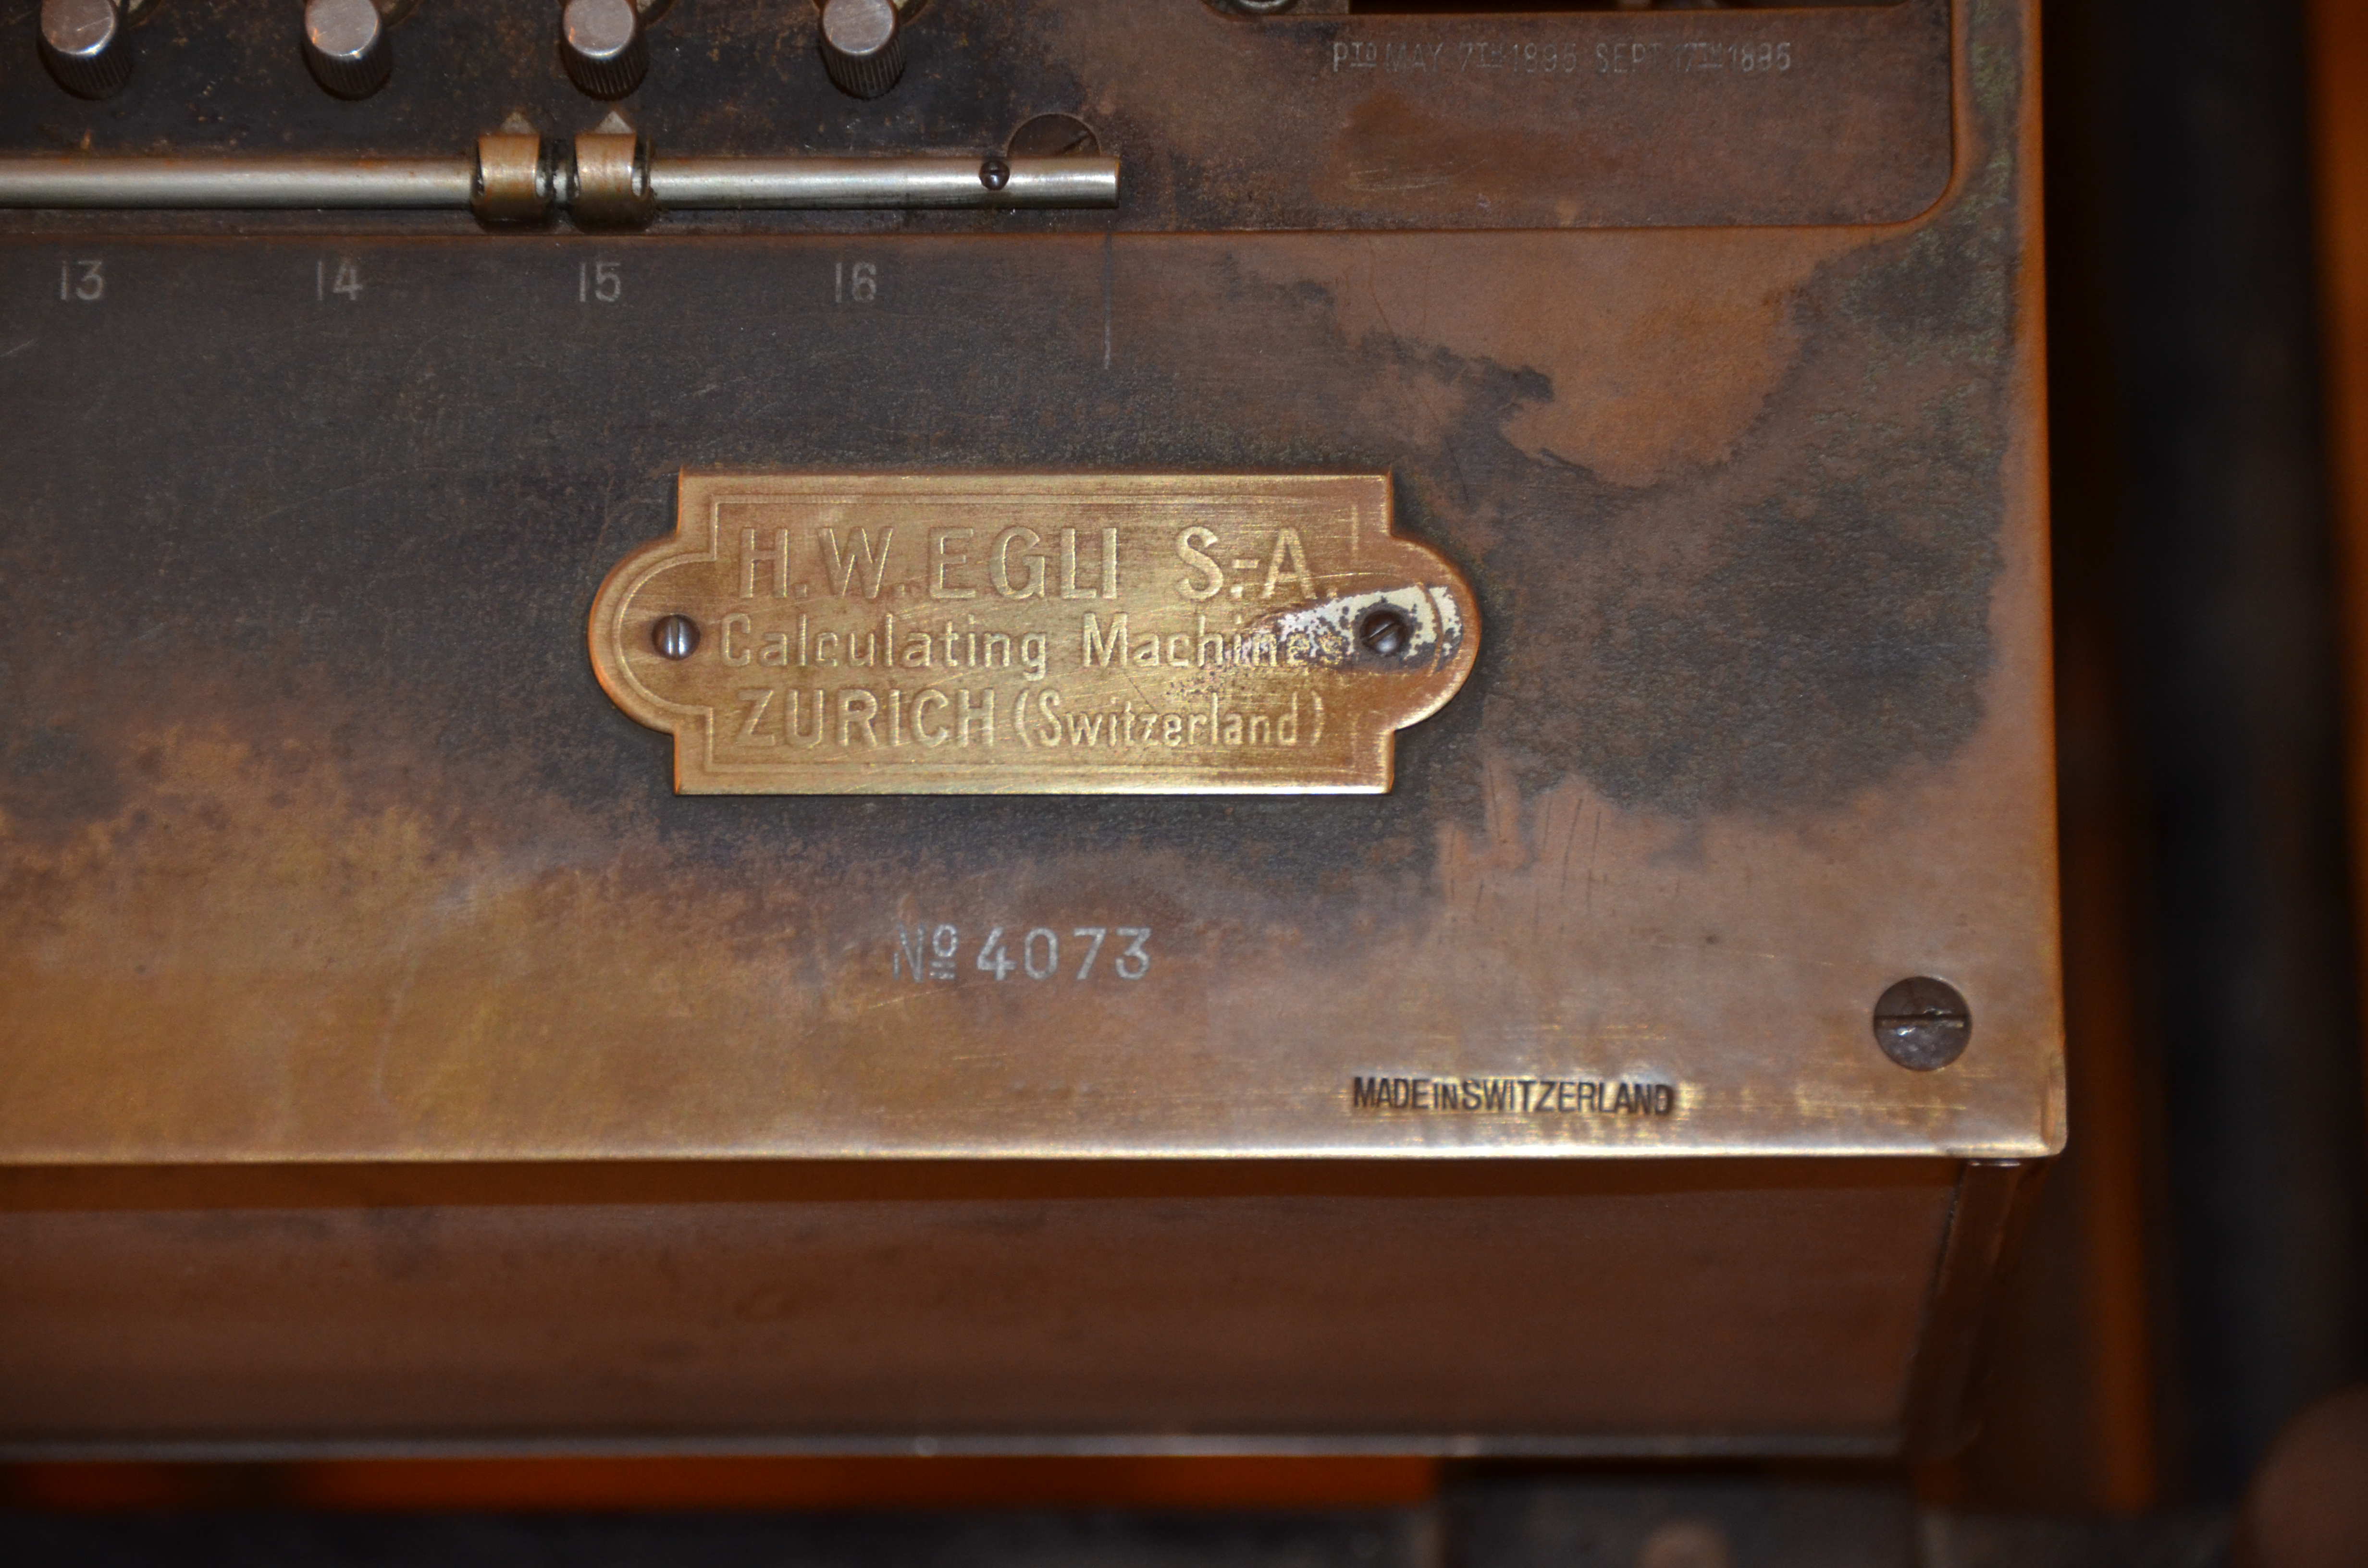
In 1893, engineer Hans W. Egli began selling a calculator titled the “Millionaire”. Egli produced and sold these machines over nearly forty years from Zurich, Sweden. These calculators, while being large, heavy, and expensive, were extremely efficient at multiplication. Most other calculators of the time, and at all really, use repeated additions to perform multiplication. Egli’s calculator did not. It used a mechanical brass-milled lookup table for performing any single digit multiplication in one turn of the crank, or one machine cycle. A two digit multiplication would then only require two cranks or cycles. Compared to other machines of the time, this was lighting fast.
The machines were produced all the way up to the early 1930’s and sold by a single American distributer. Early machines used sliders and a multiplication lever, and were set in a wooden case. As the years progressed, other options were added such as an electric motor drive, stand, and keyboard controls. Most machines, due to the cost, were bought and used by large businesses, such as insurance companies, the government, or scientists. Eventually, the speed and shrinking size of electric rotary calculators meant less of these machines were sold. Eventually production of these calculators stopped and Egli focused on their other machine, the Madas.
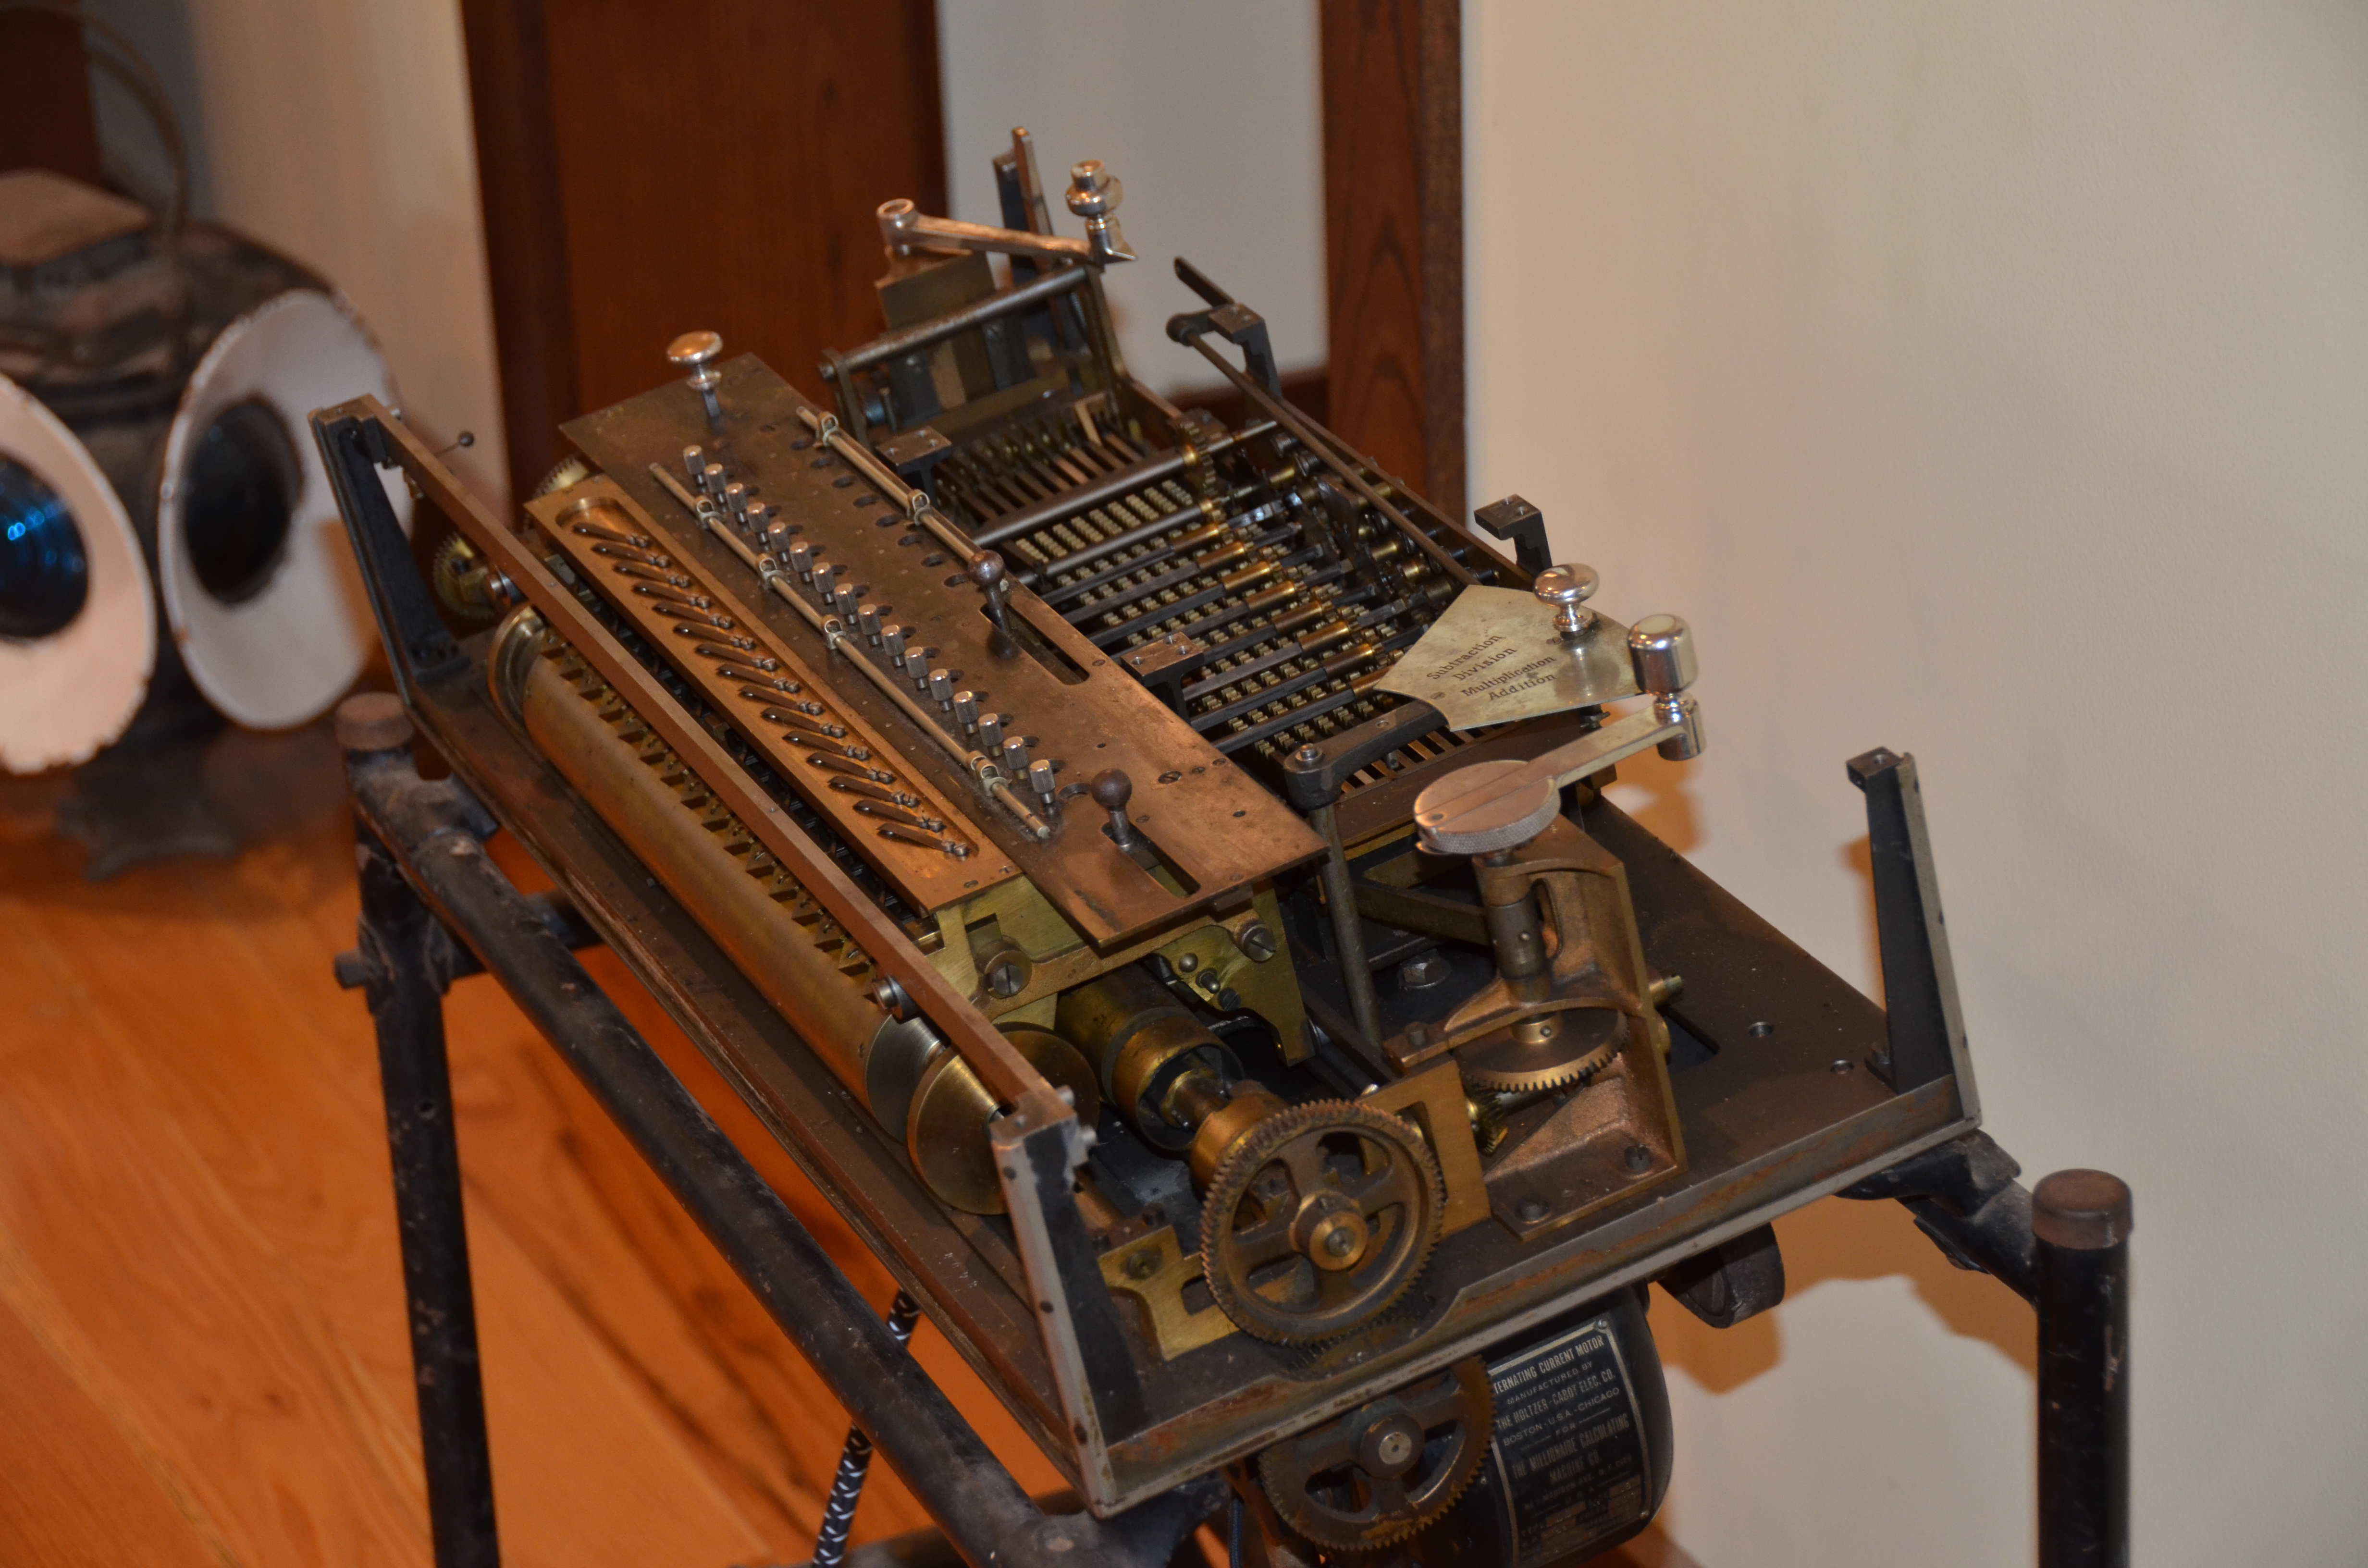
Model VIIIe
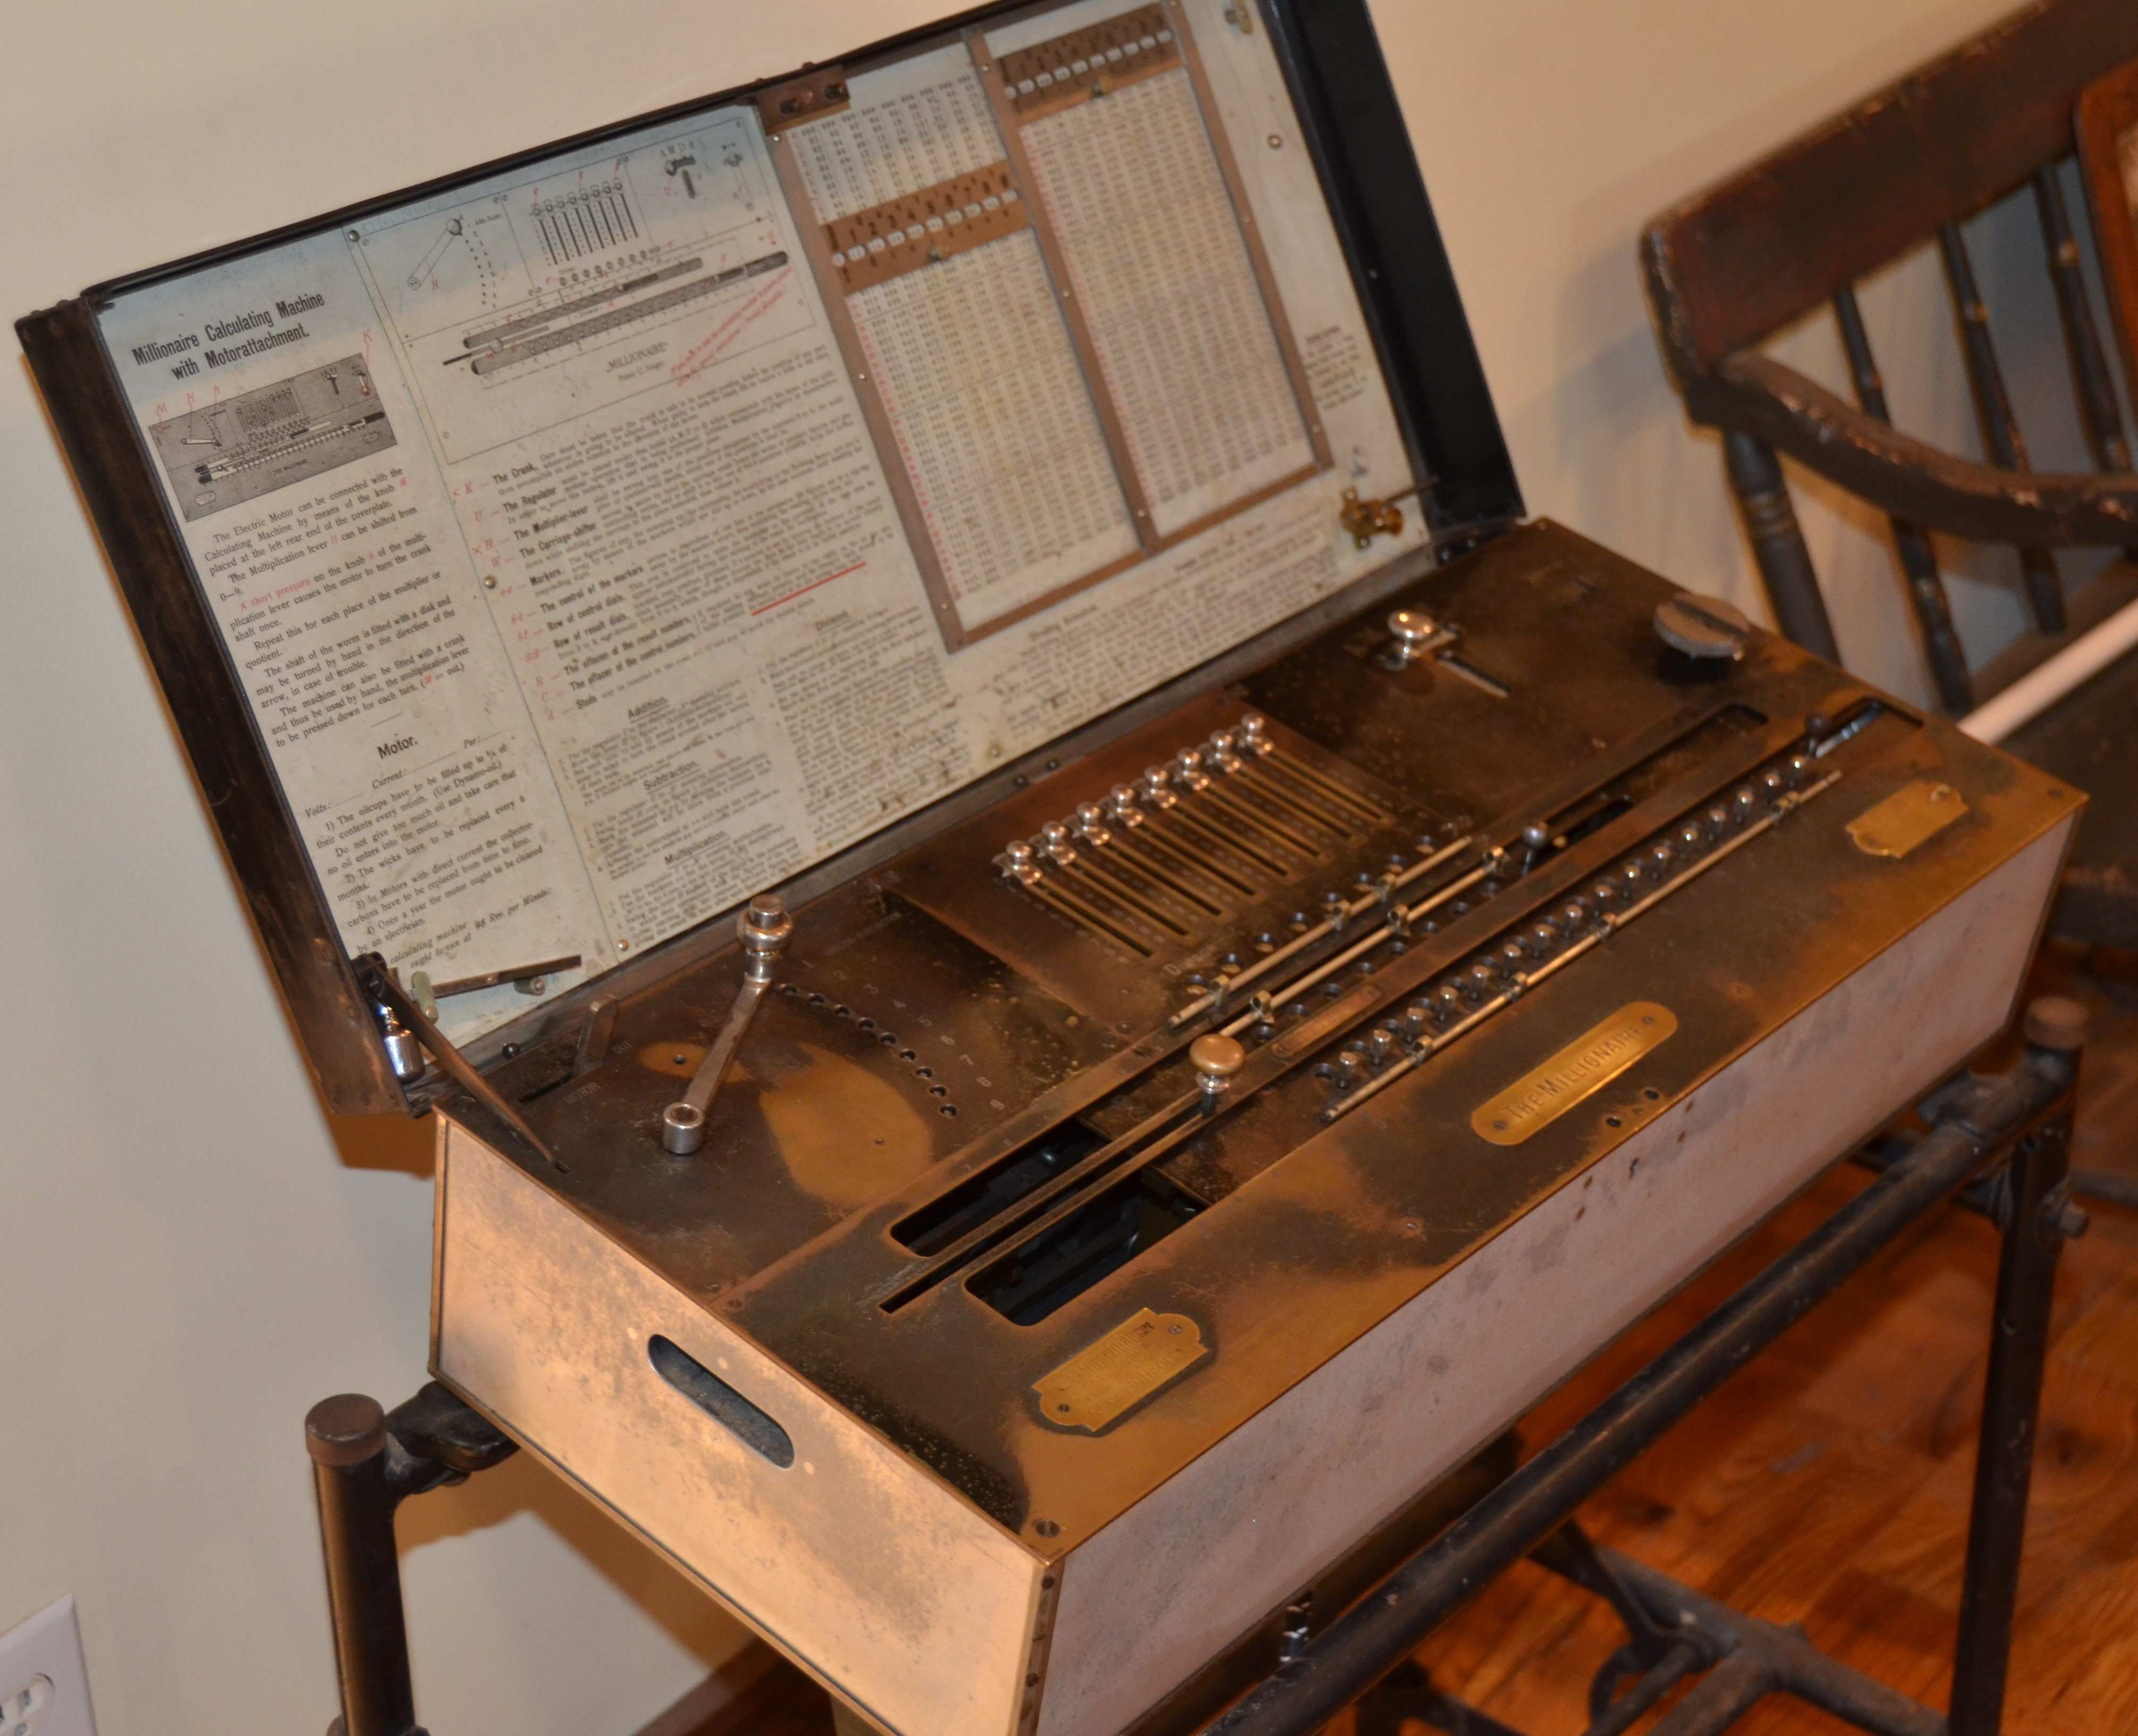
This specific machine is the model VIIIe. The “VIII” because the machine has an 8 digit input, and the “e” for electric. This machine was purchased and picked up from a gentleman in Warrenton, VA. He bought it at an estate sale in the same general area with the intention of re-selling it. Unfortunately, no more history on this specific machine is known.
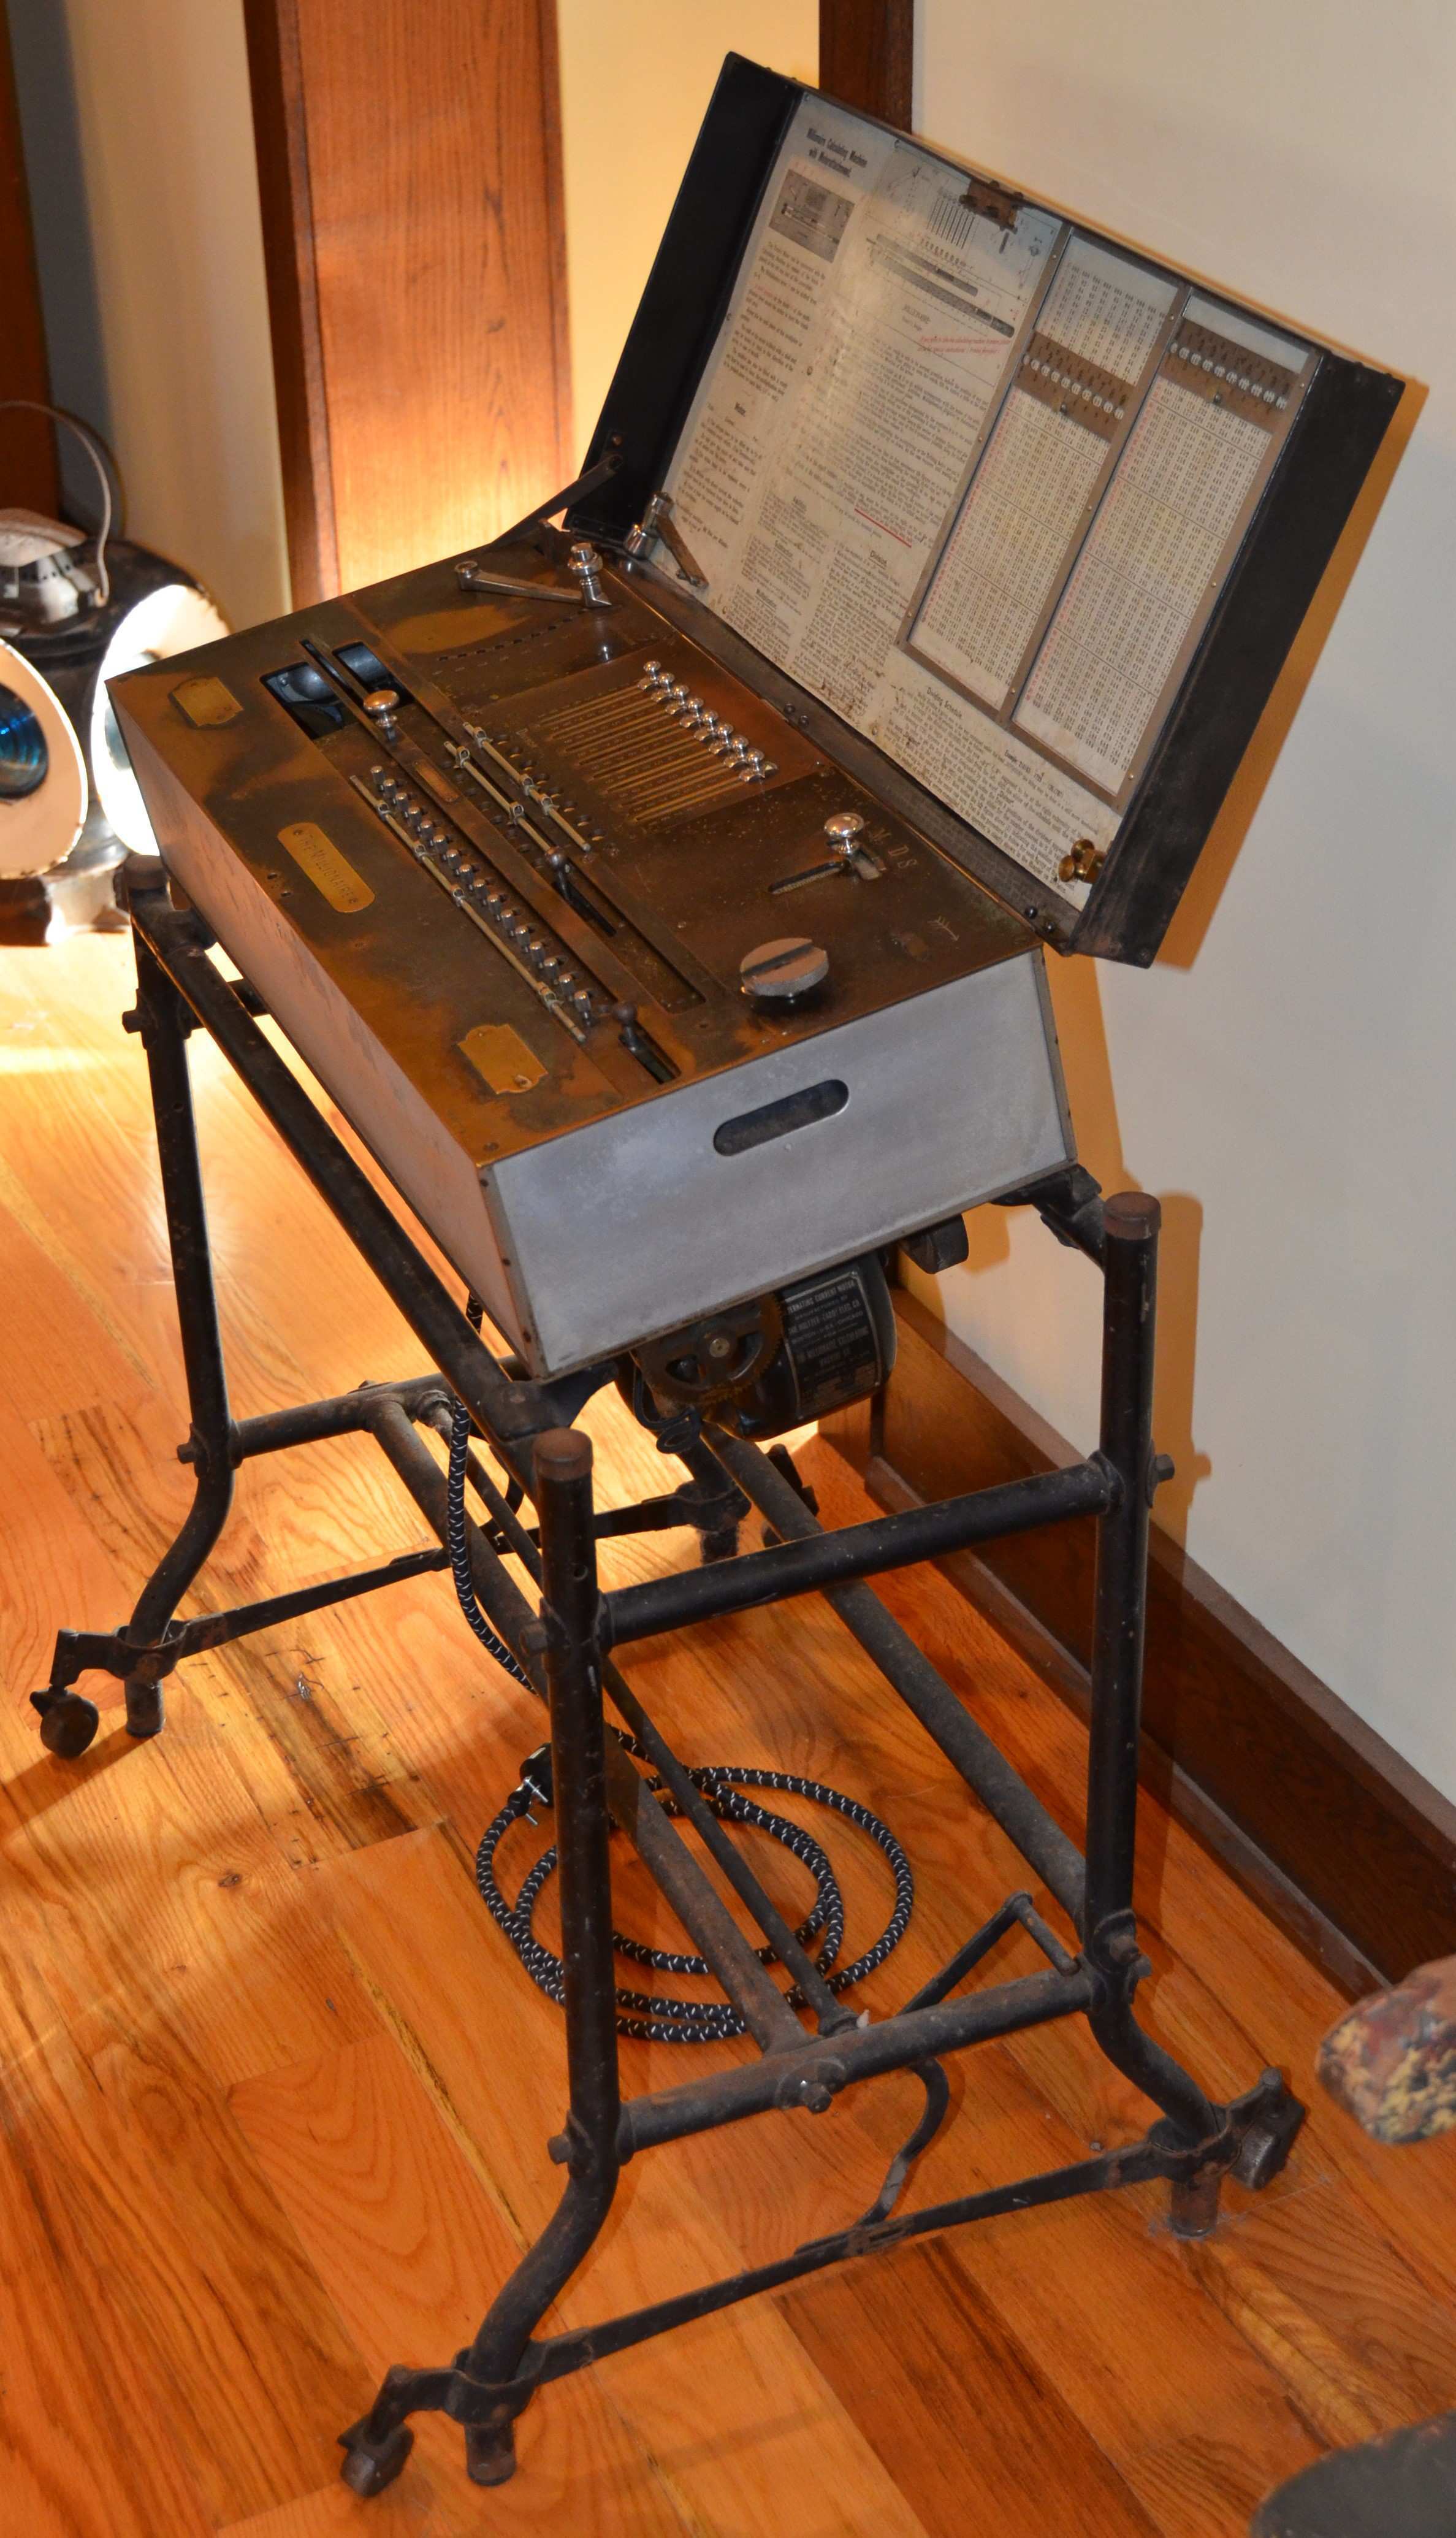
The actual calculator sets on a steel tube frame, with adjustable casters on the bottom. The motor, motor switch, and some of the gearing is attached upside down to the underside of the machine. Just the main calculator, without the motor and stand weighs around 70 pounds, with the motor and stand it probably comes to around 140 pounds.
This machine is one of the rarer ones. Based on data from the Museum für Kommunikation in Berne, a total of only 236 machines in this particular model were ever produced. The most common Millionaire machines did not have an electric motor. Of the machines that did have a motor, machines with a keyboard input were most common. Electric machines were usually bought for when a large amount of calculations needed to be made - and the fastest way to input numbers was the keyboard. Sliders are very slow compared to easily selecting numbers on the keyboard, making electric machines with slider input more rare.
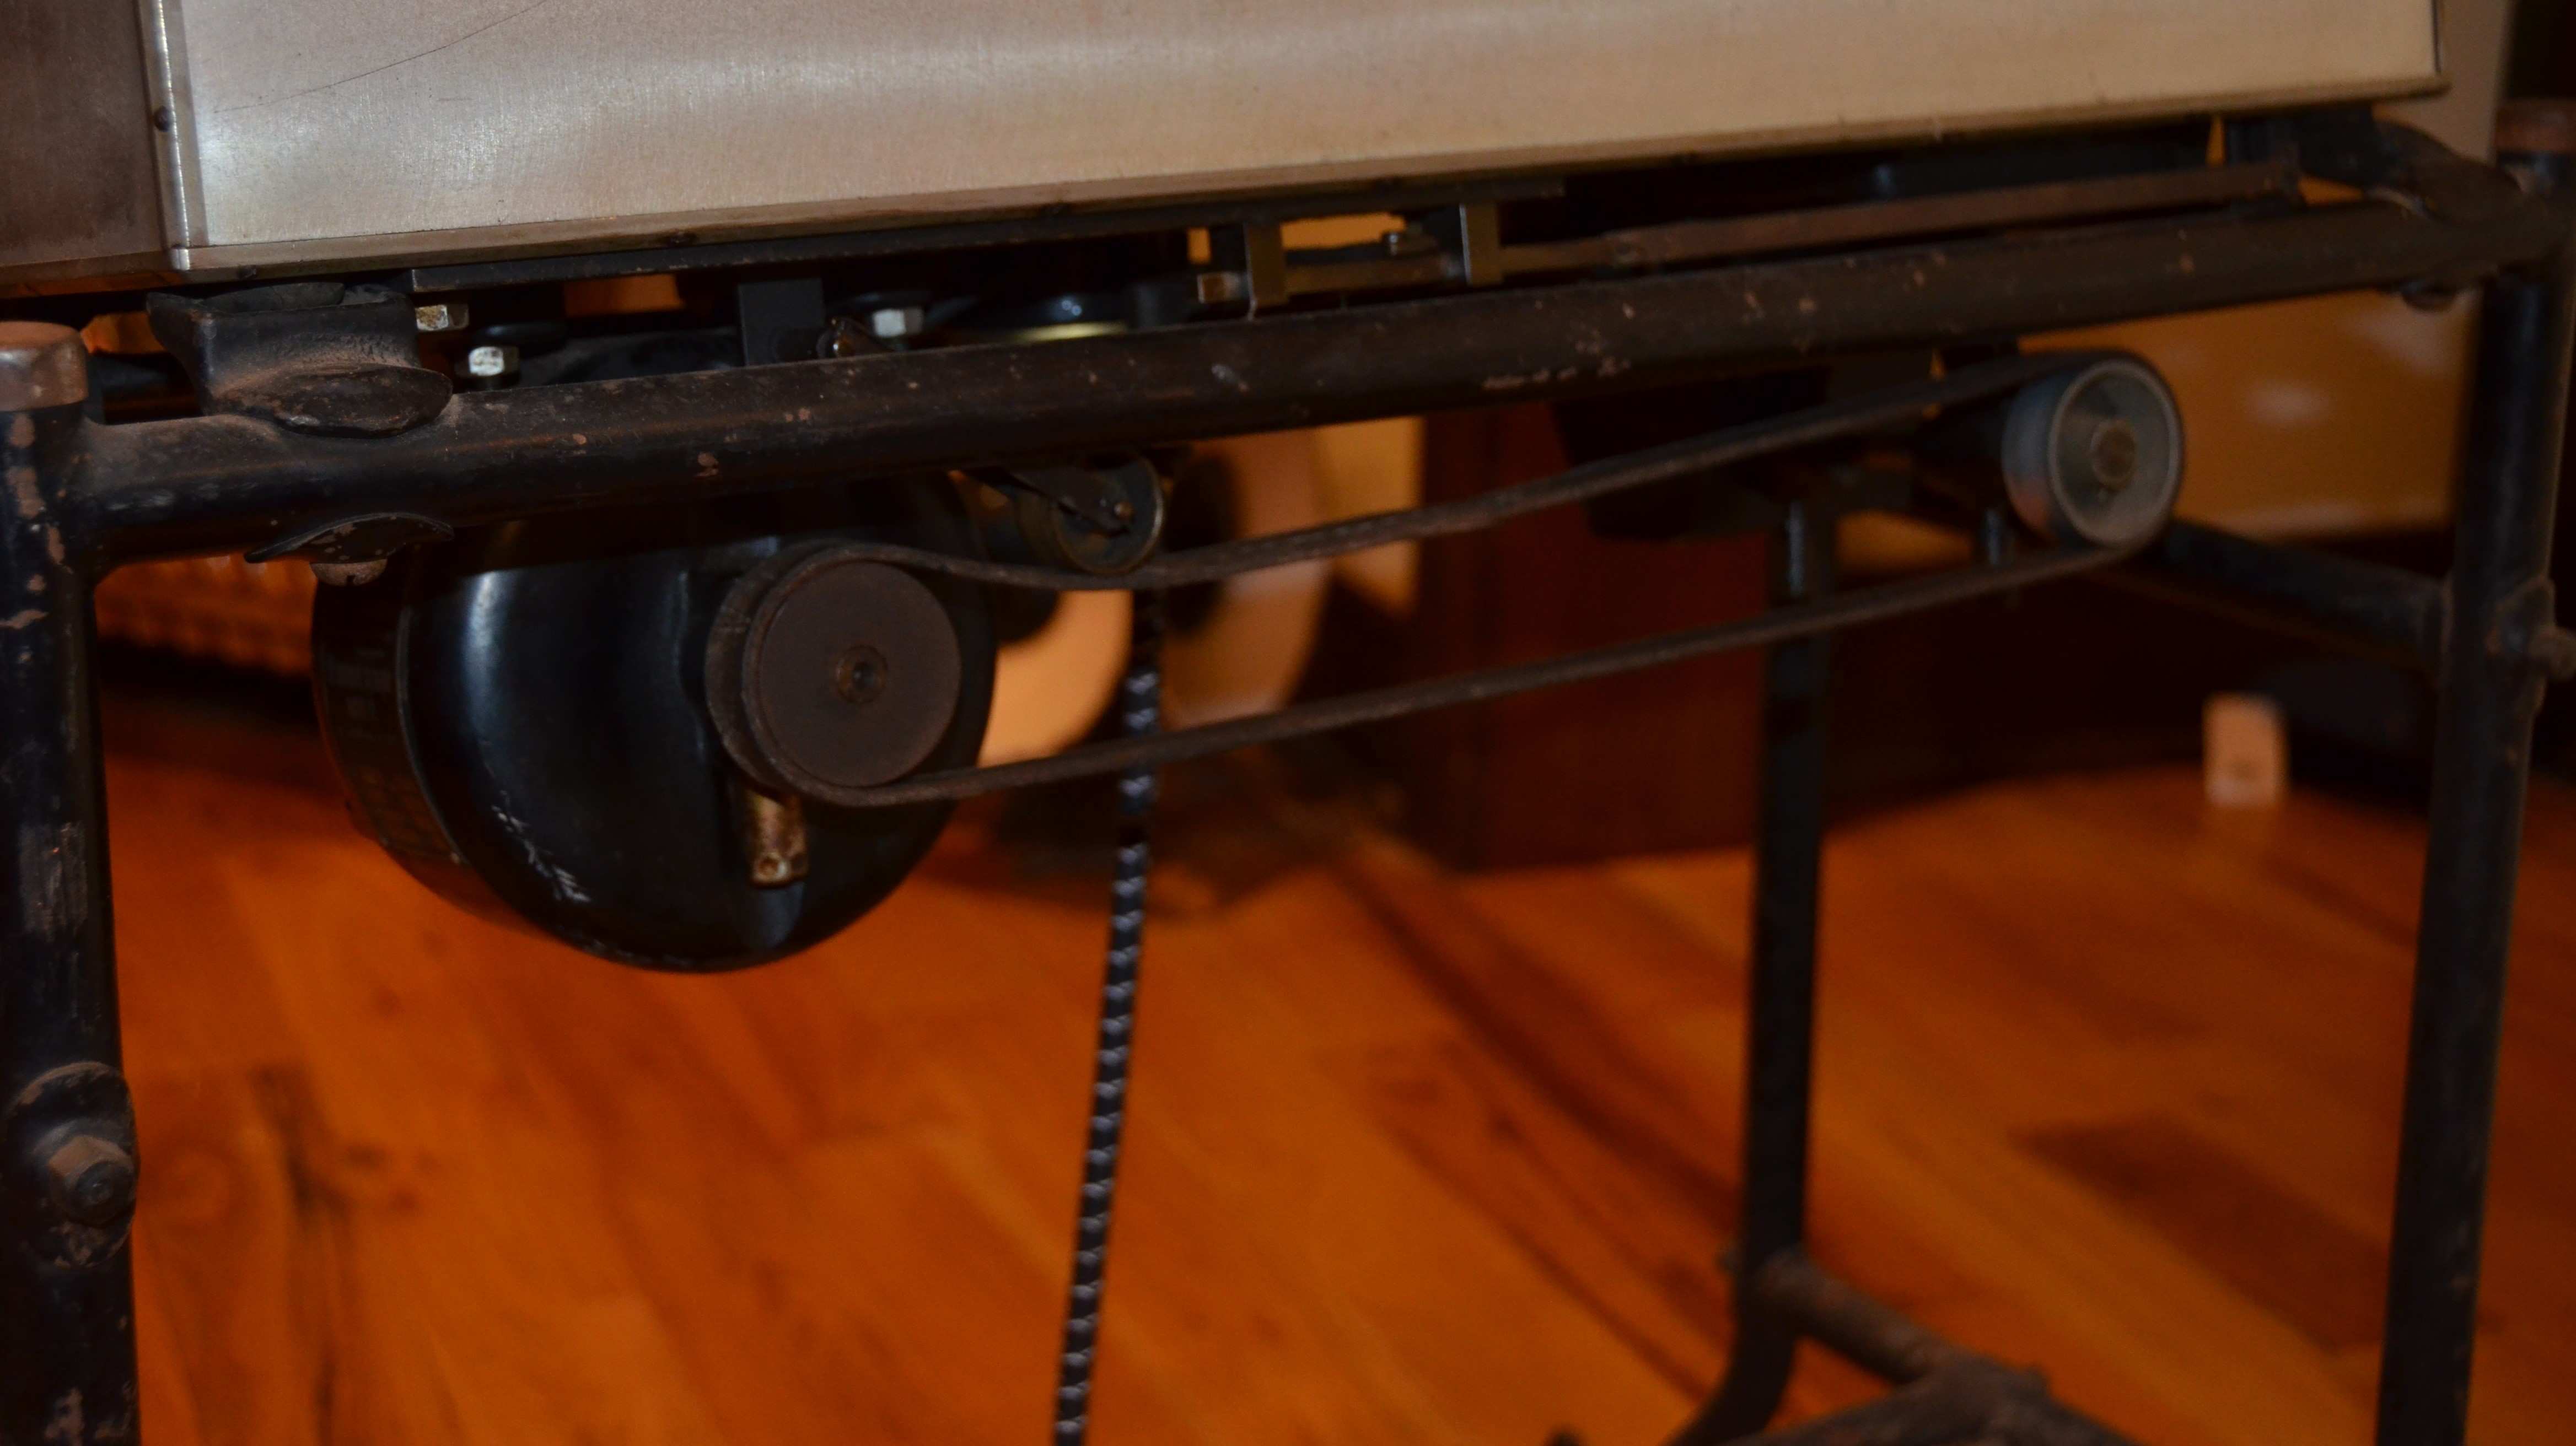
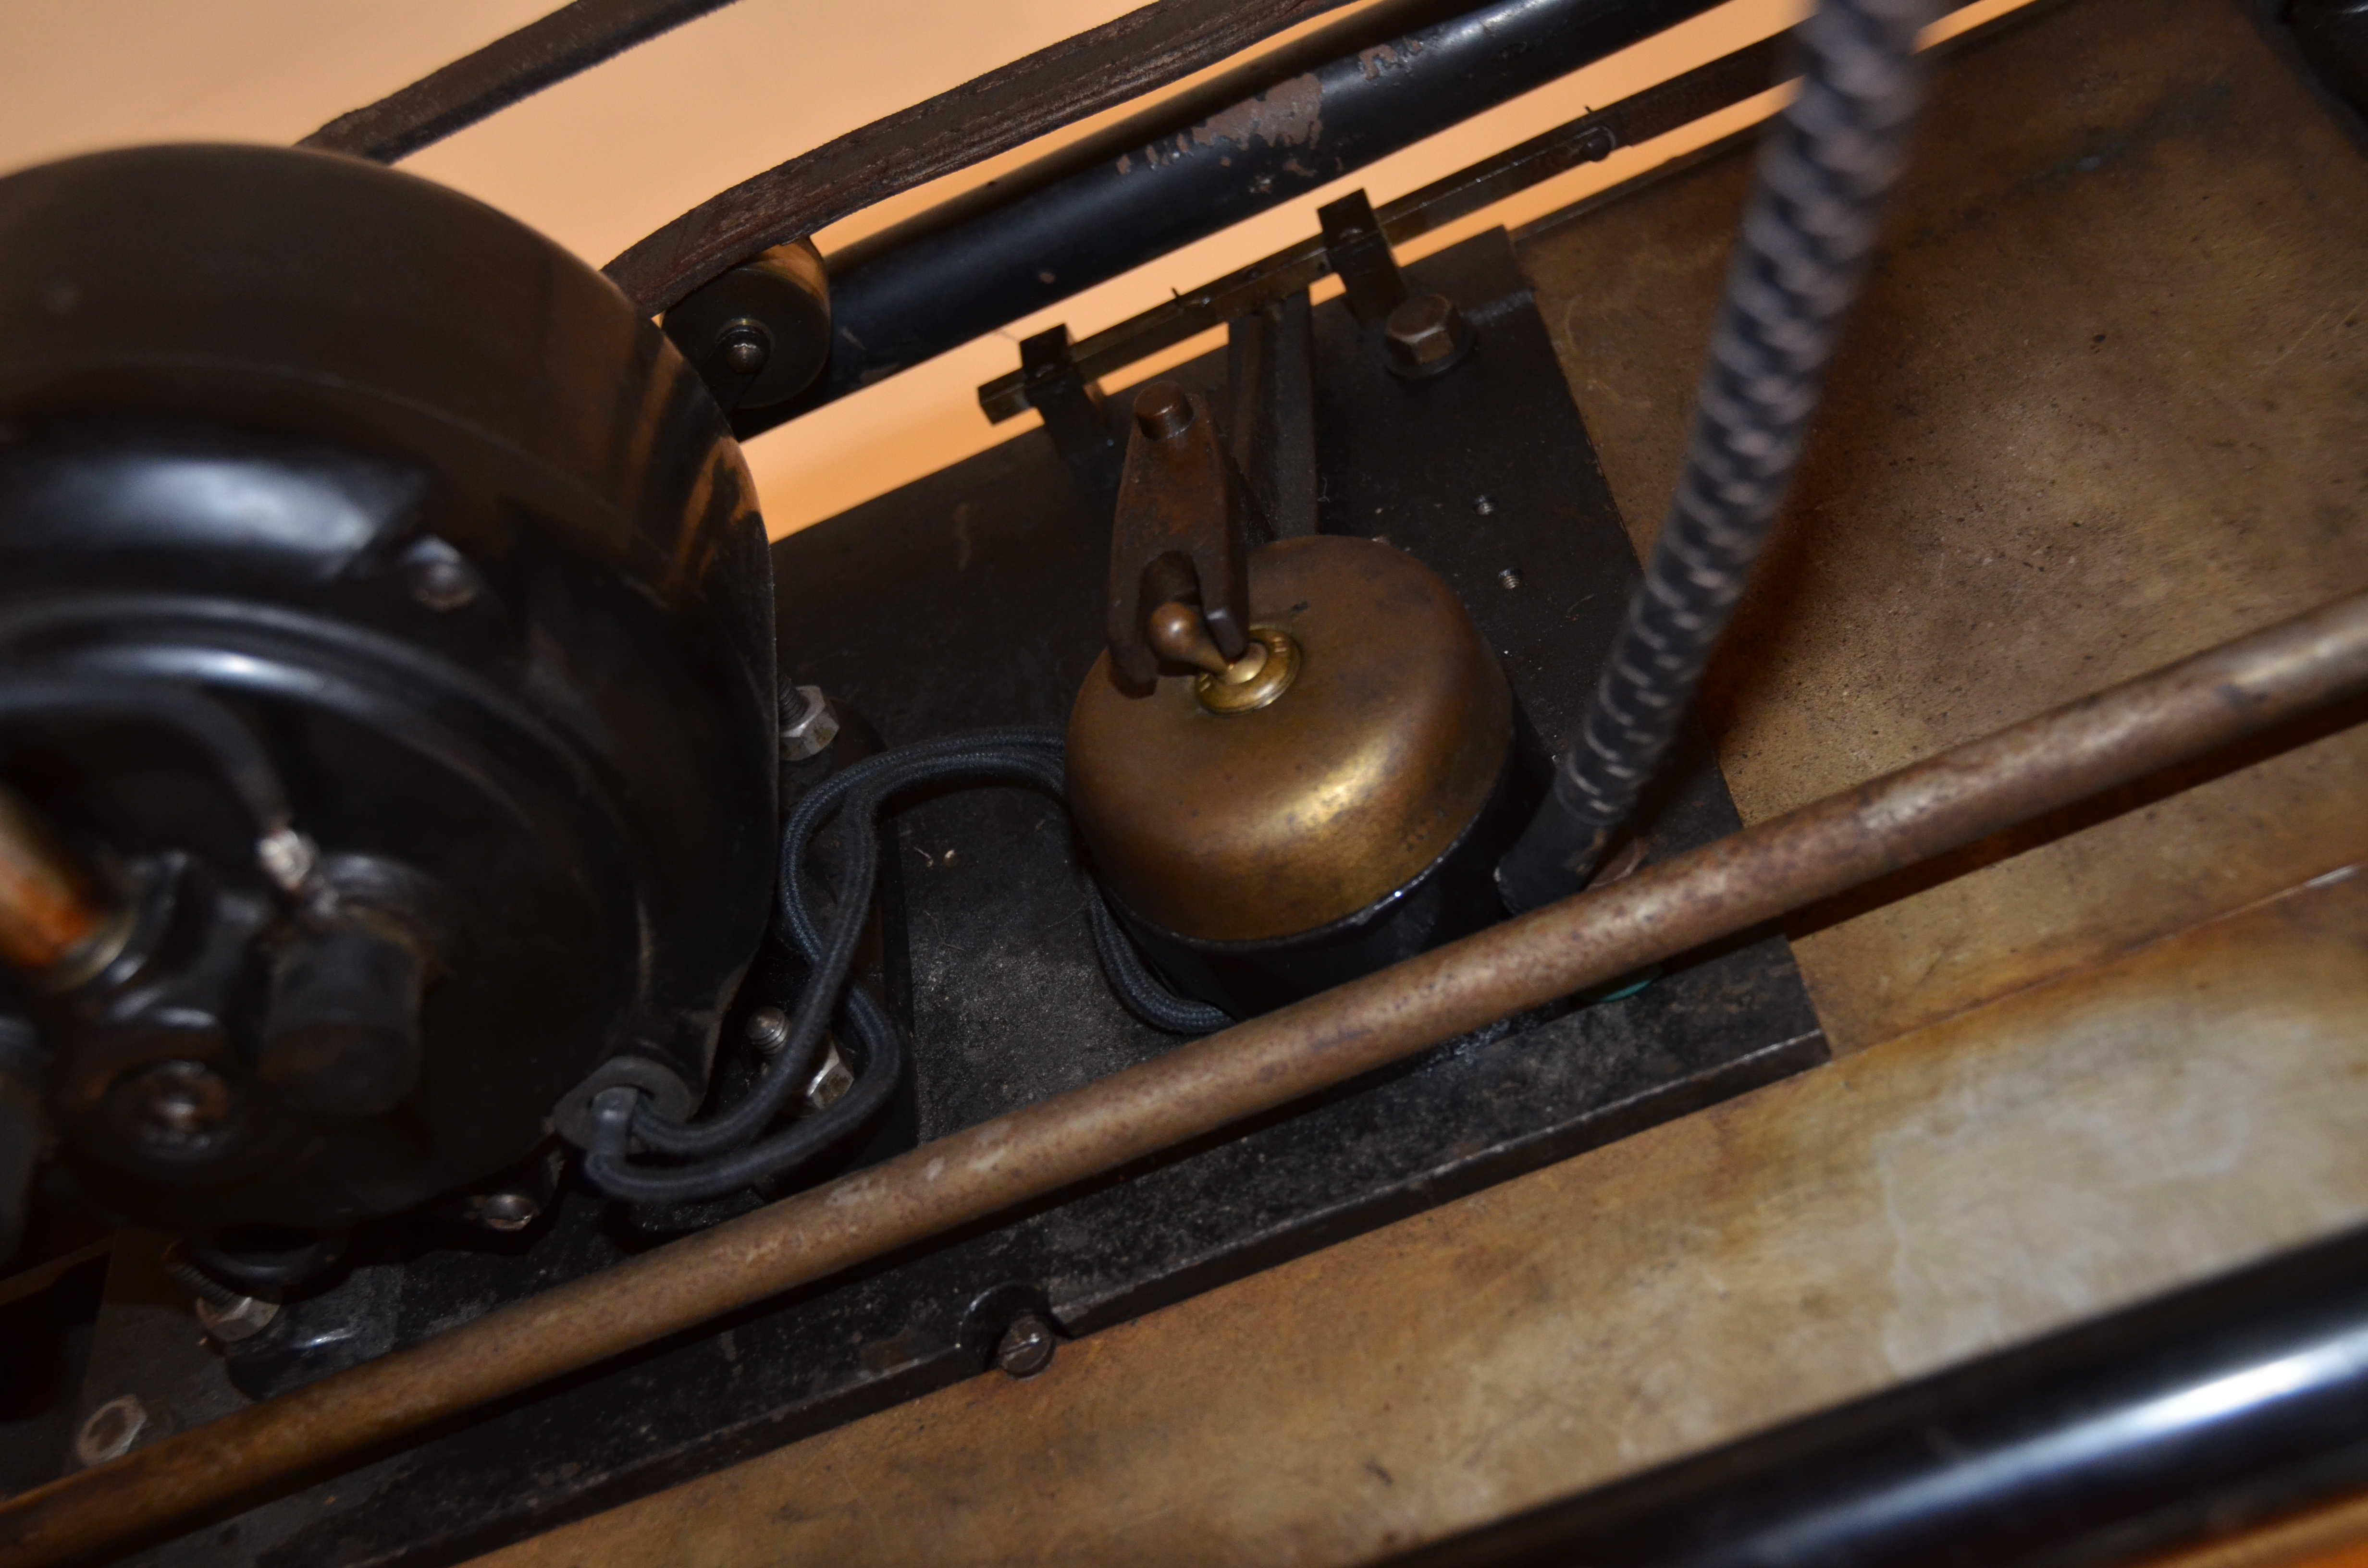
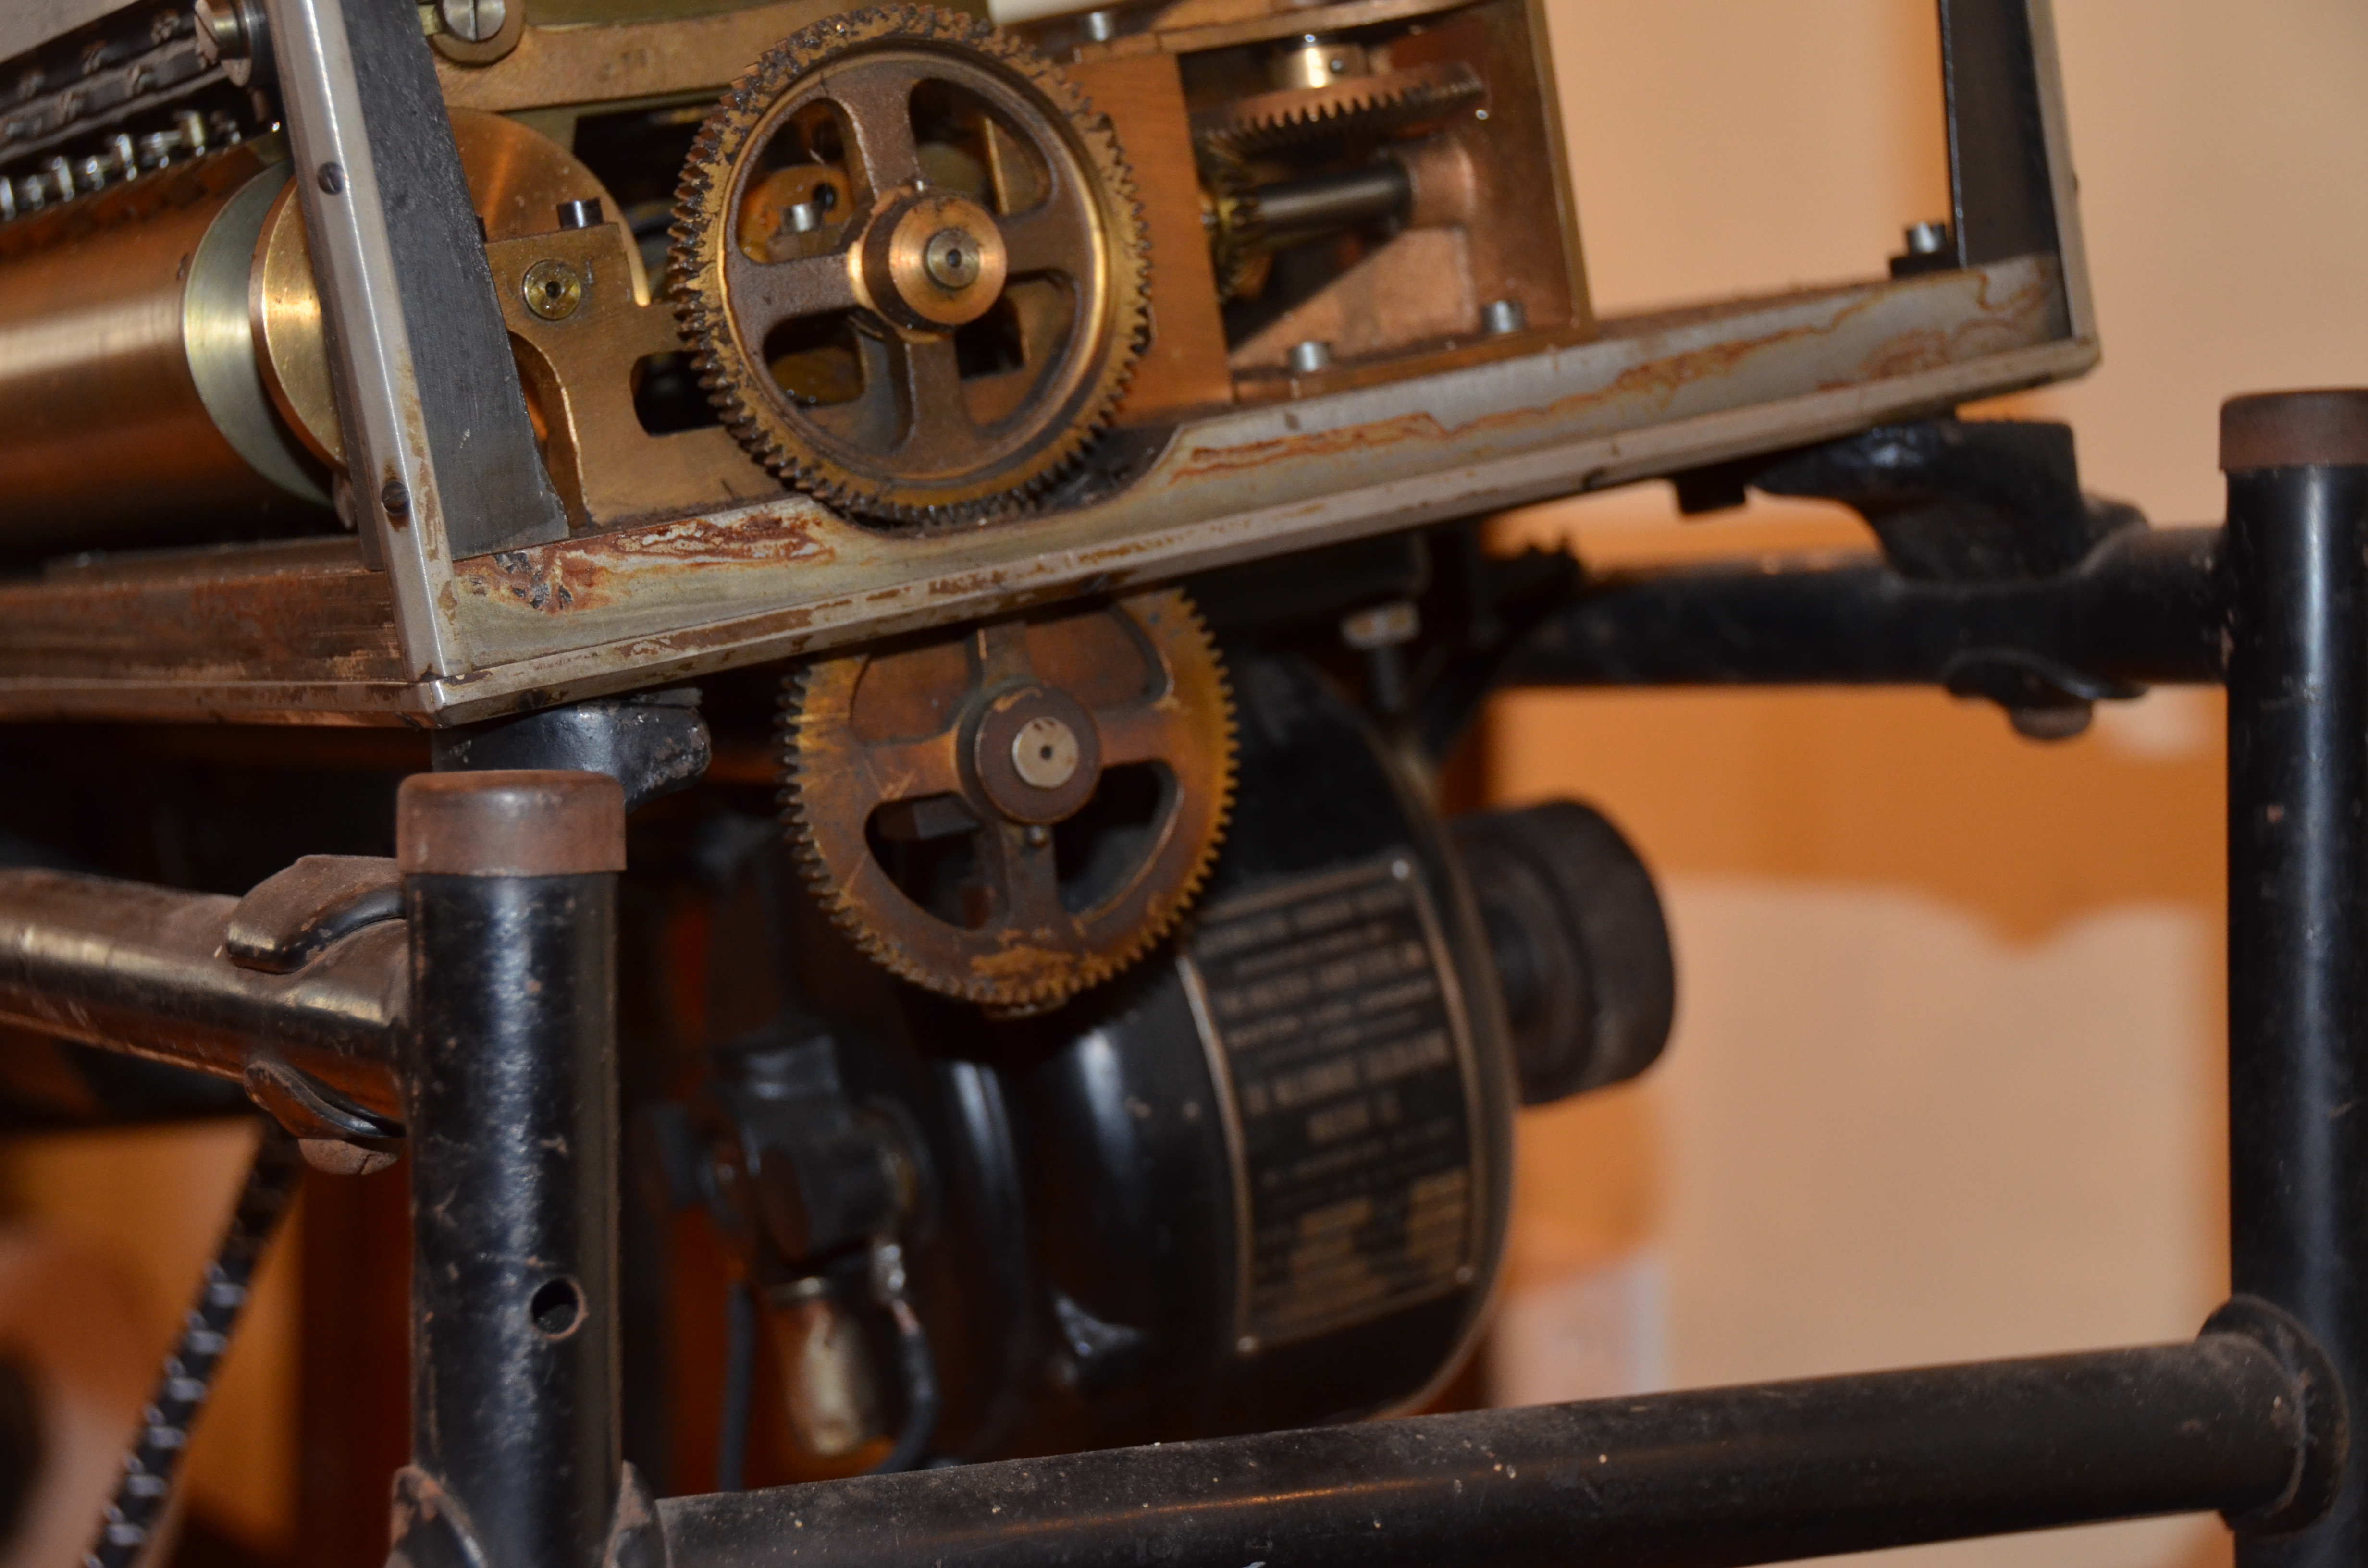
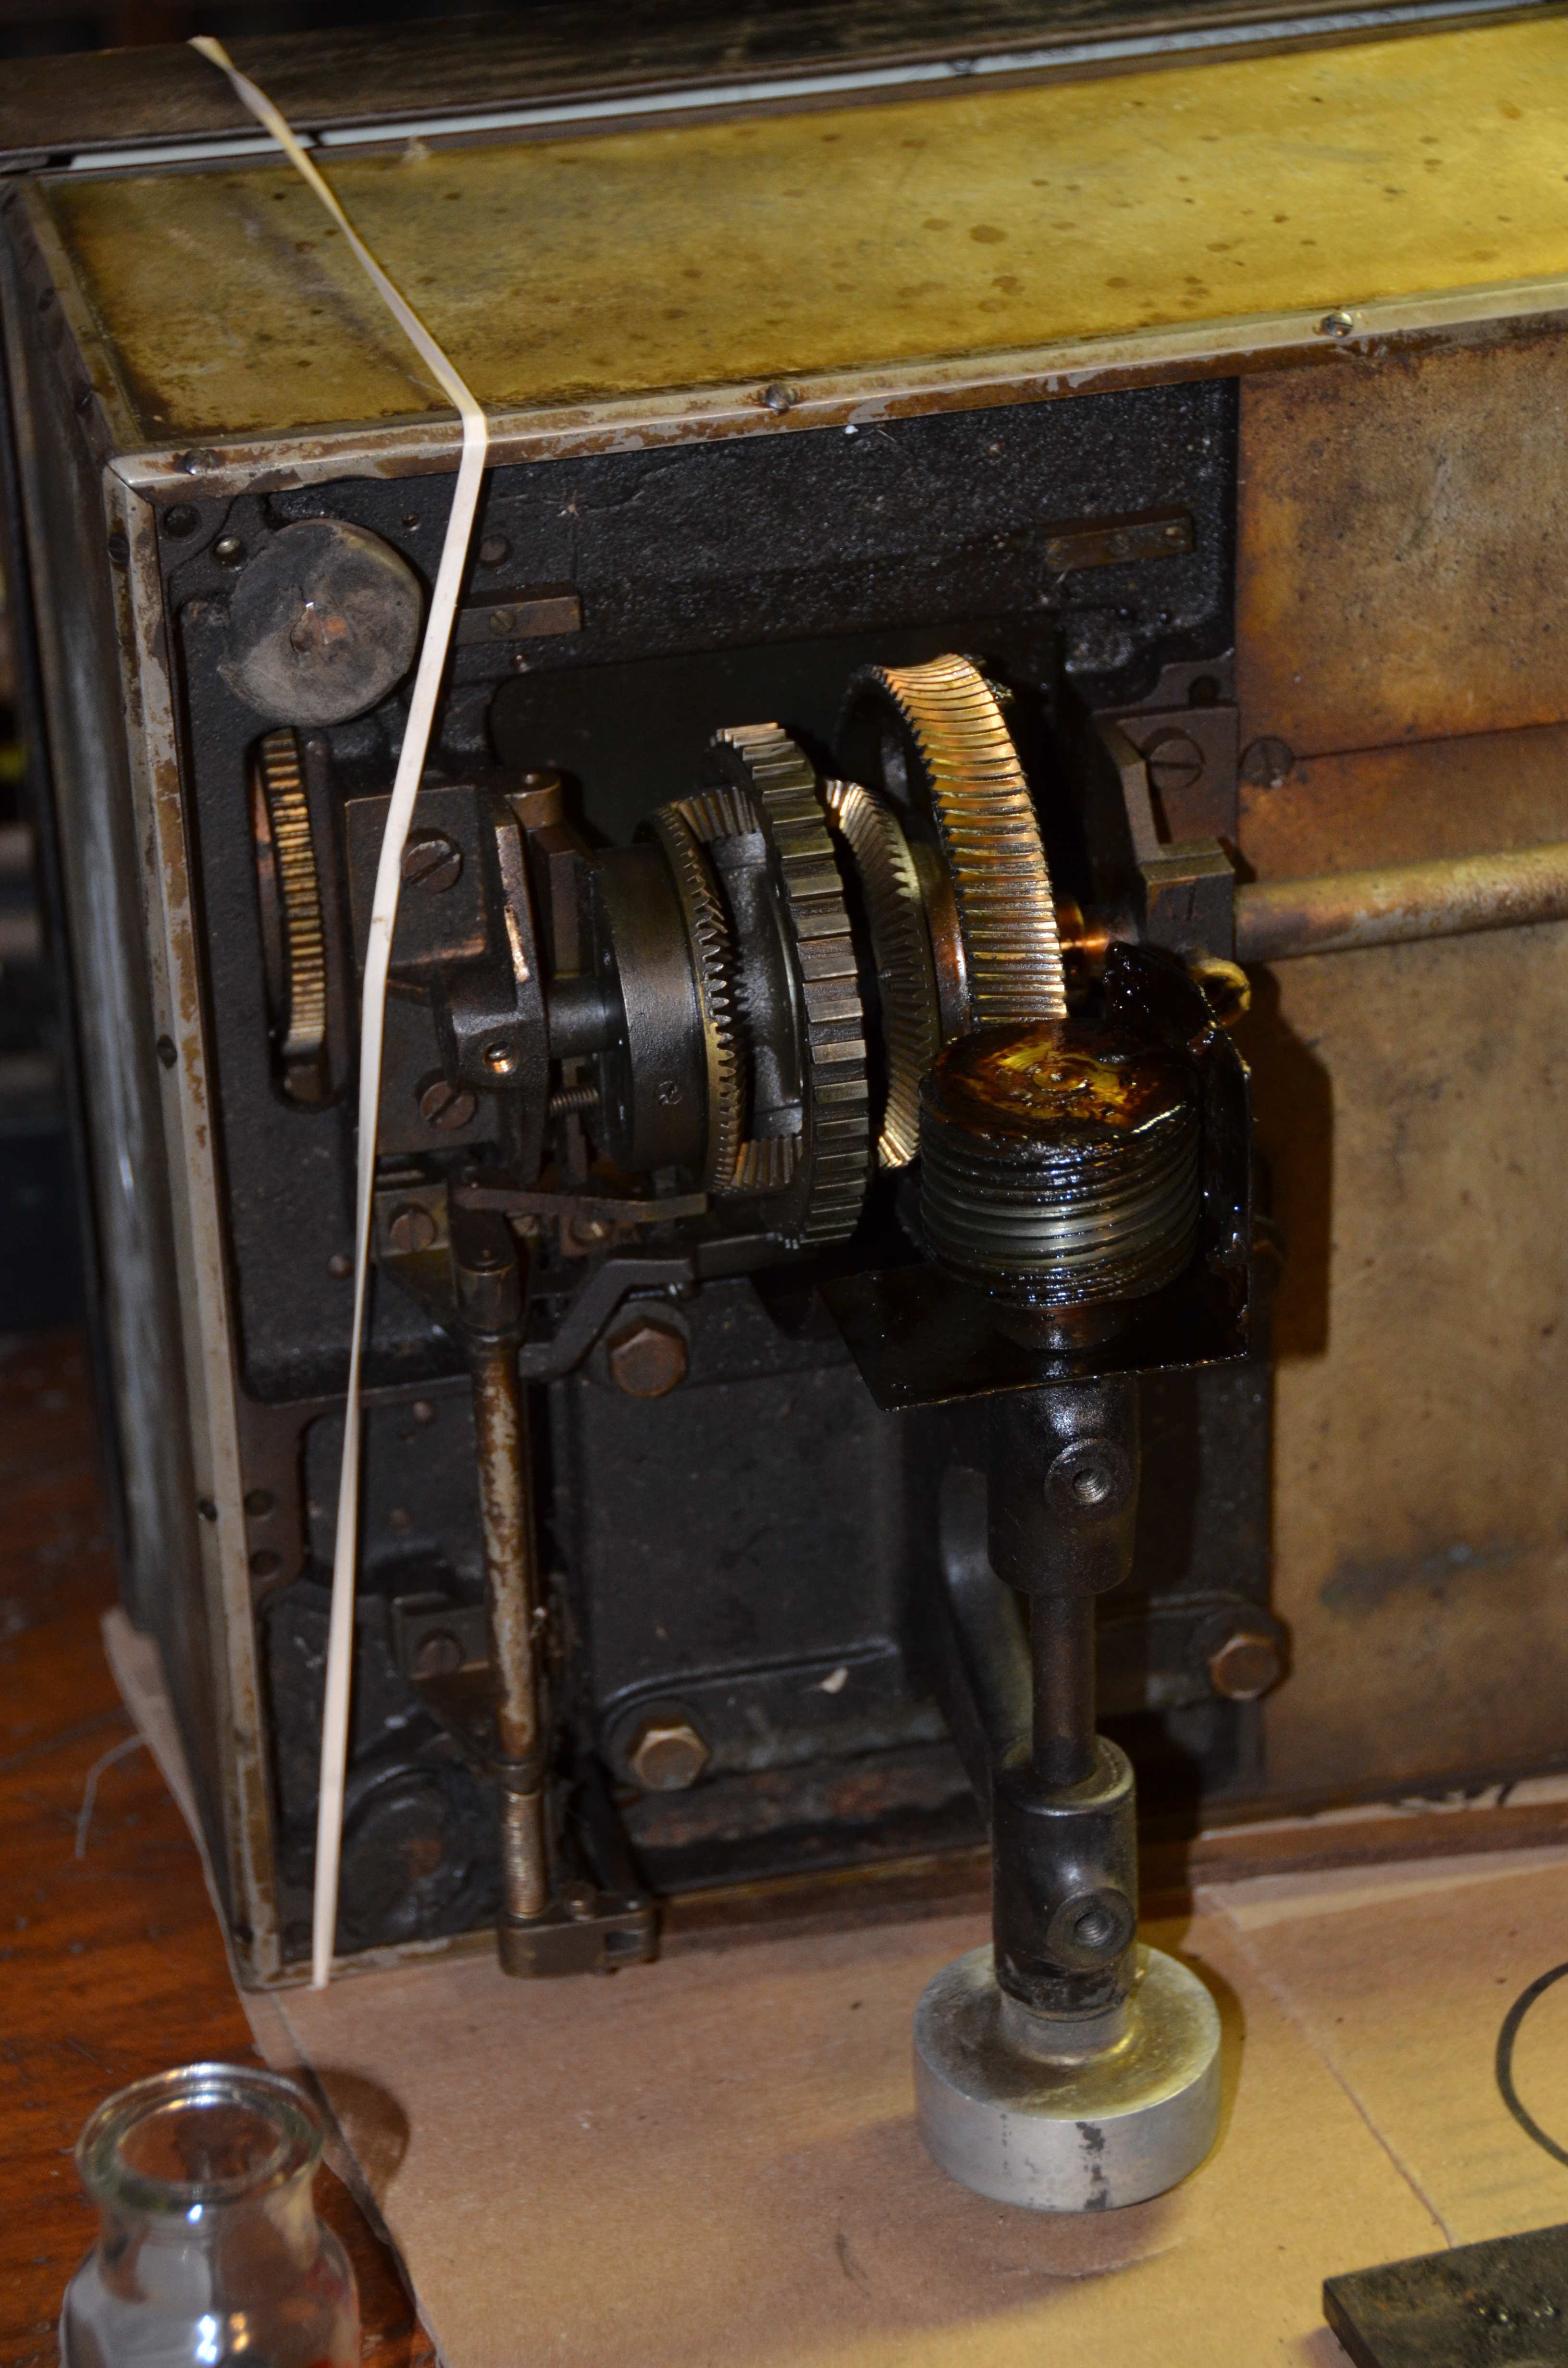
The motor is attached underneath the base of the calculator, along with a switch, spiral reduction gearing, multiple bevel gears and a clutch that connects to the main machine. The motor is connected via it’s original leather belt with a tensioner also attached under the machine.
Controls
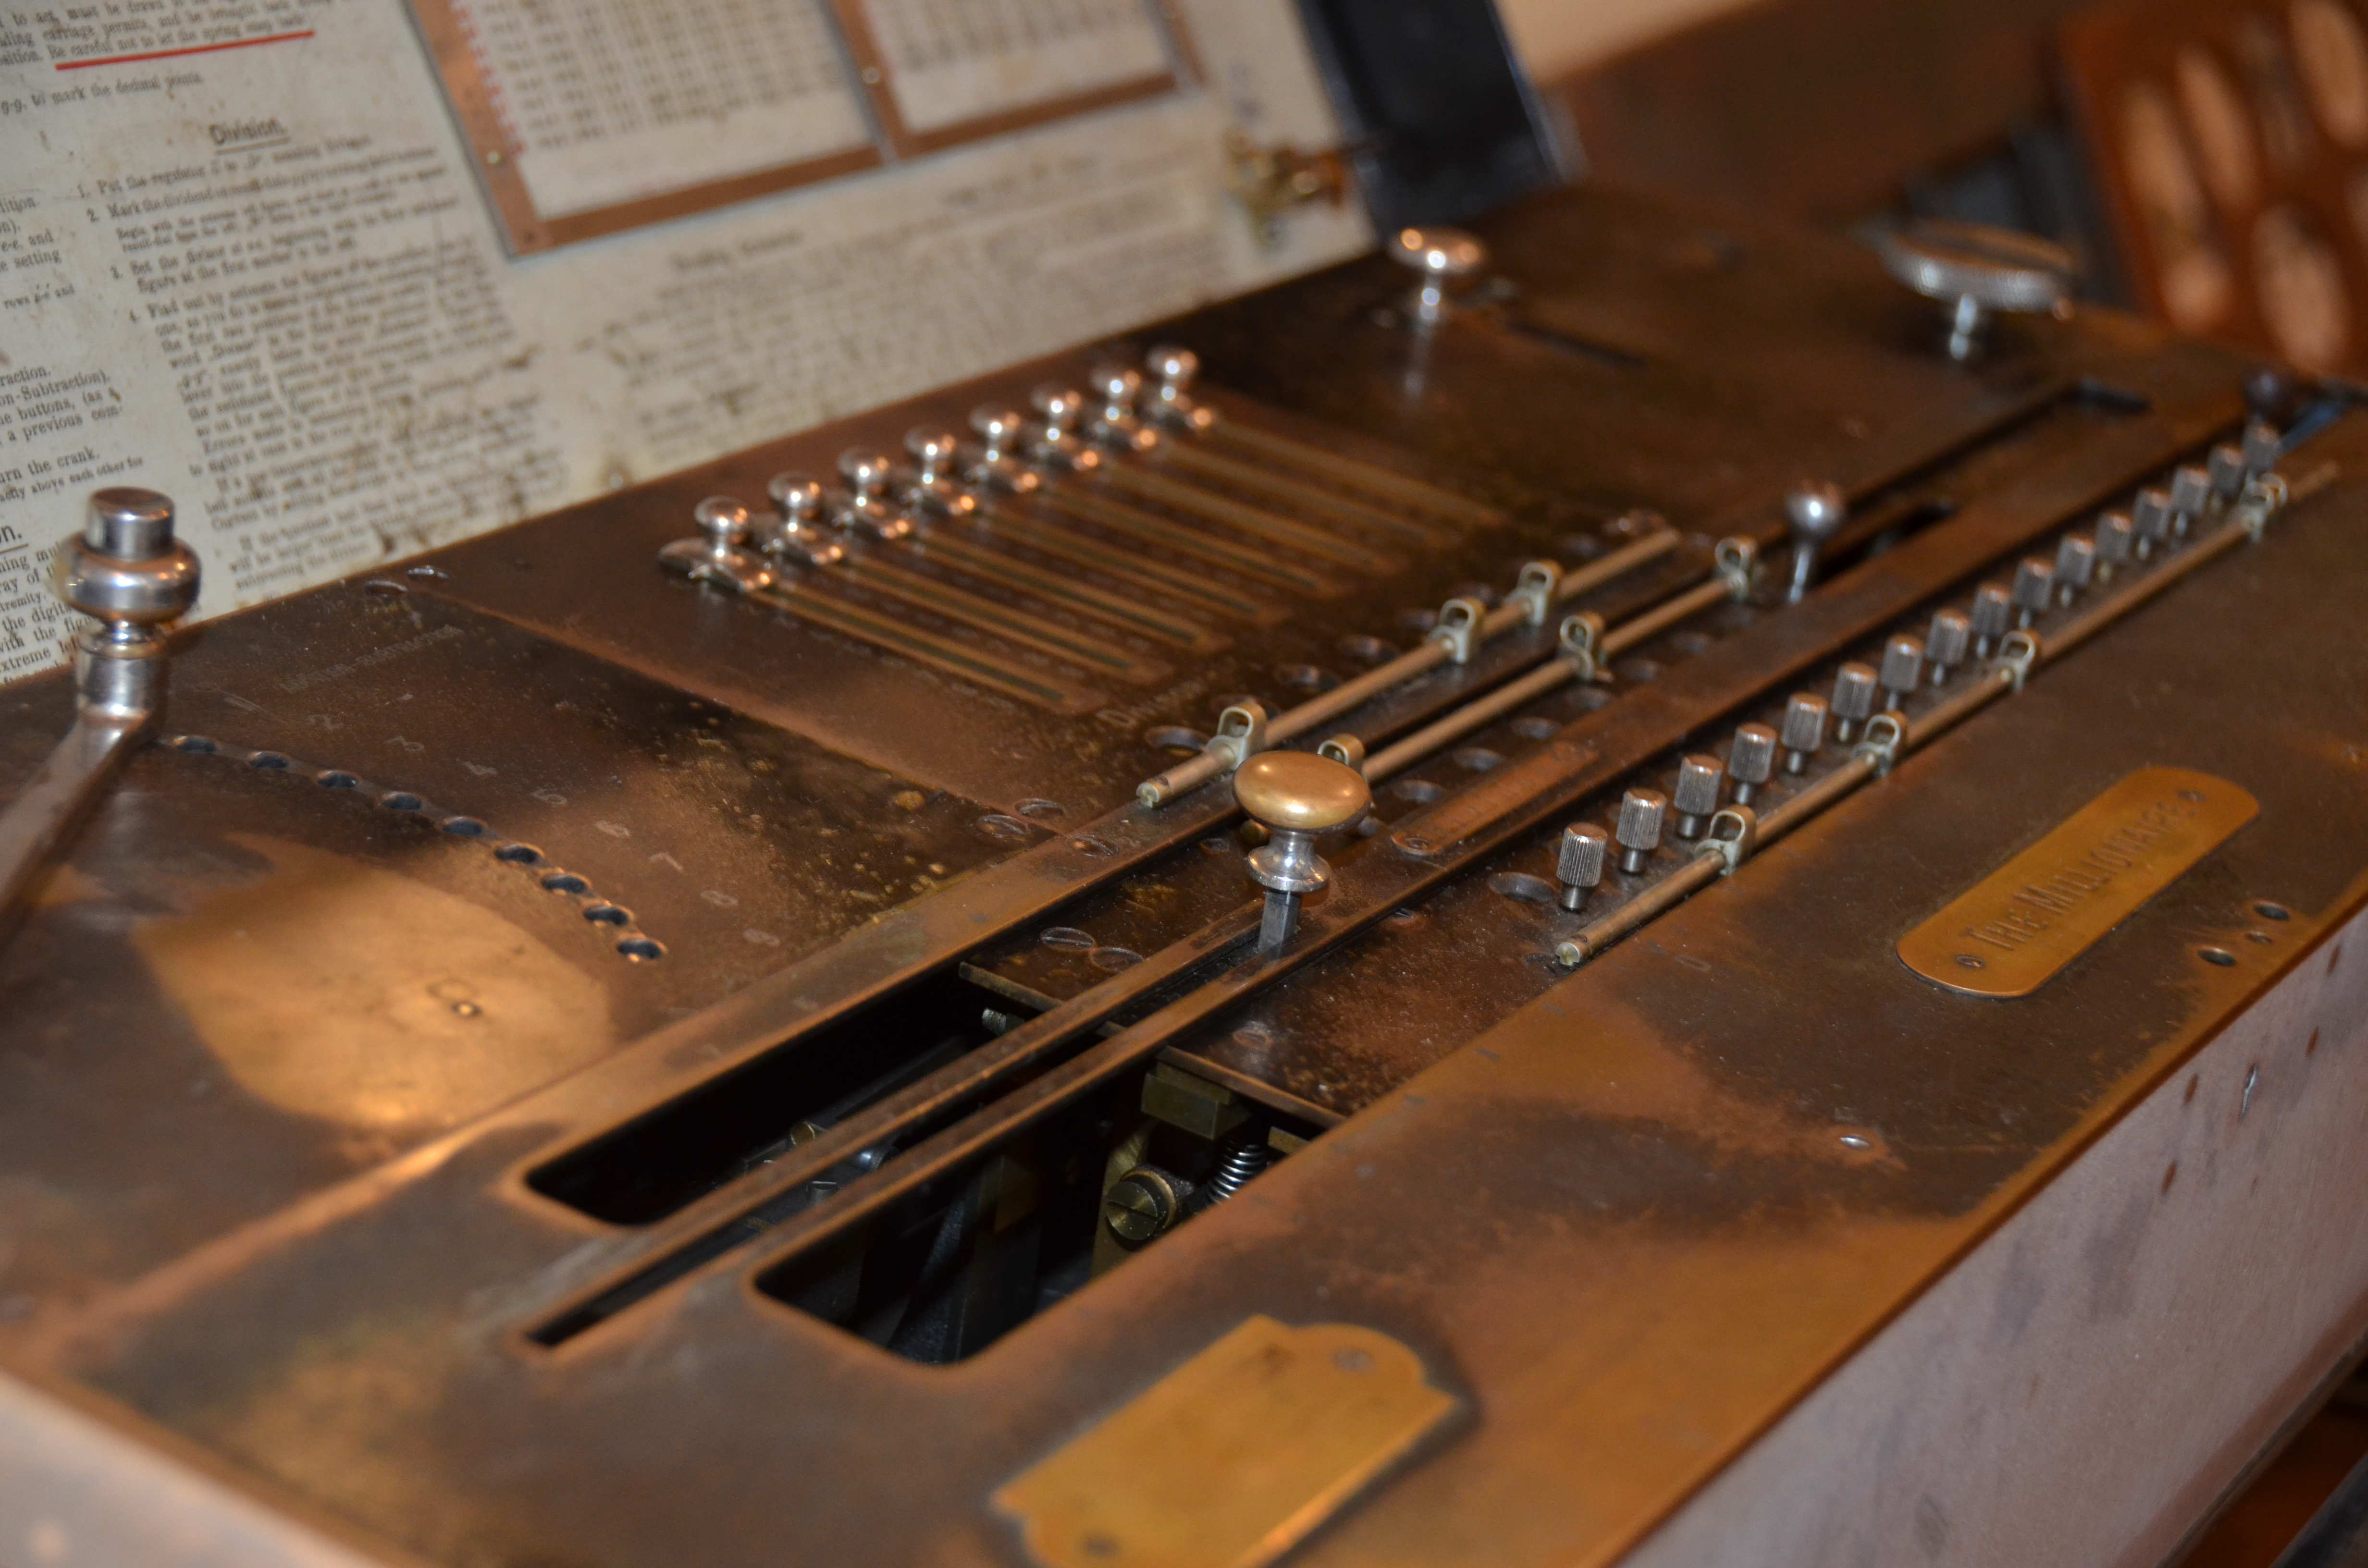
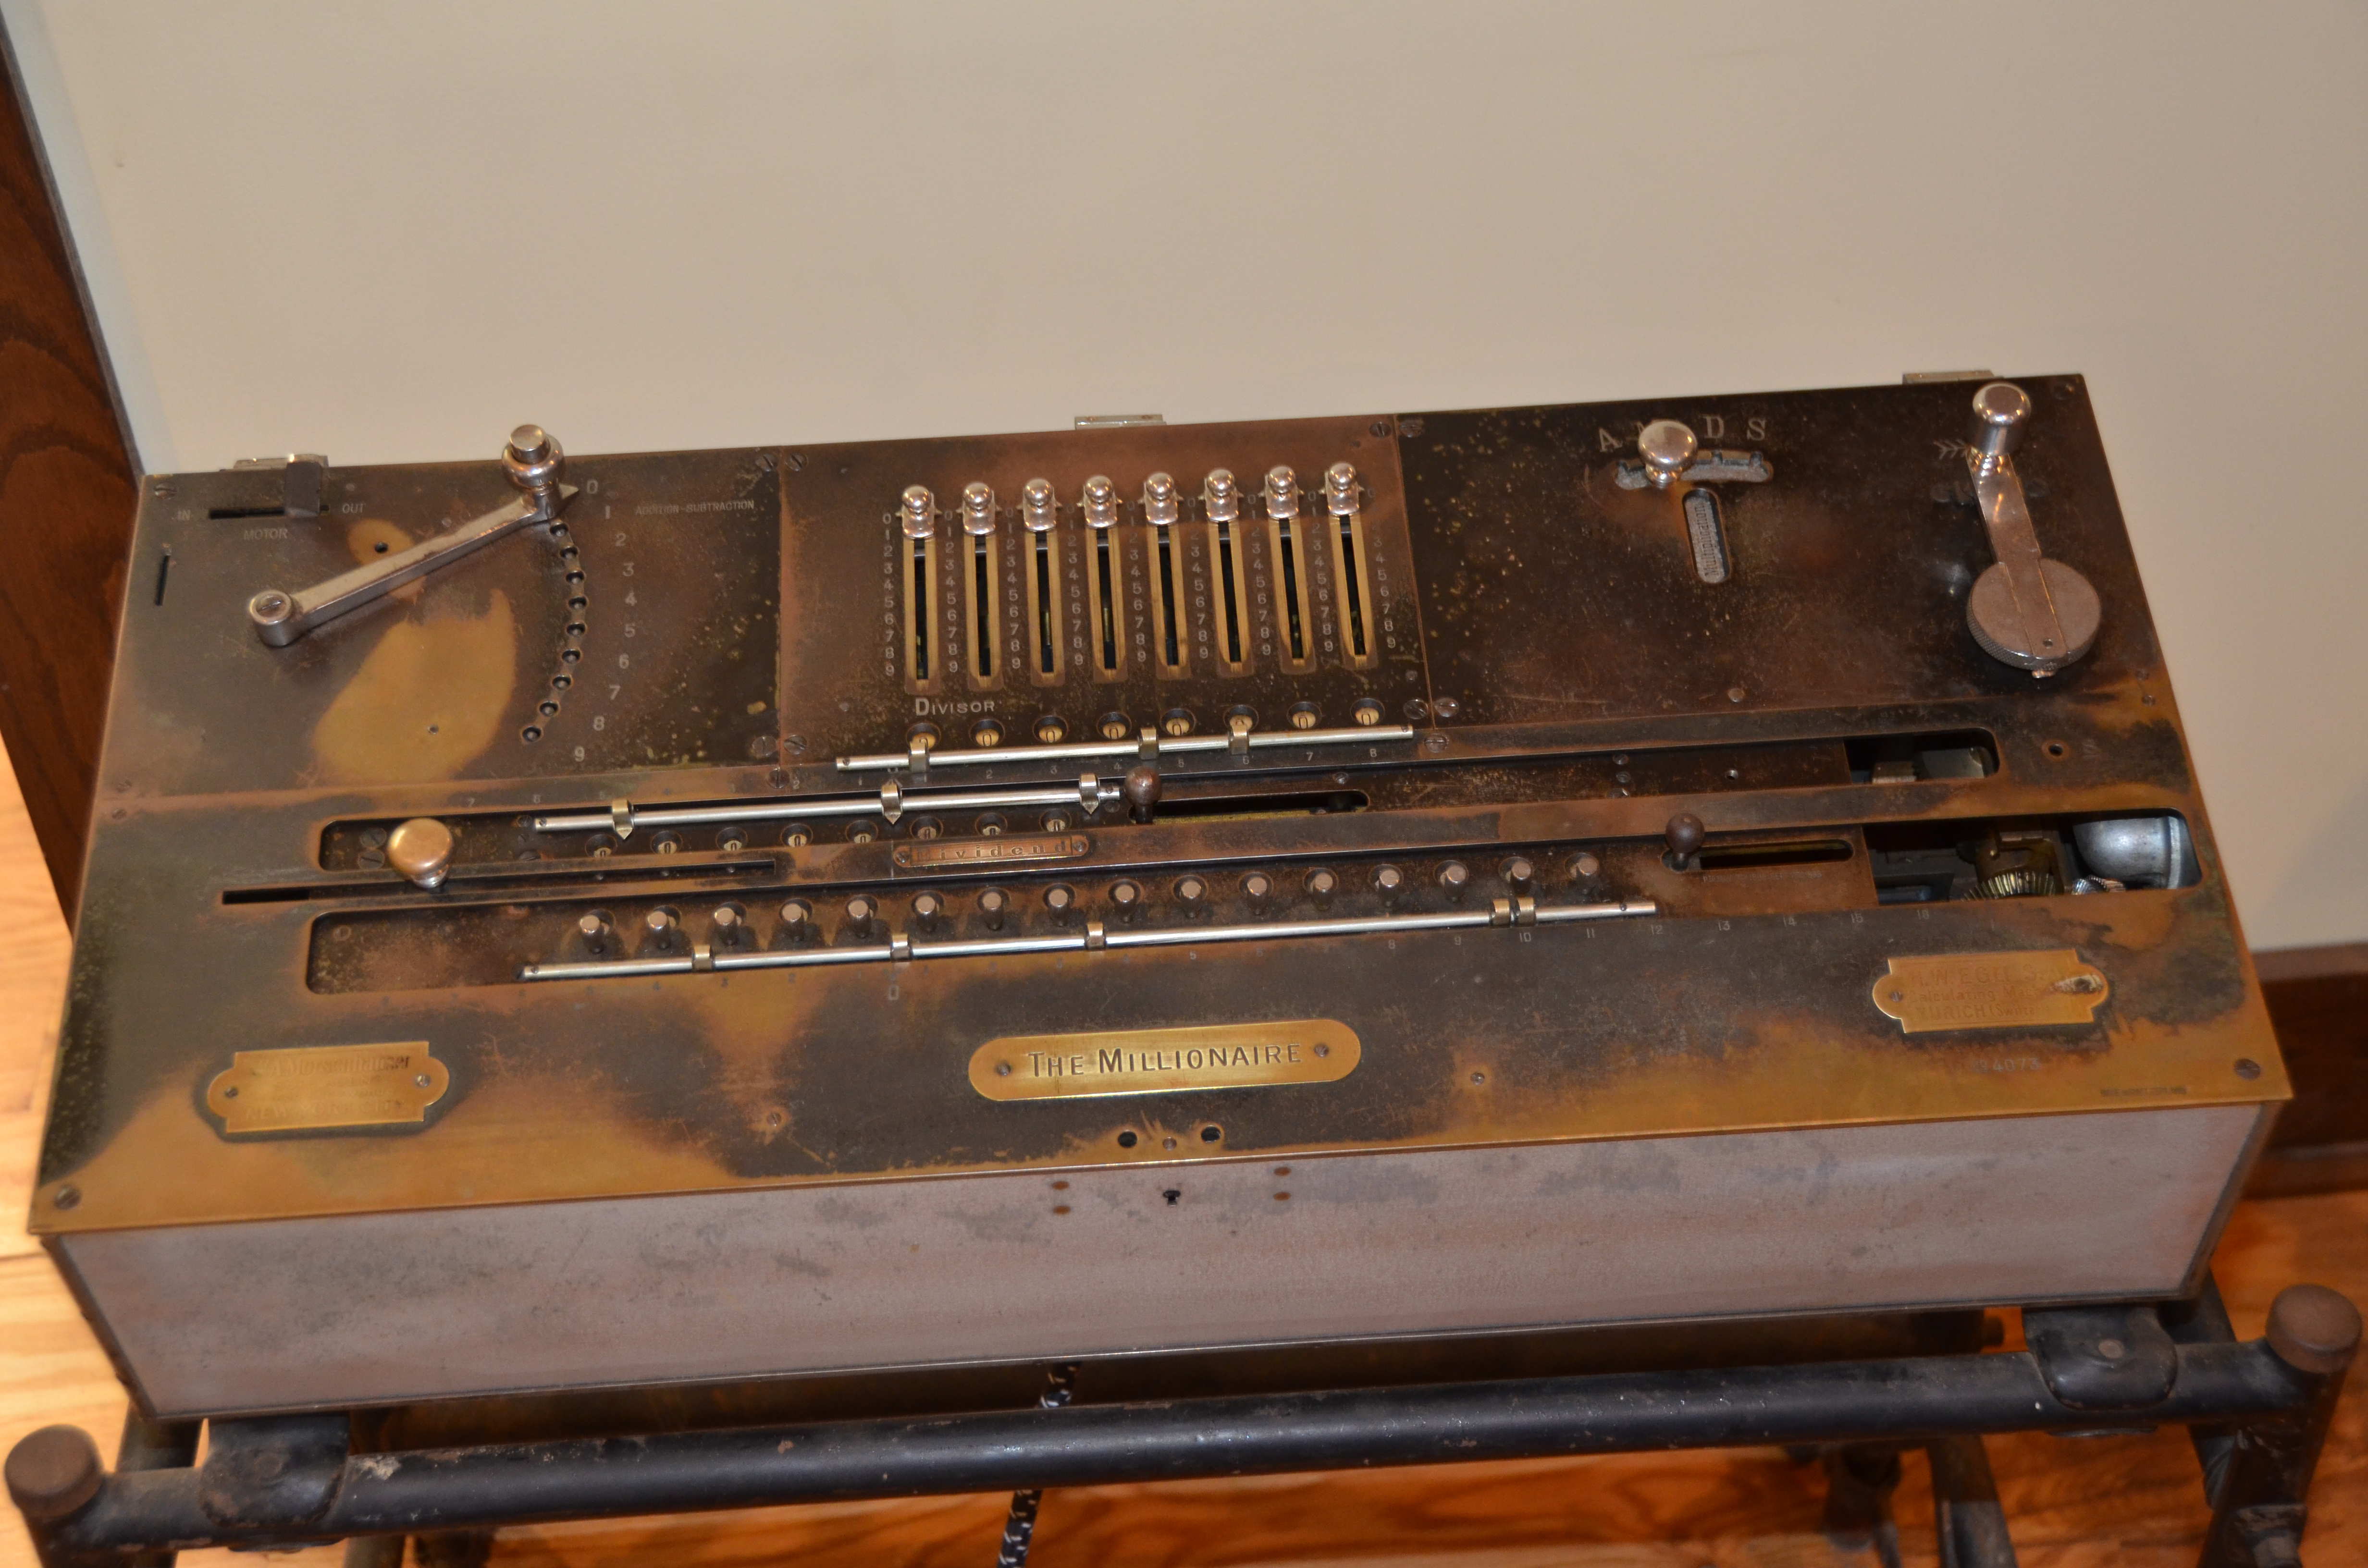
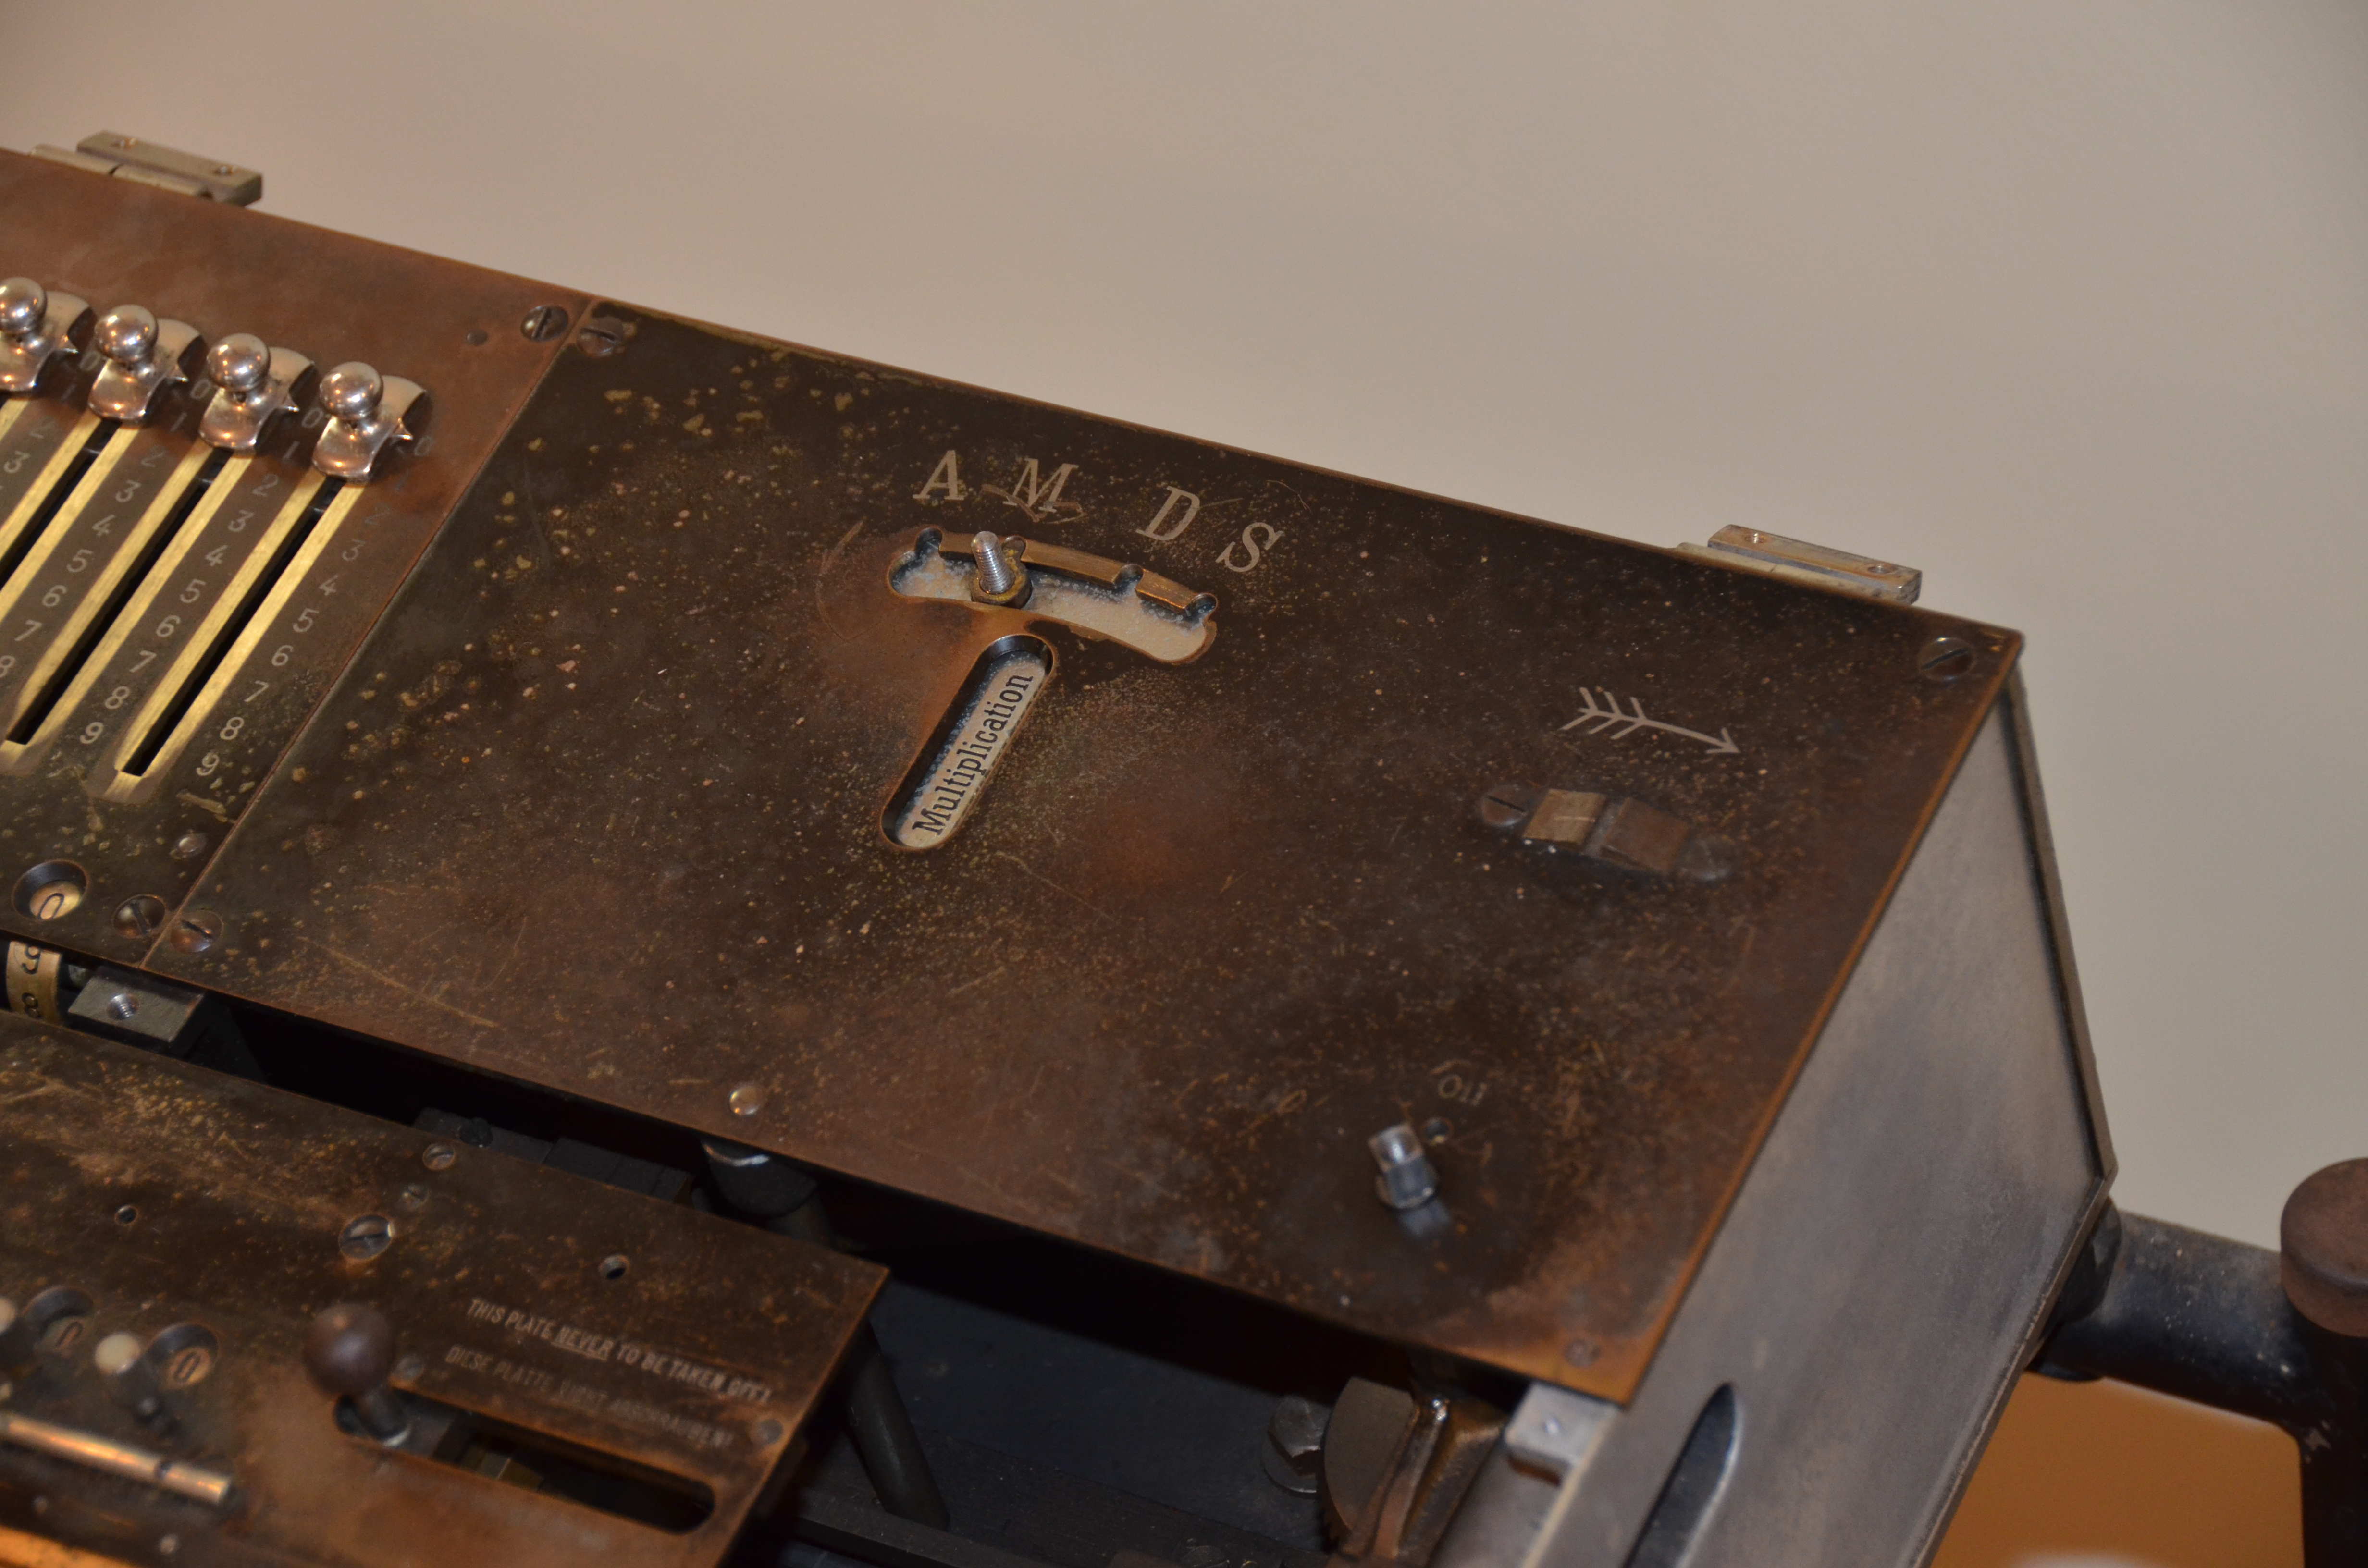
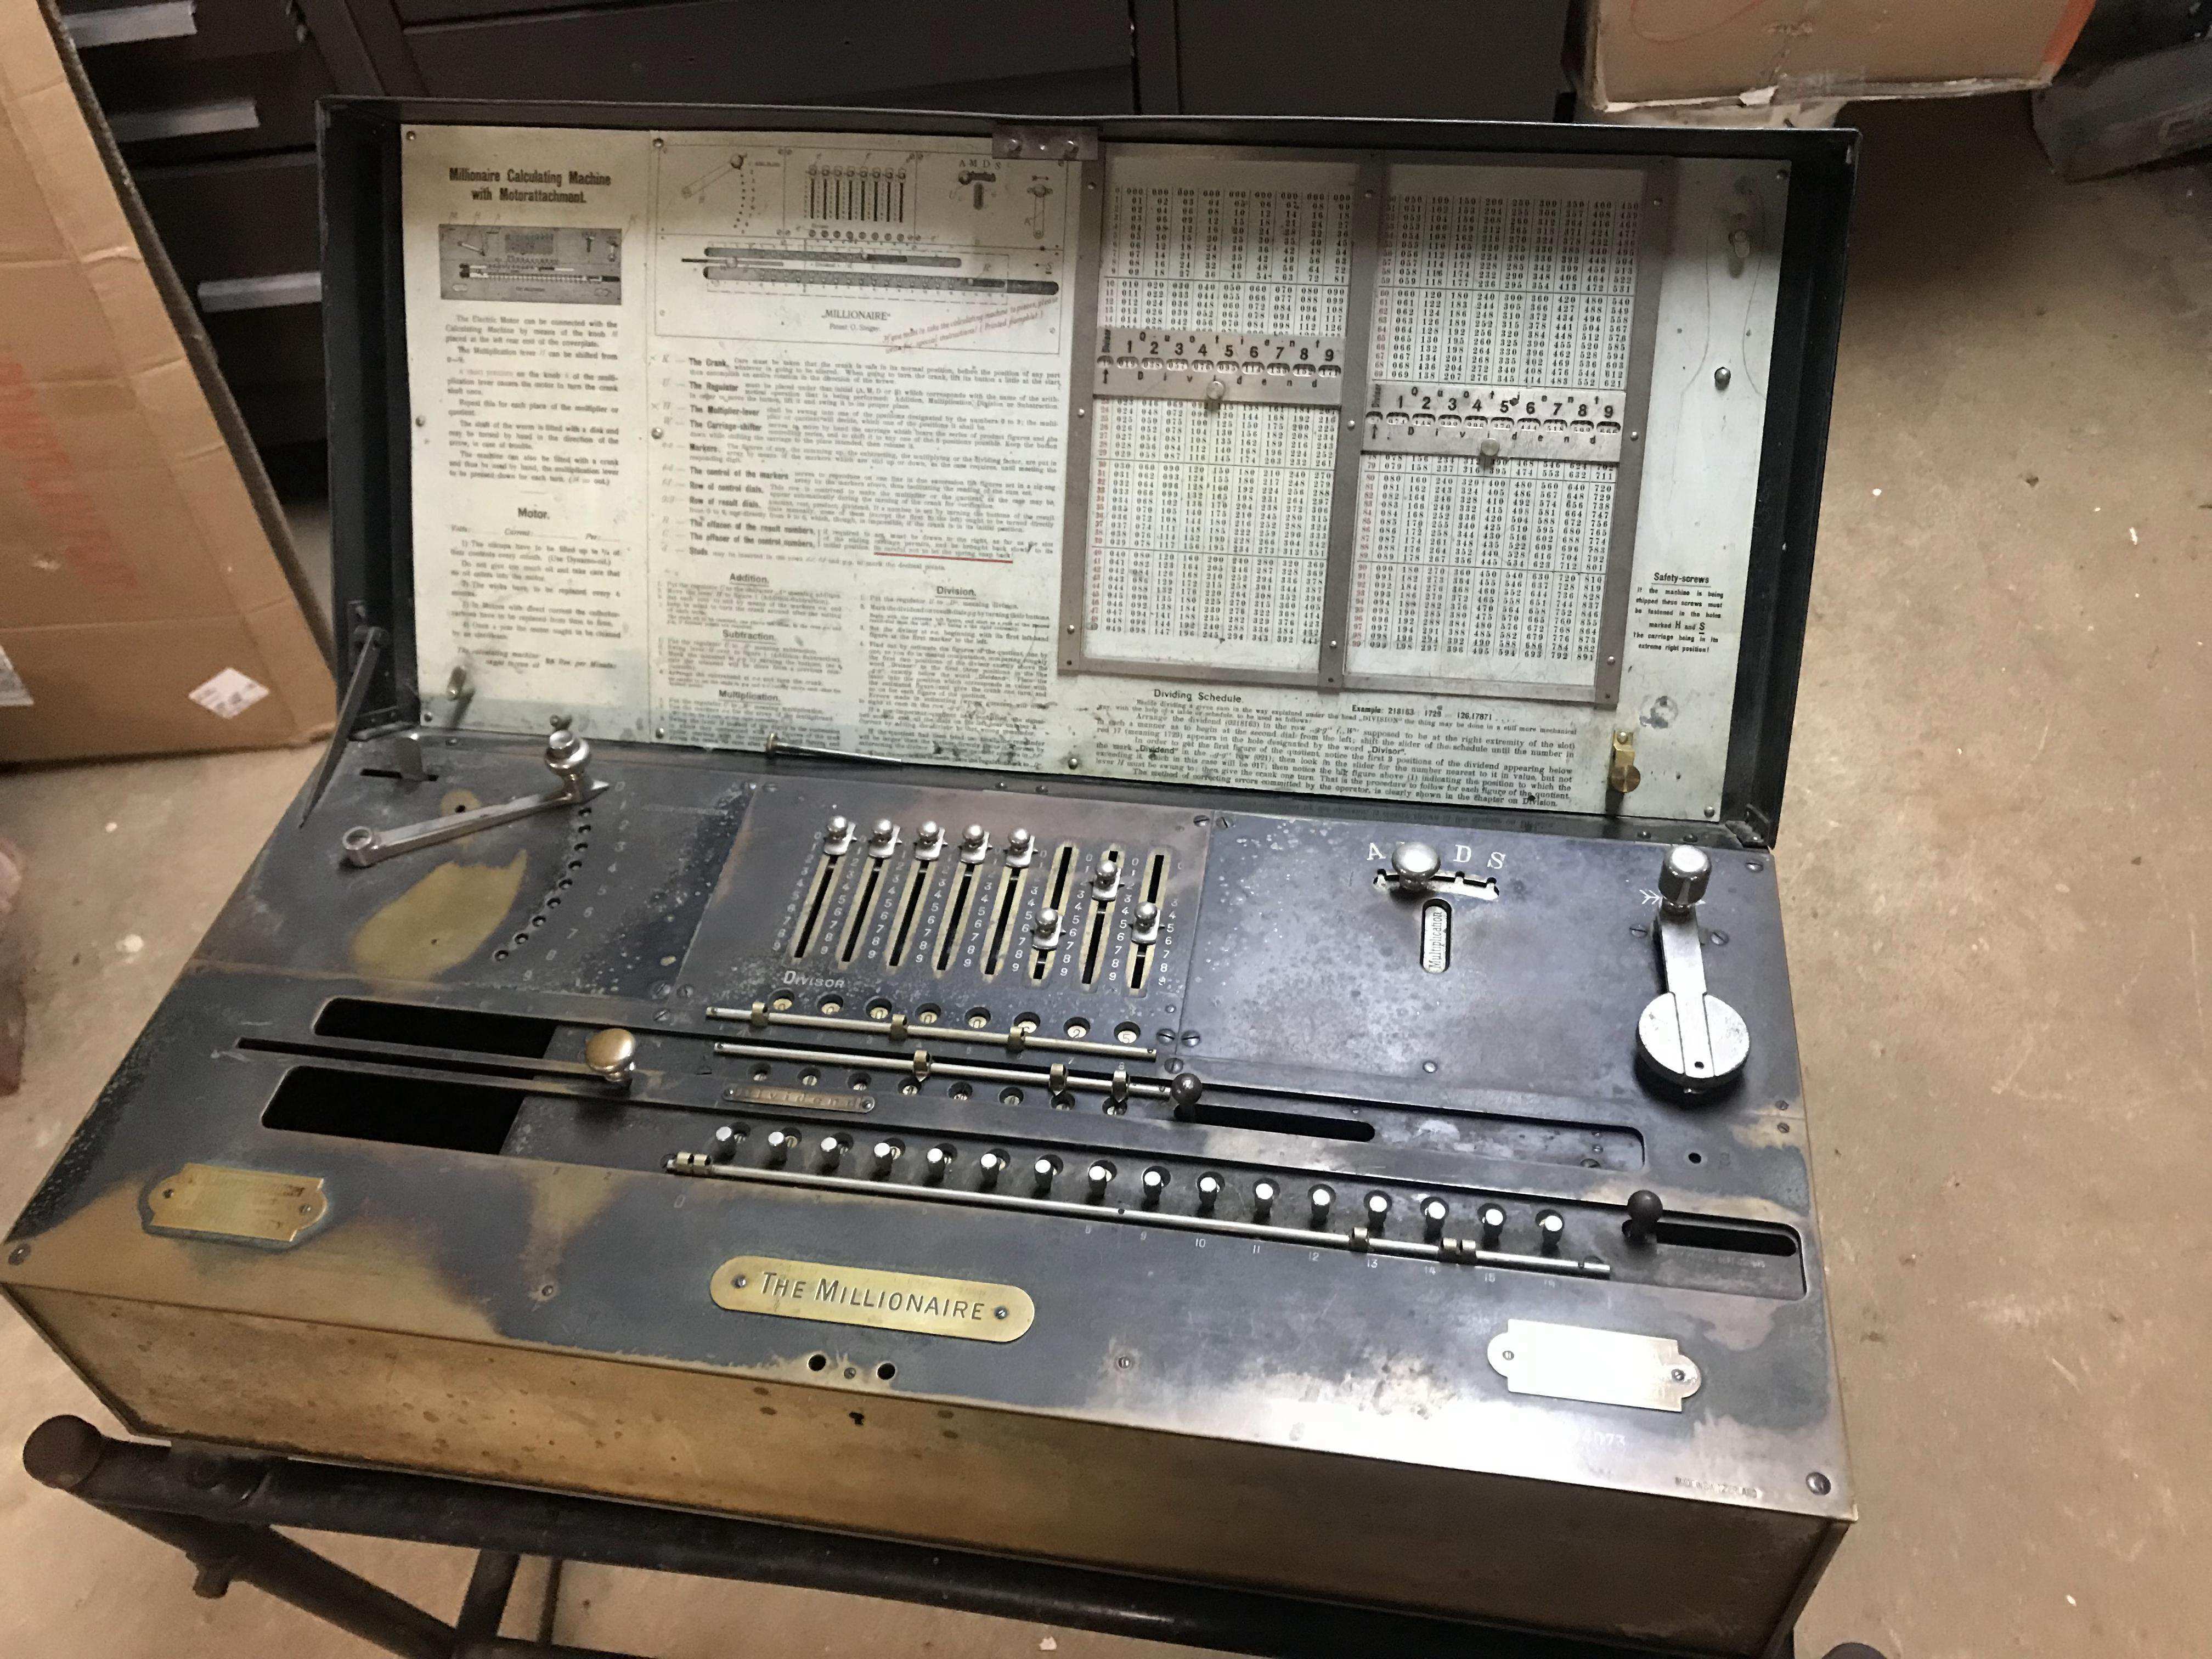
Multiplier Plate
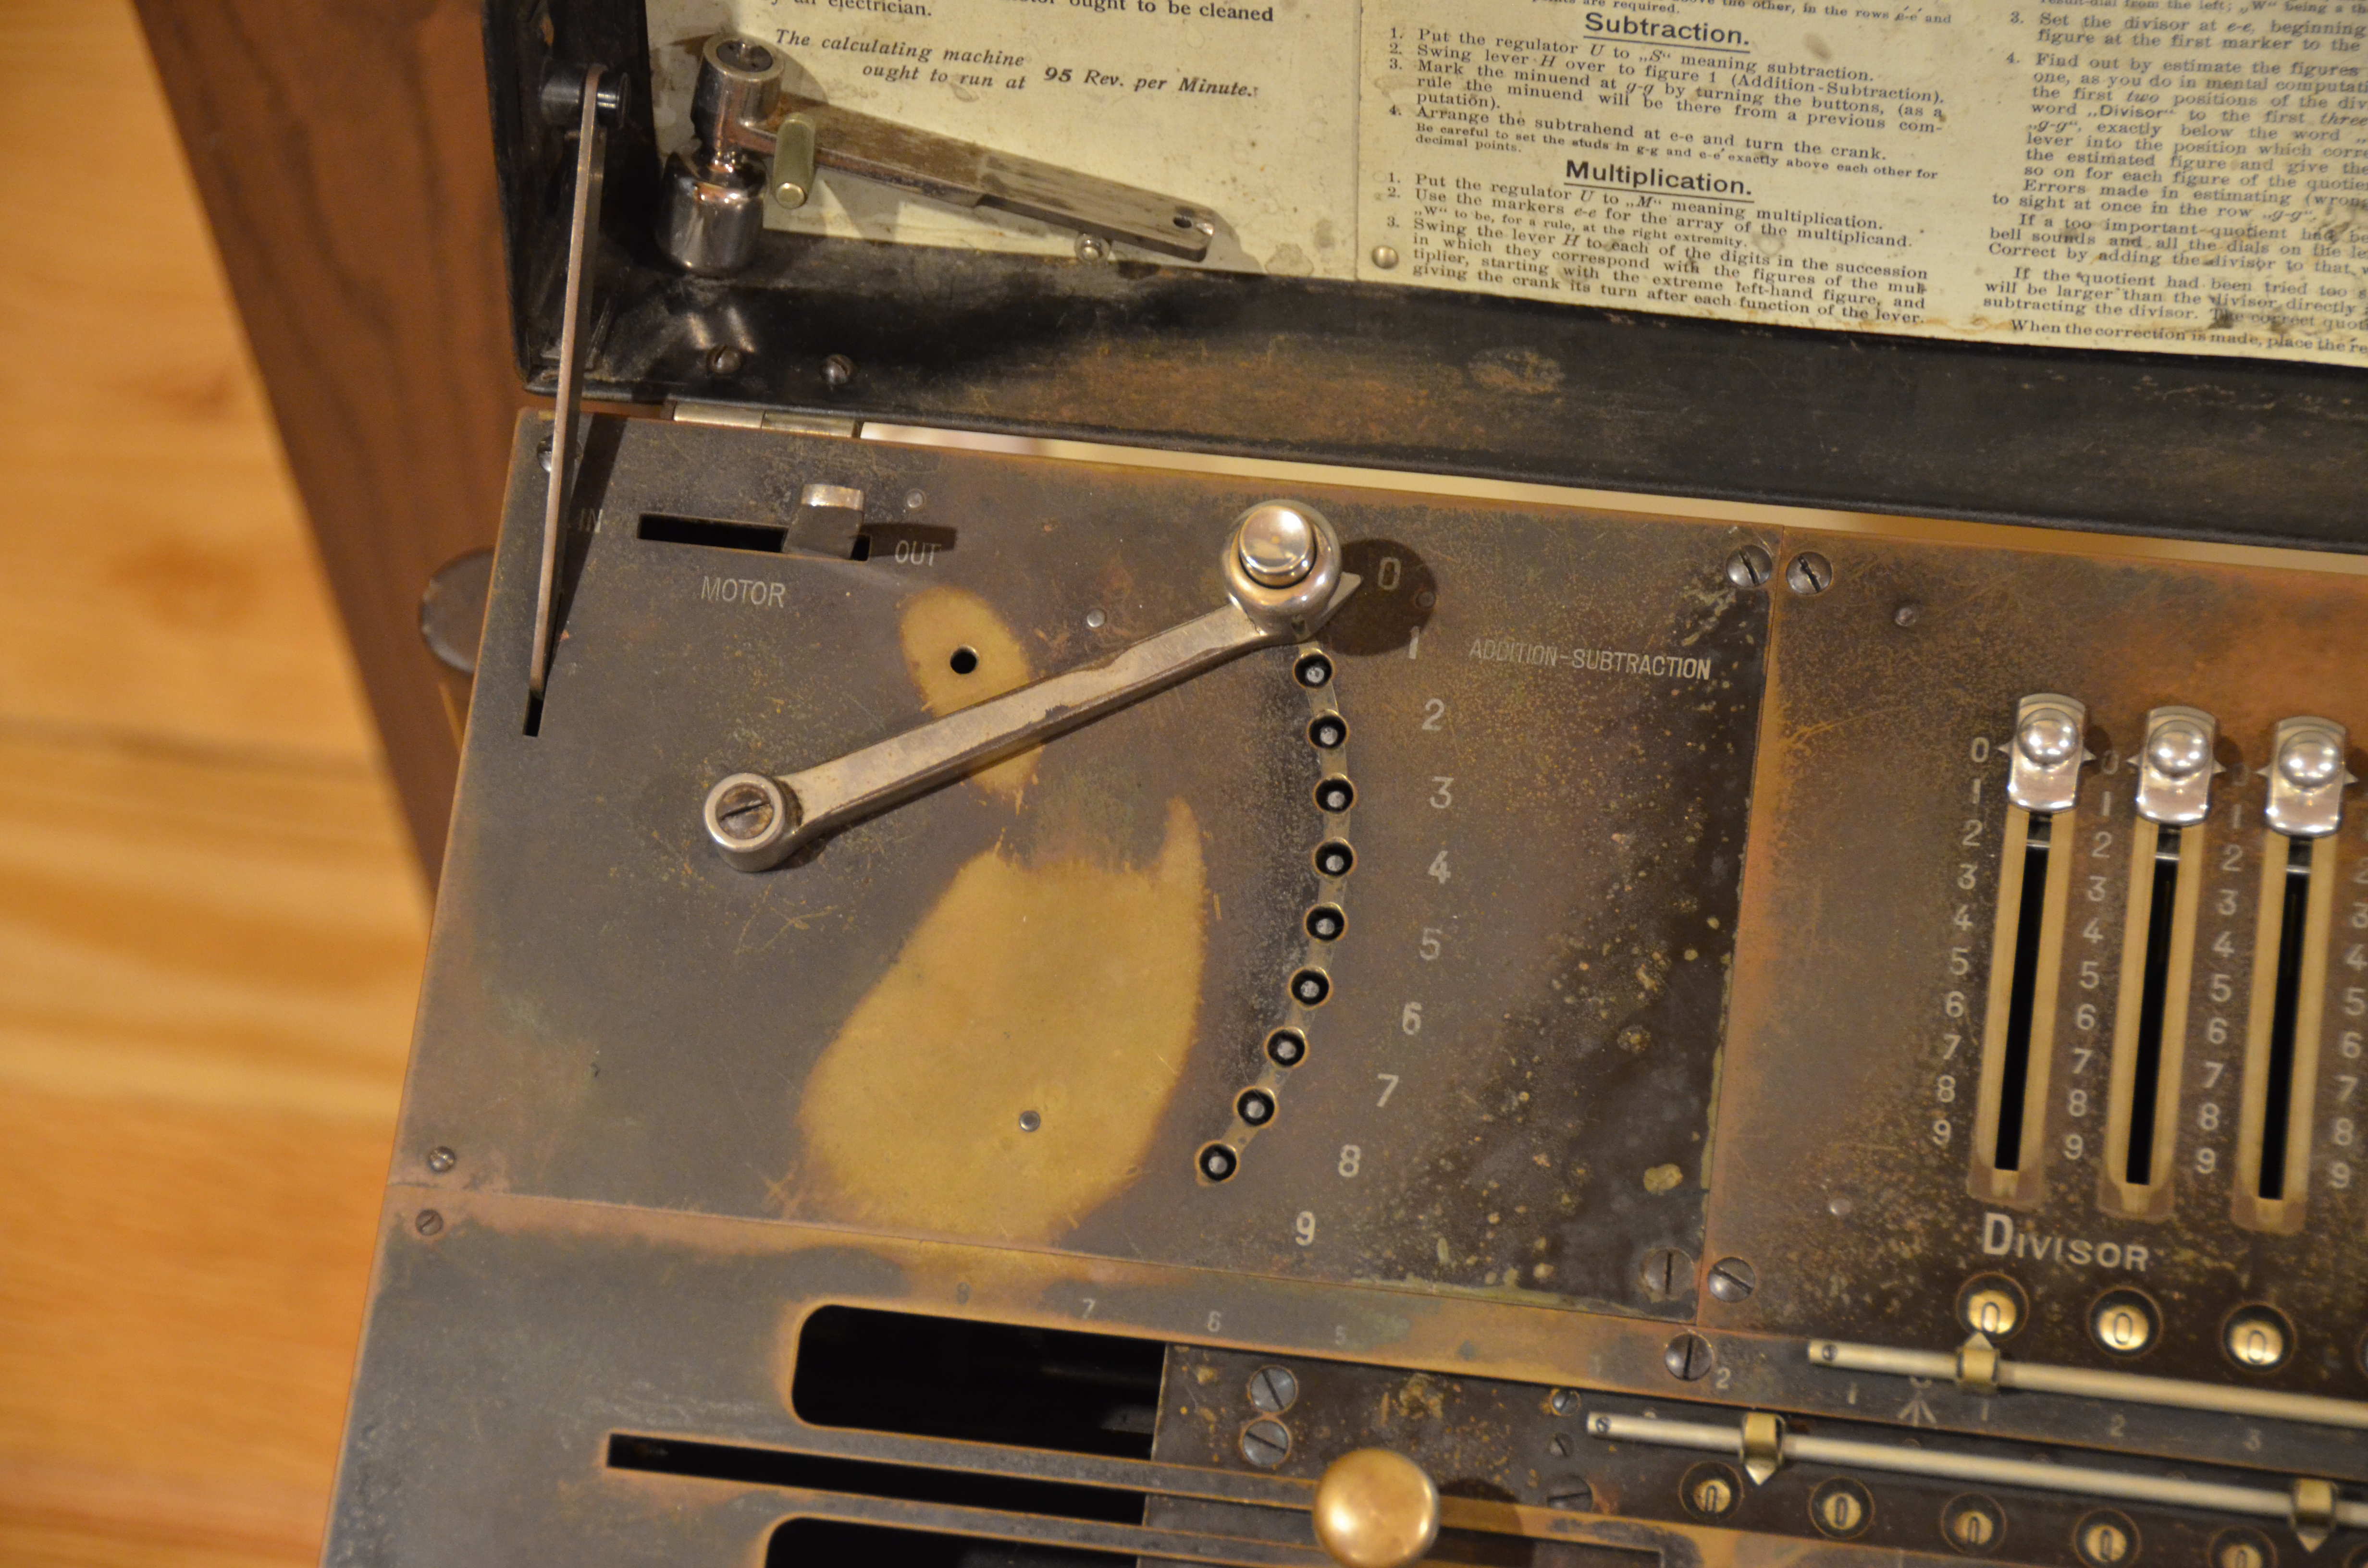
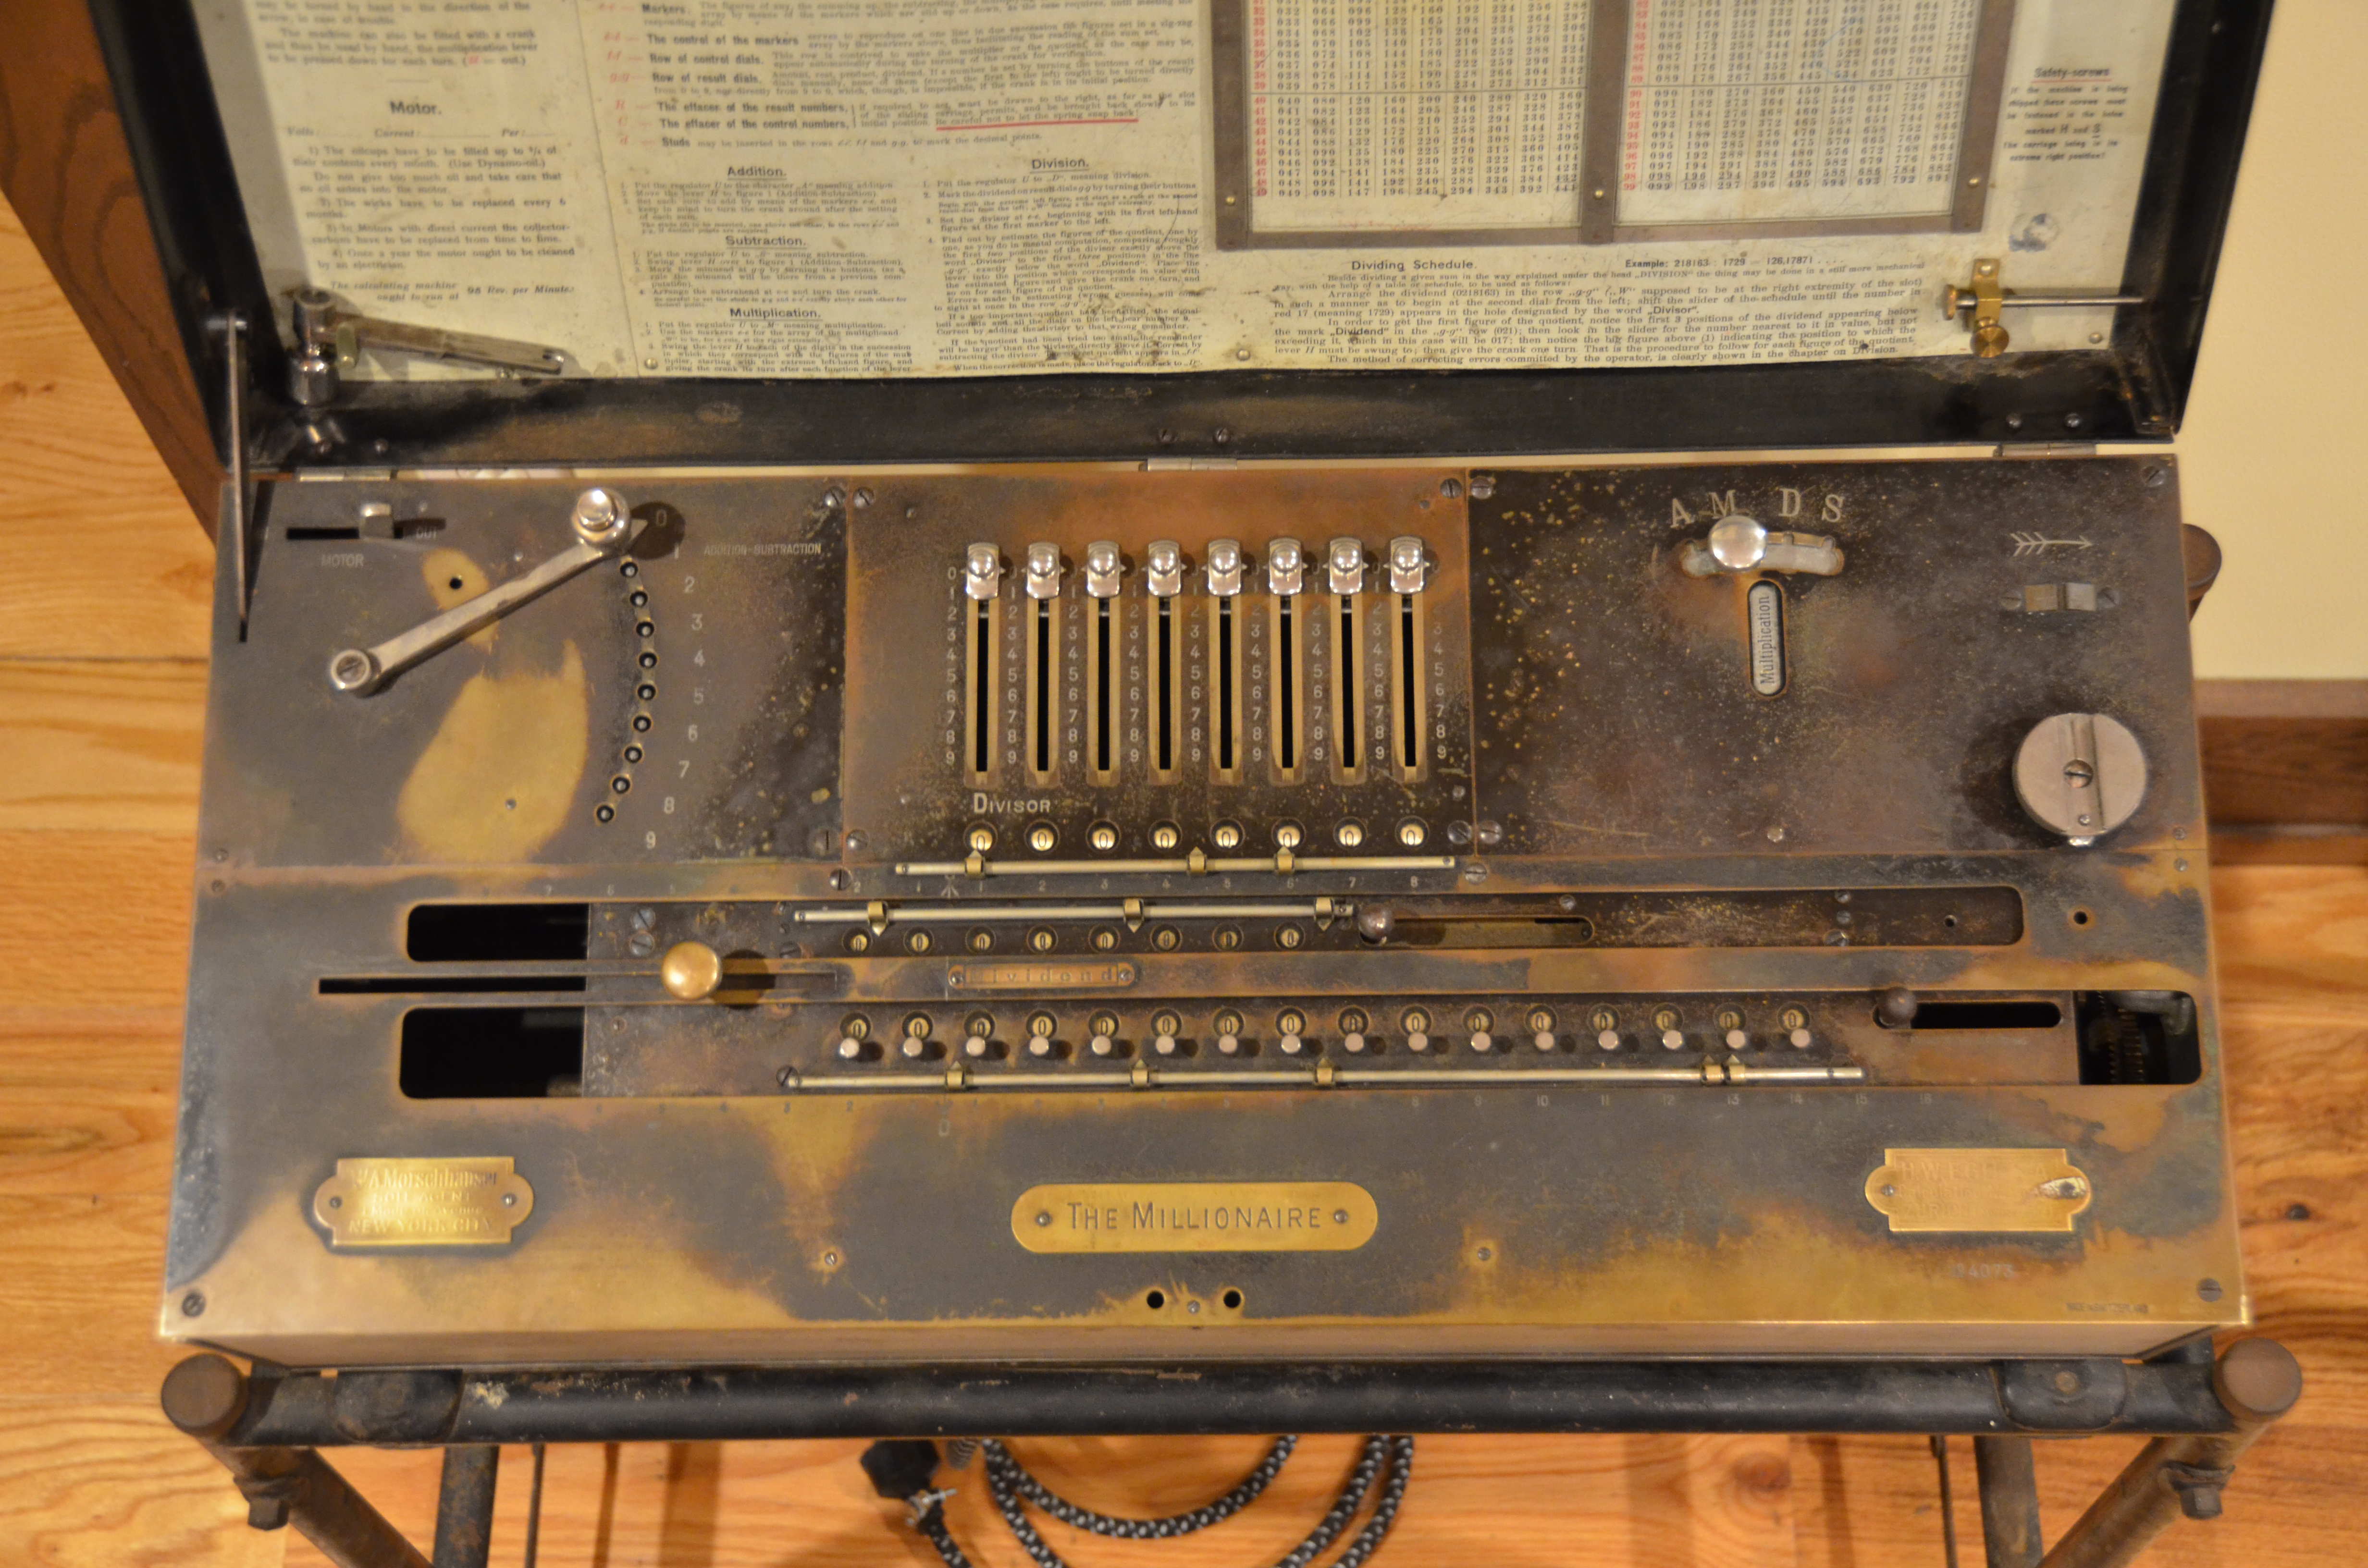
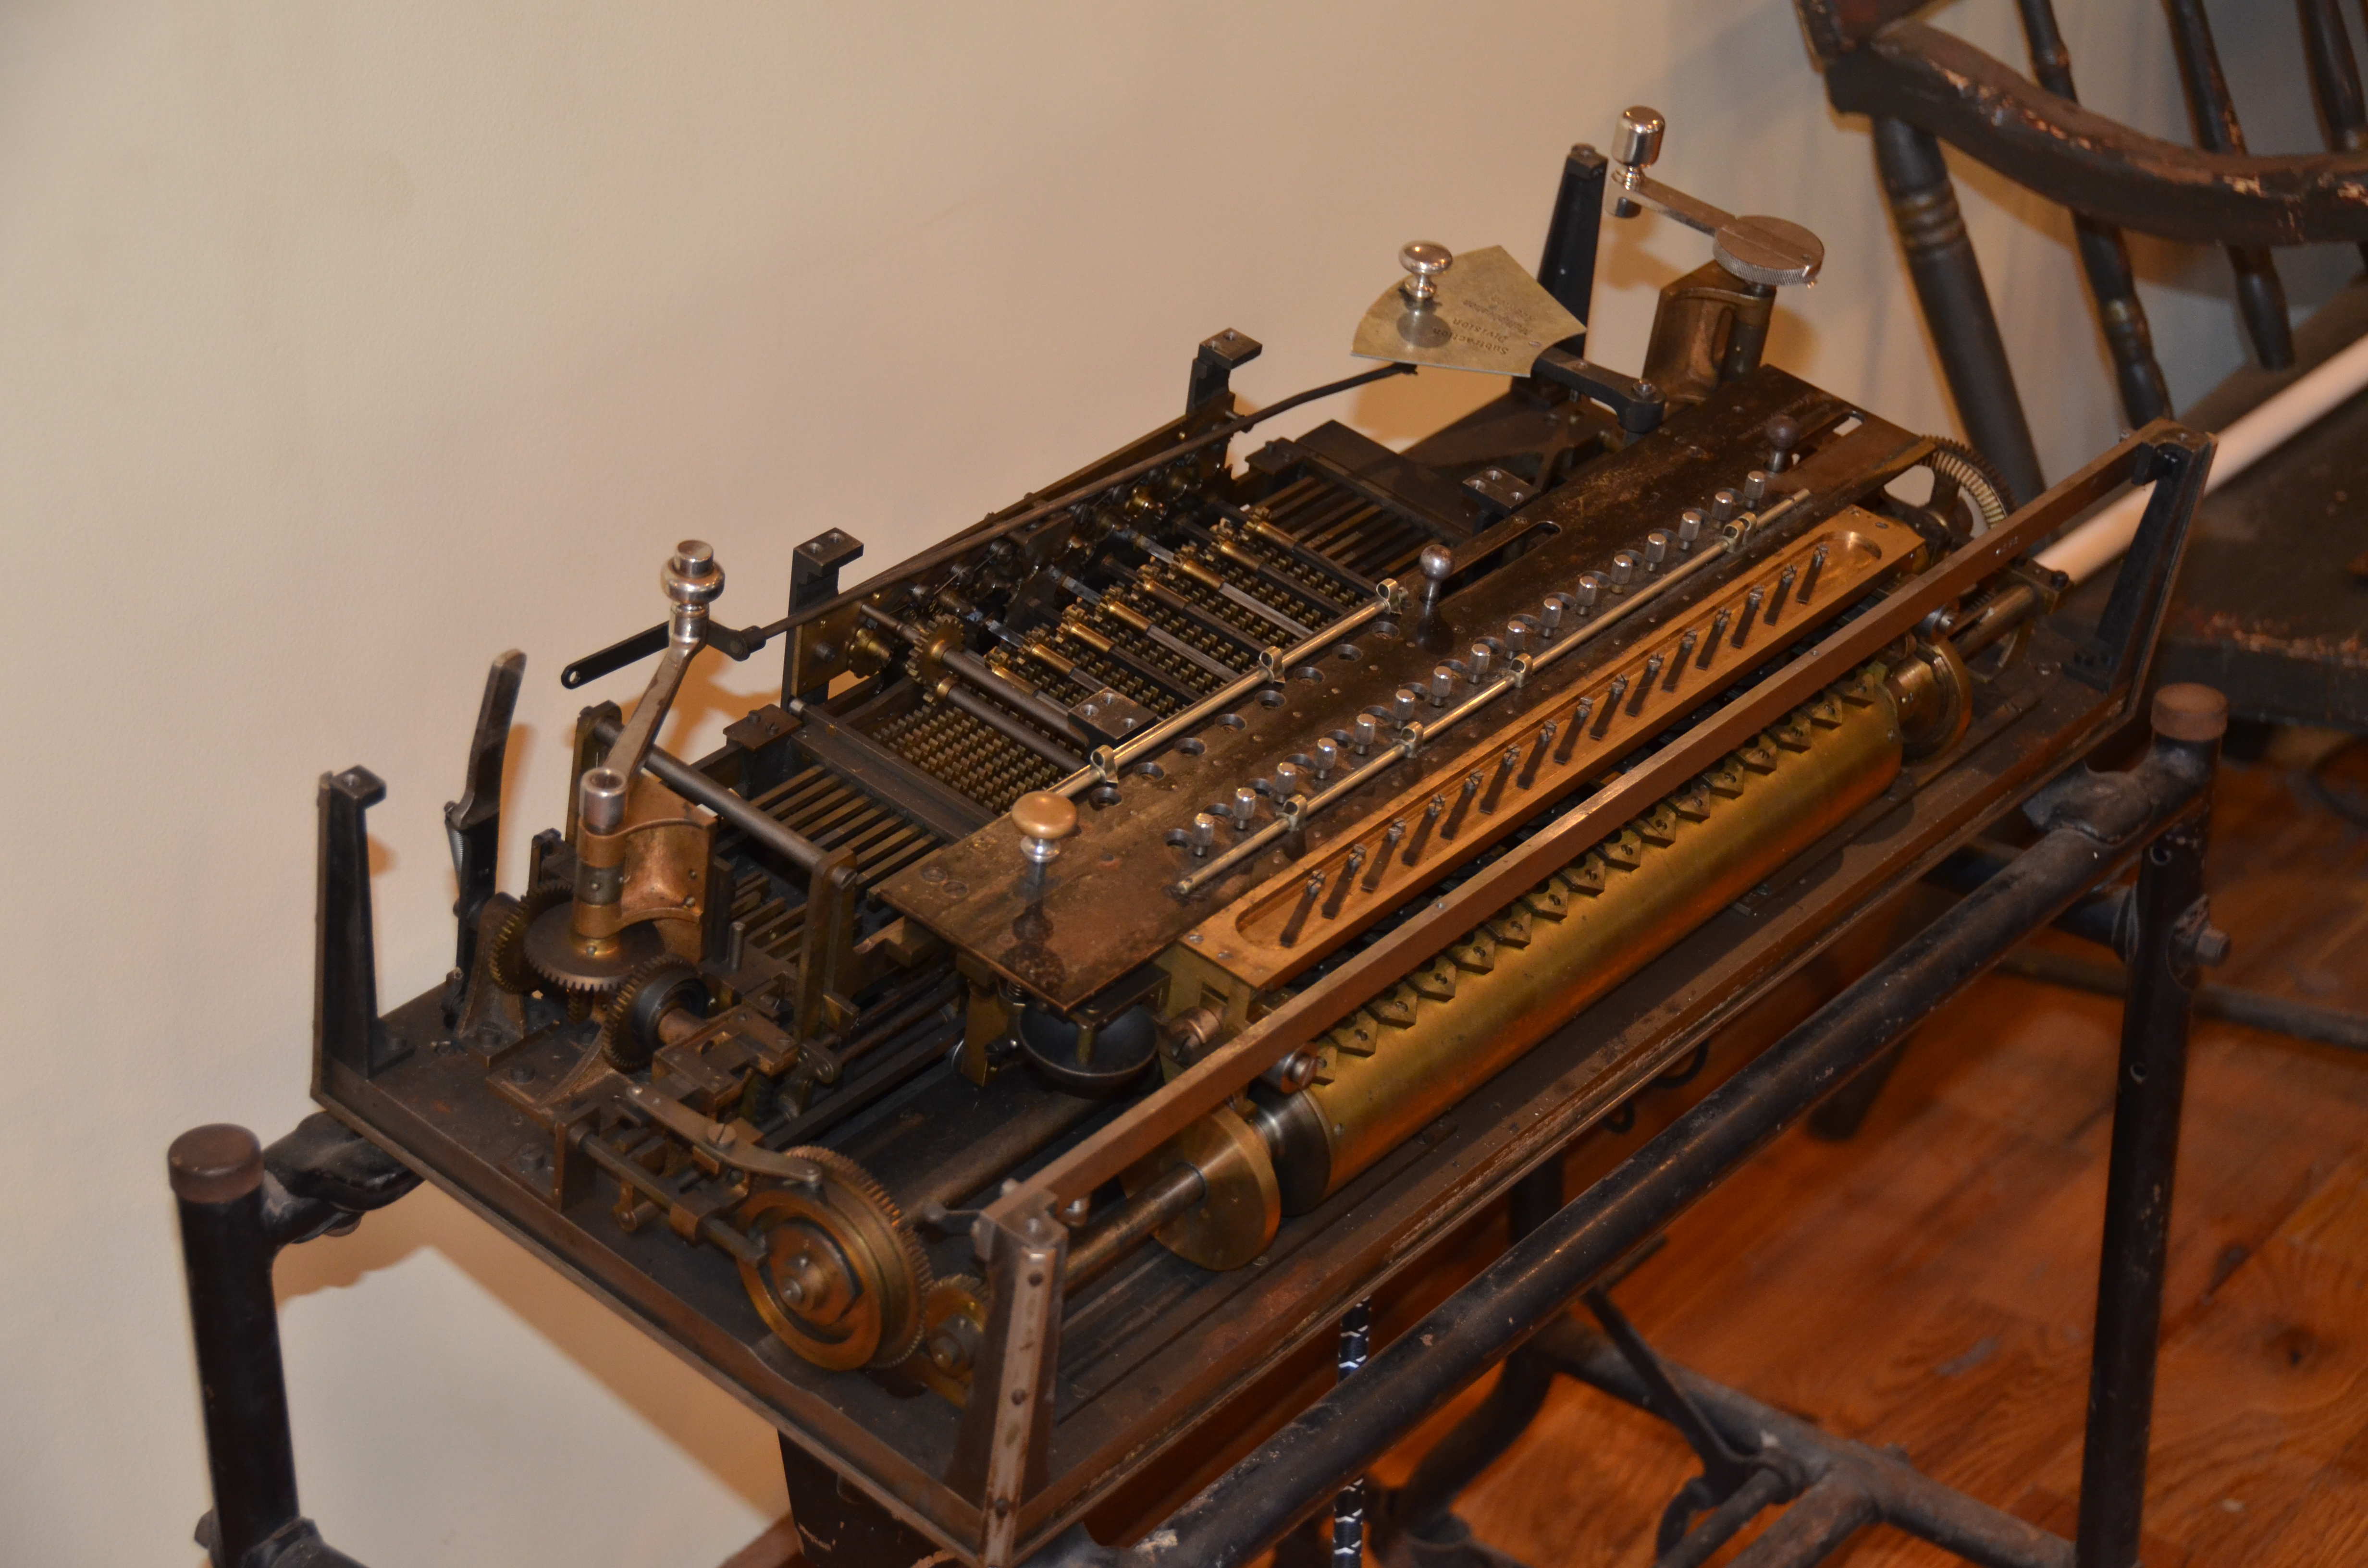
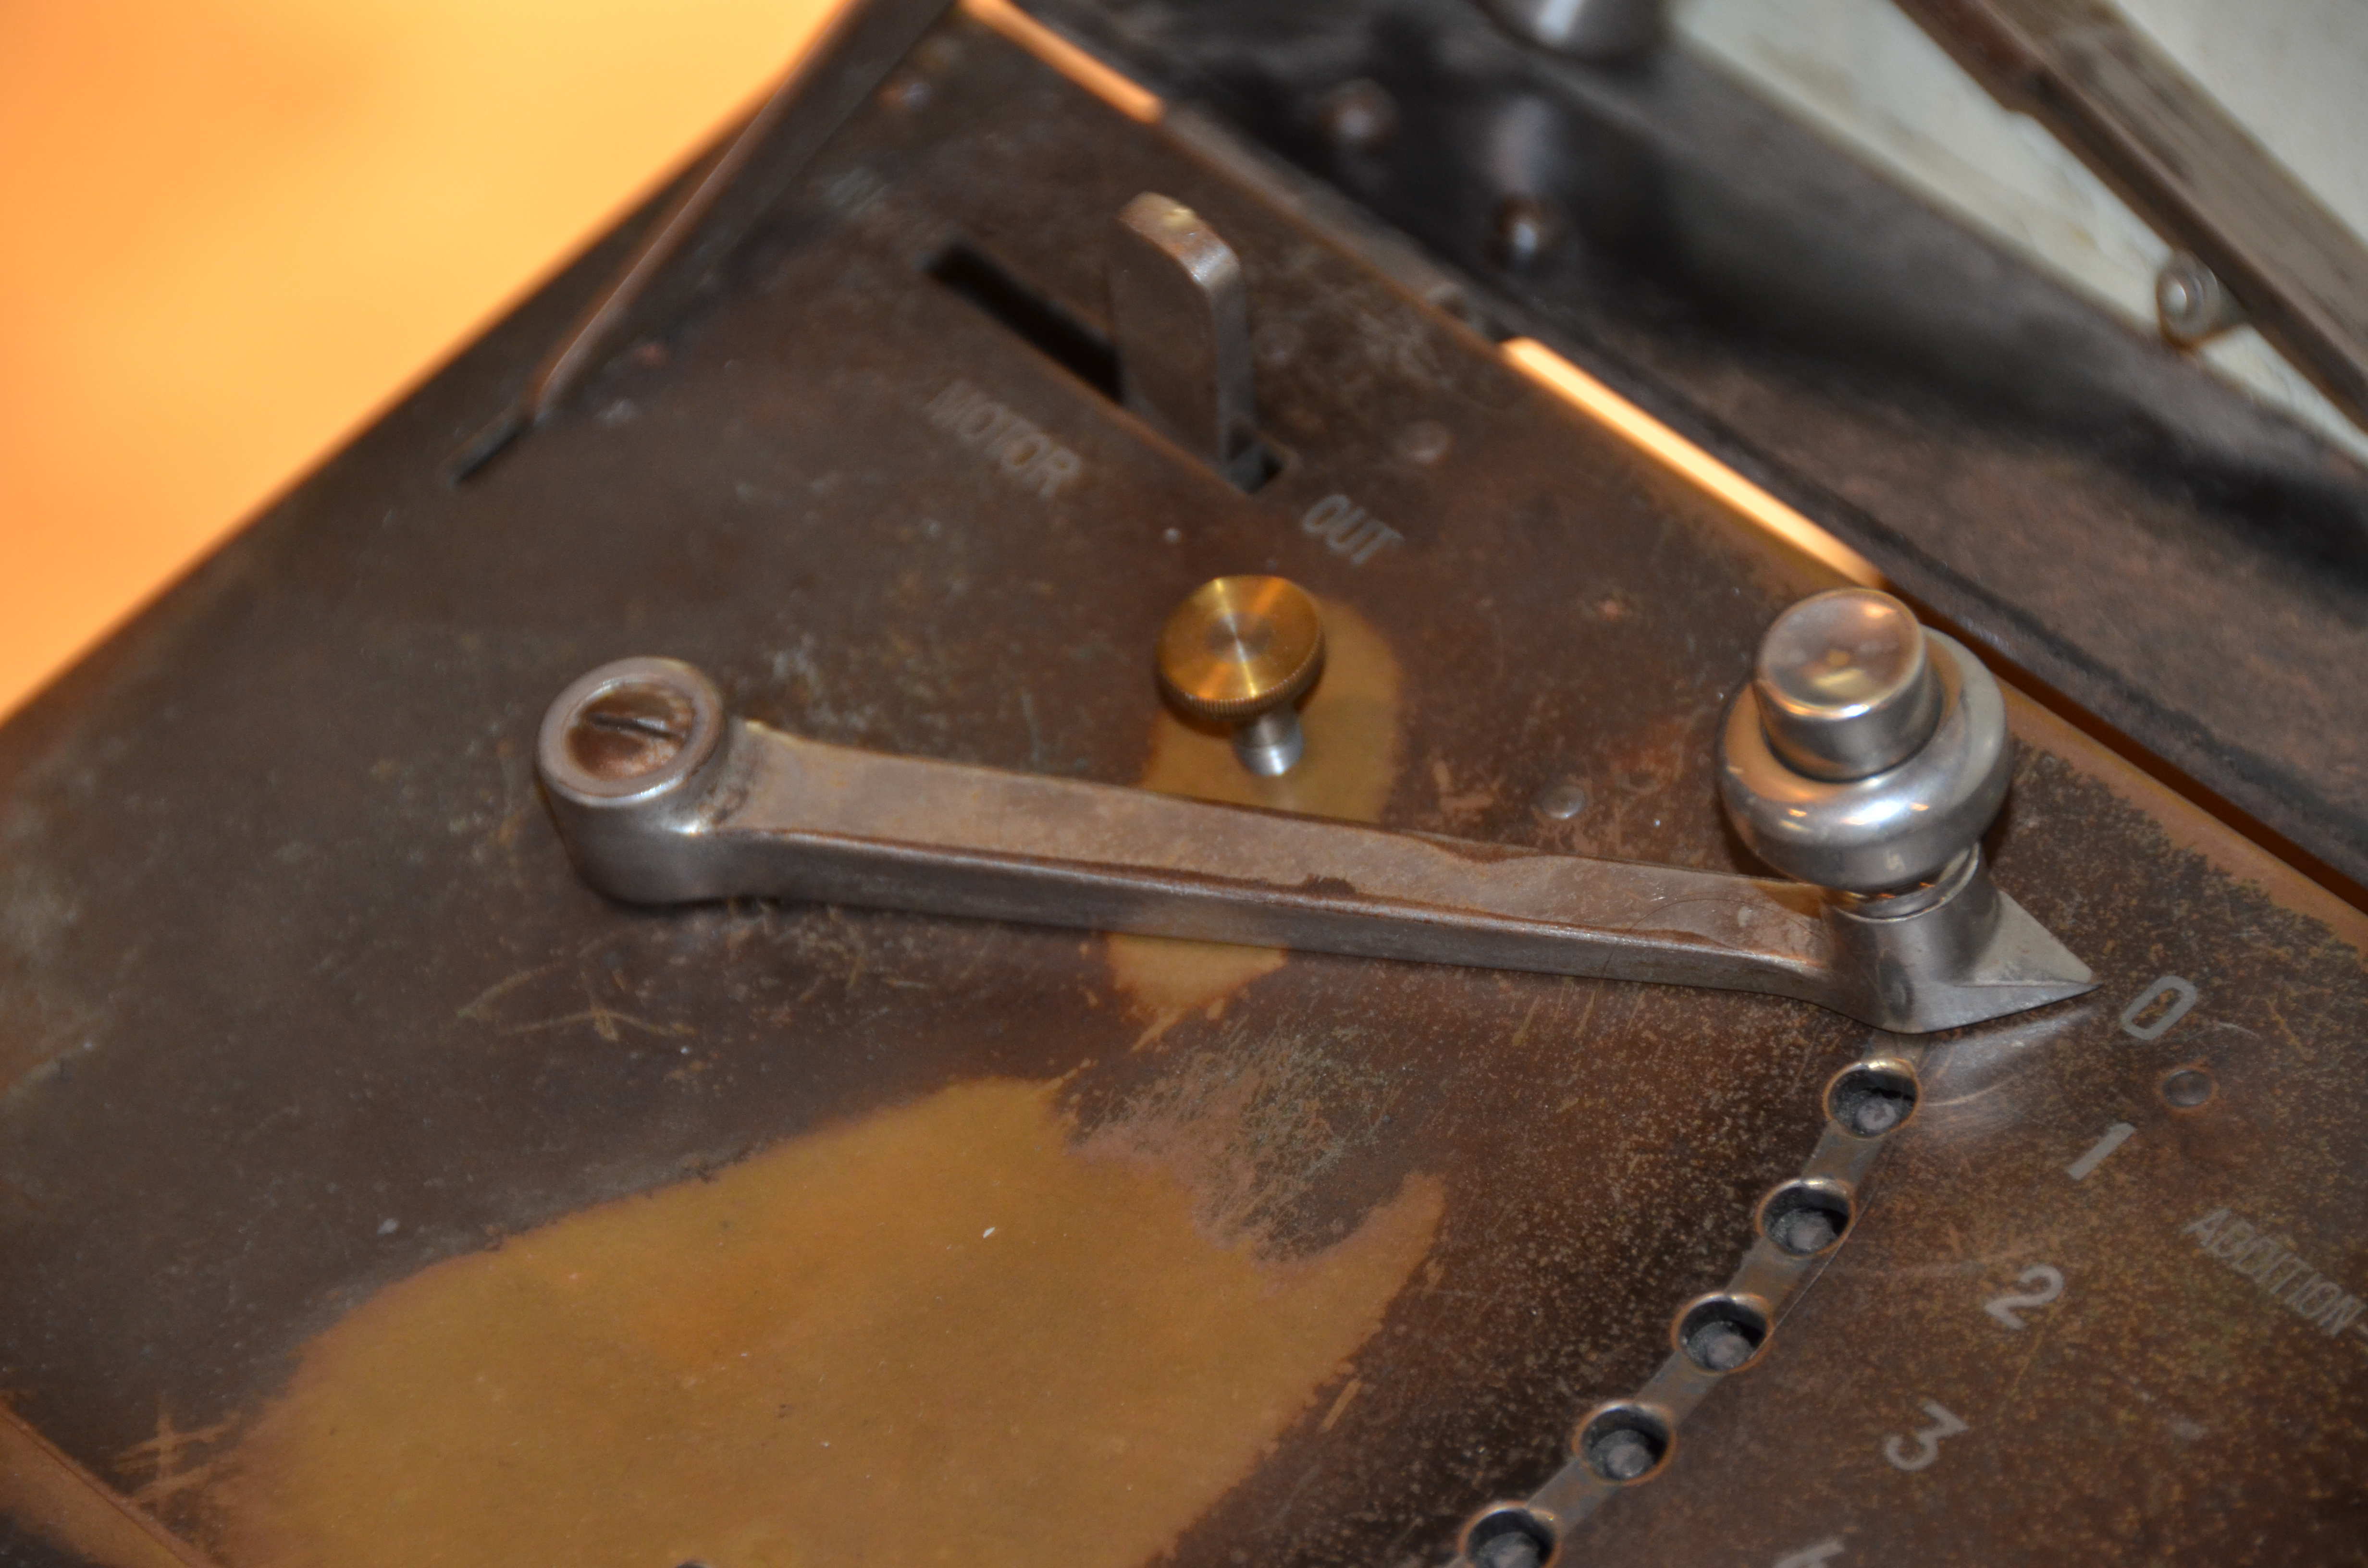
The multiplier plate at the top left of the unit contains the main multiplying lever. At the end of the lever, is the button used to start a machine cycle under manual or electric control. At the top left of the plate, is the motor “ON” “OFF” switch. This switch turns on the motor and also disengages or engages the clutch connecting the motor drive to the machine.
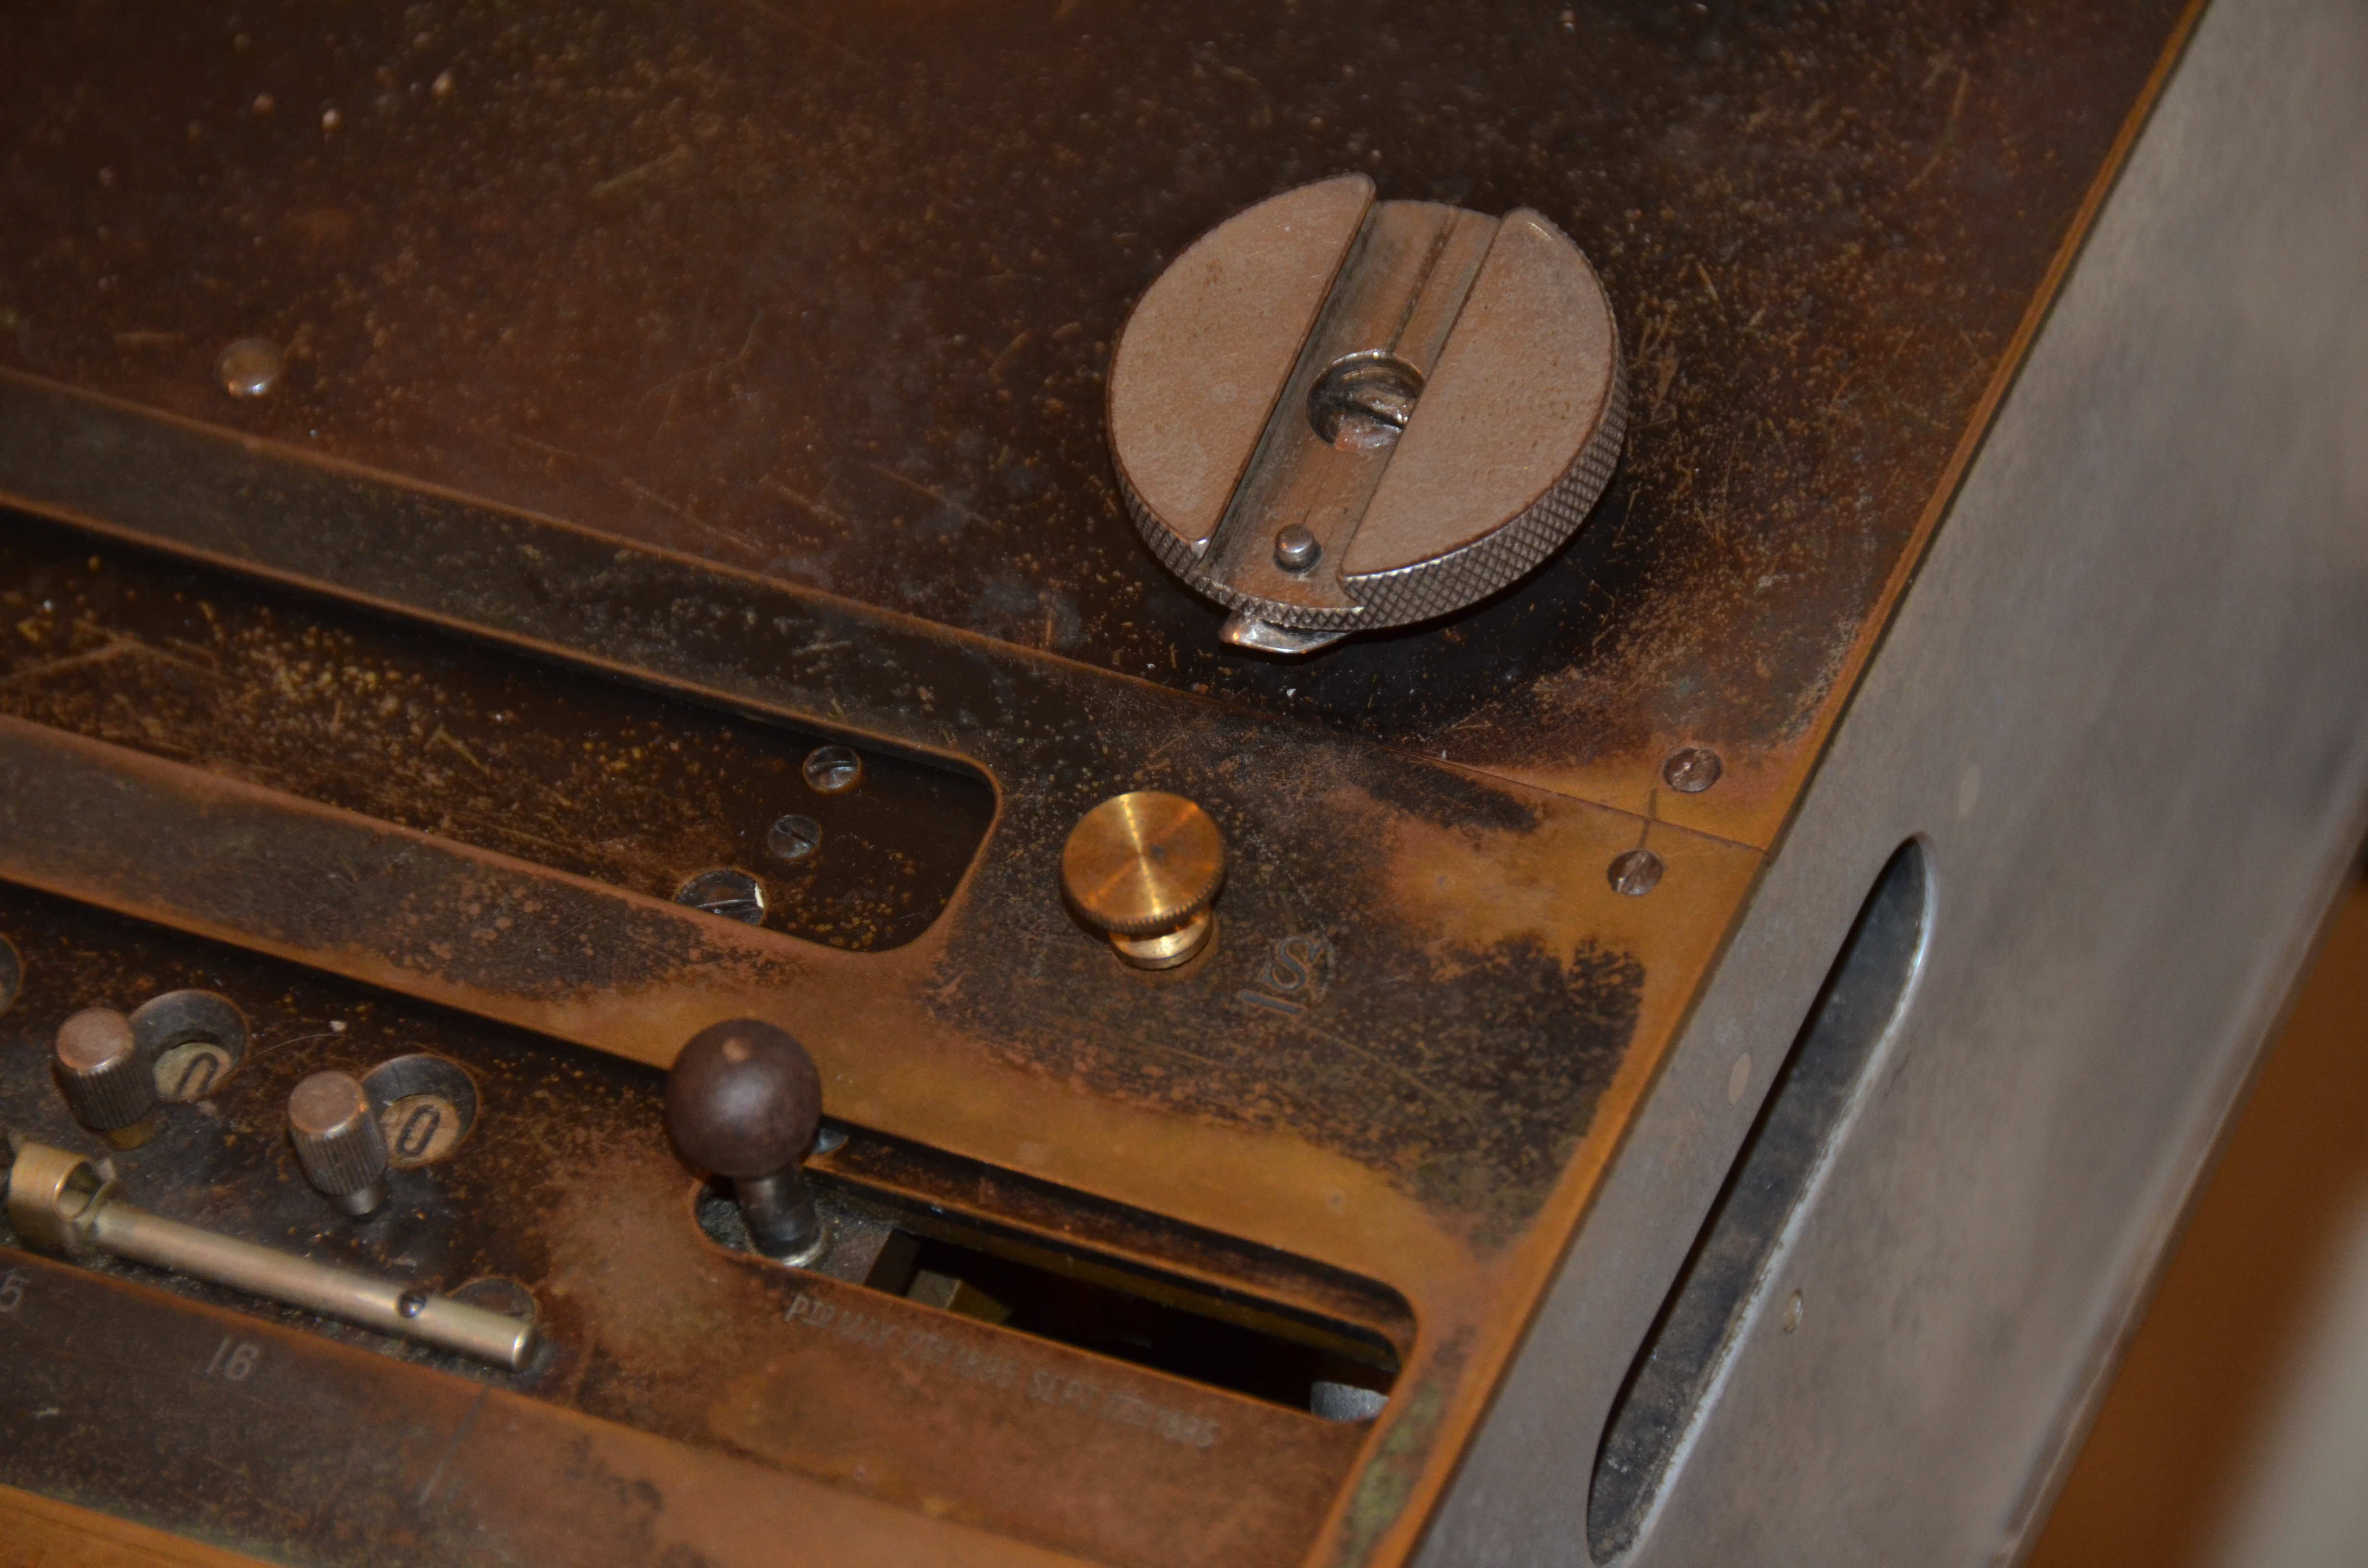
Input Plate
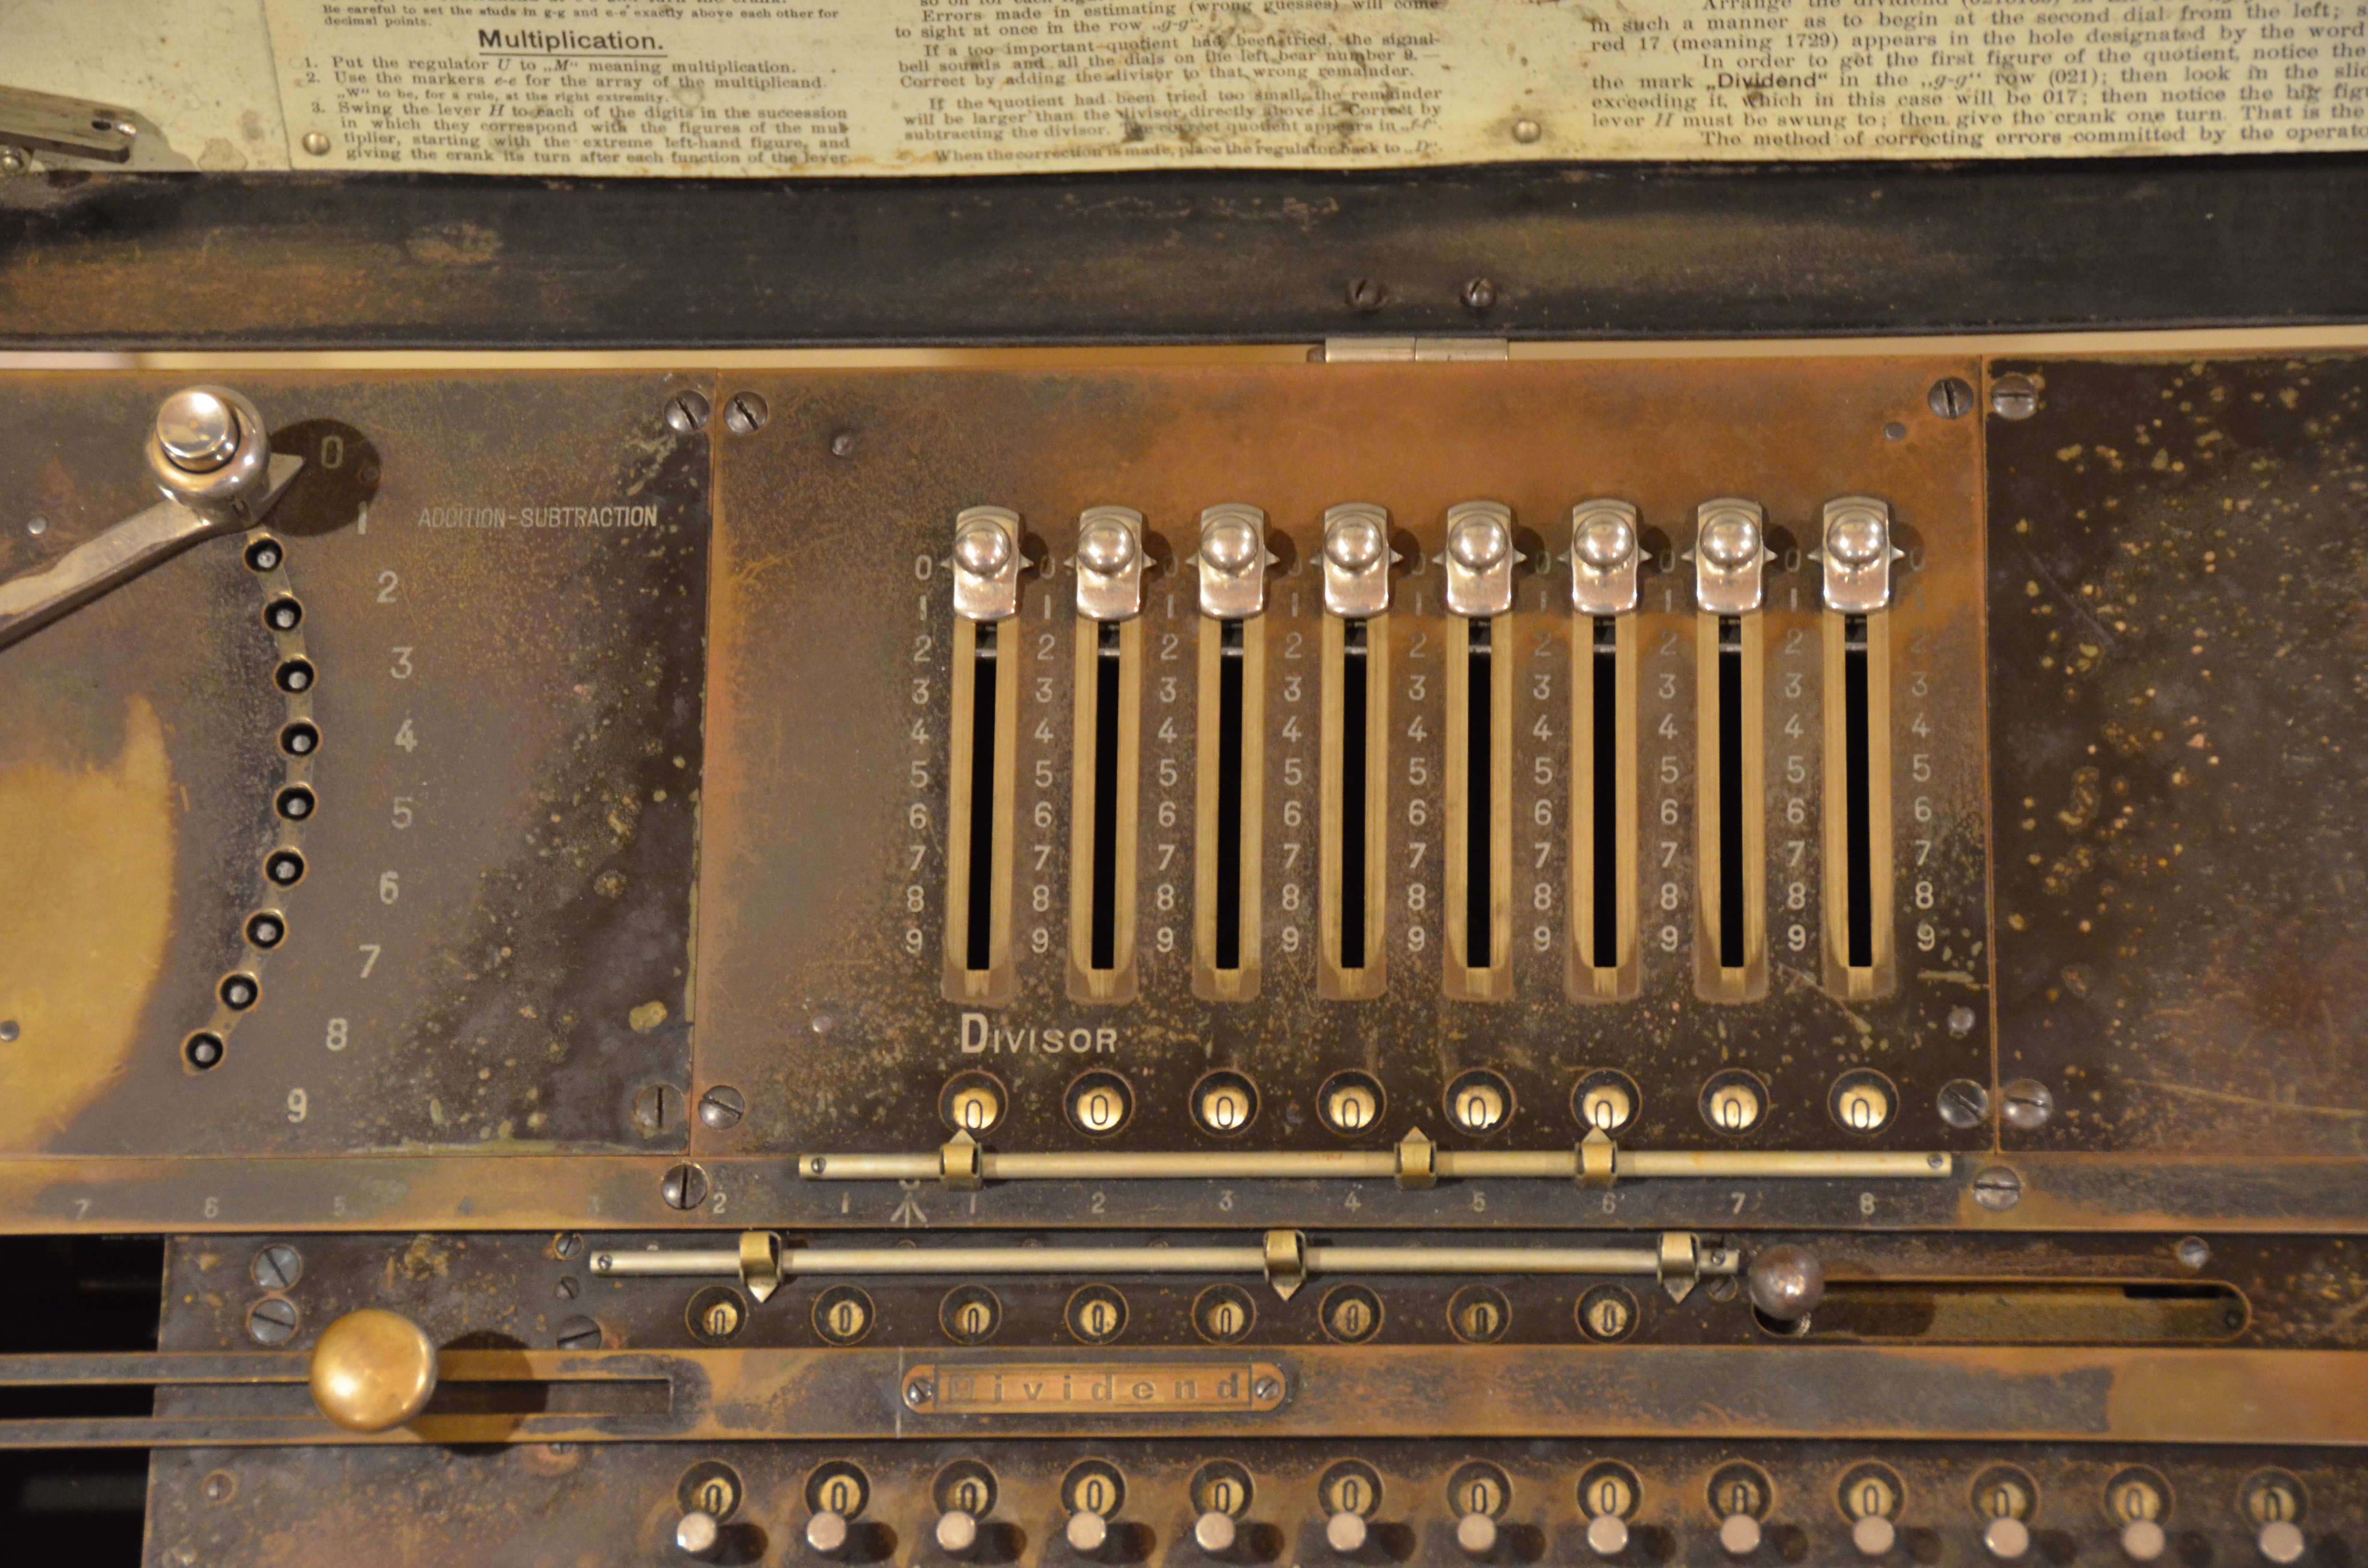
To the right is the input plate. It has eight sliders allowing for up to an eight digit number entry. Below the sliders, the number can be seen allowing for error checking. Further below this, are three movable decimal markers.
Crank Plate
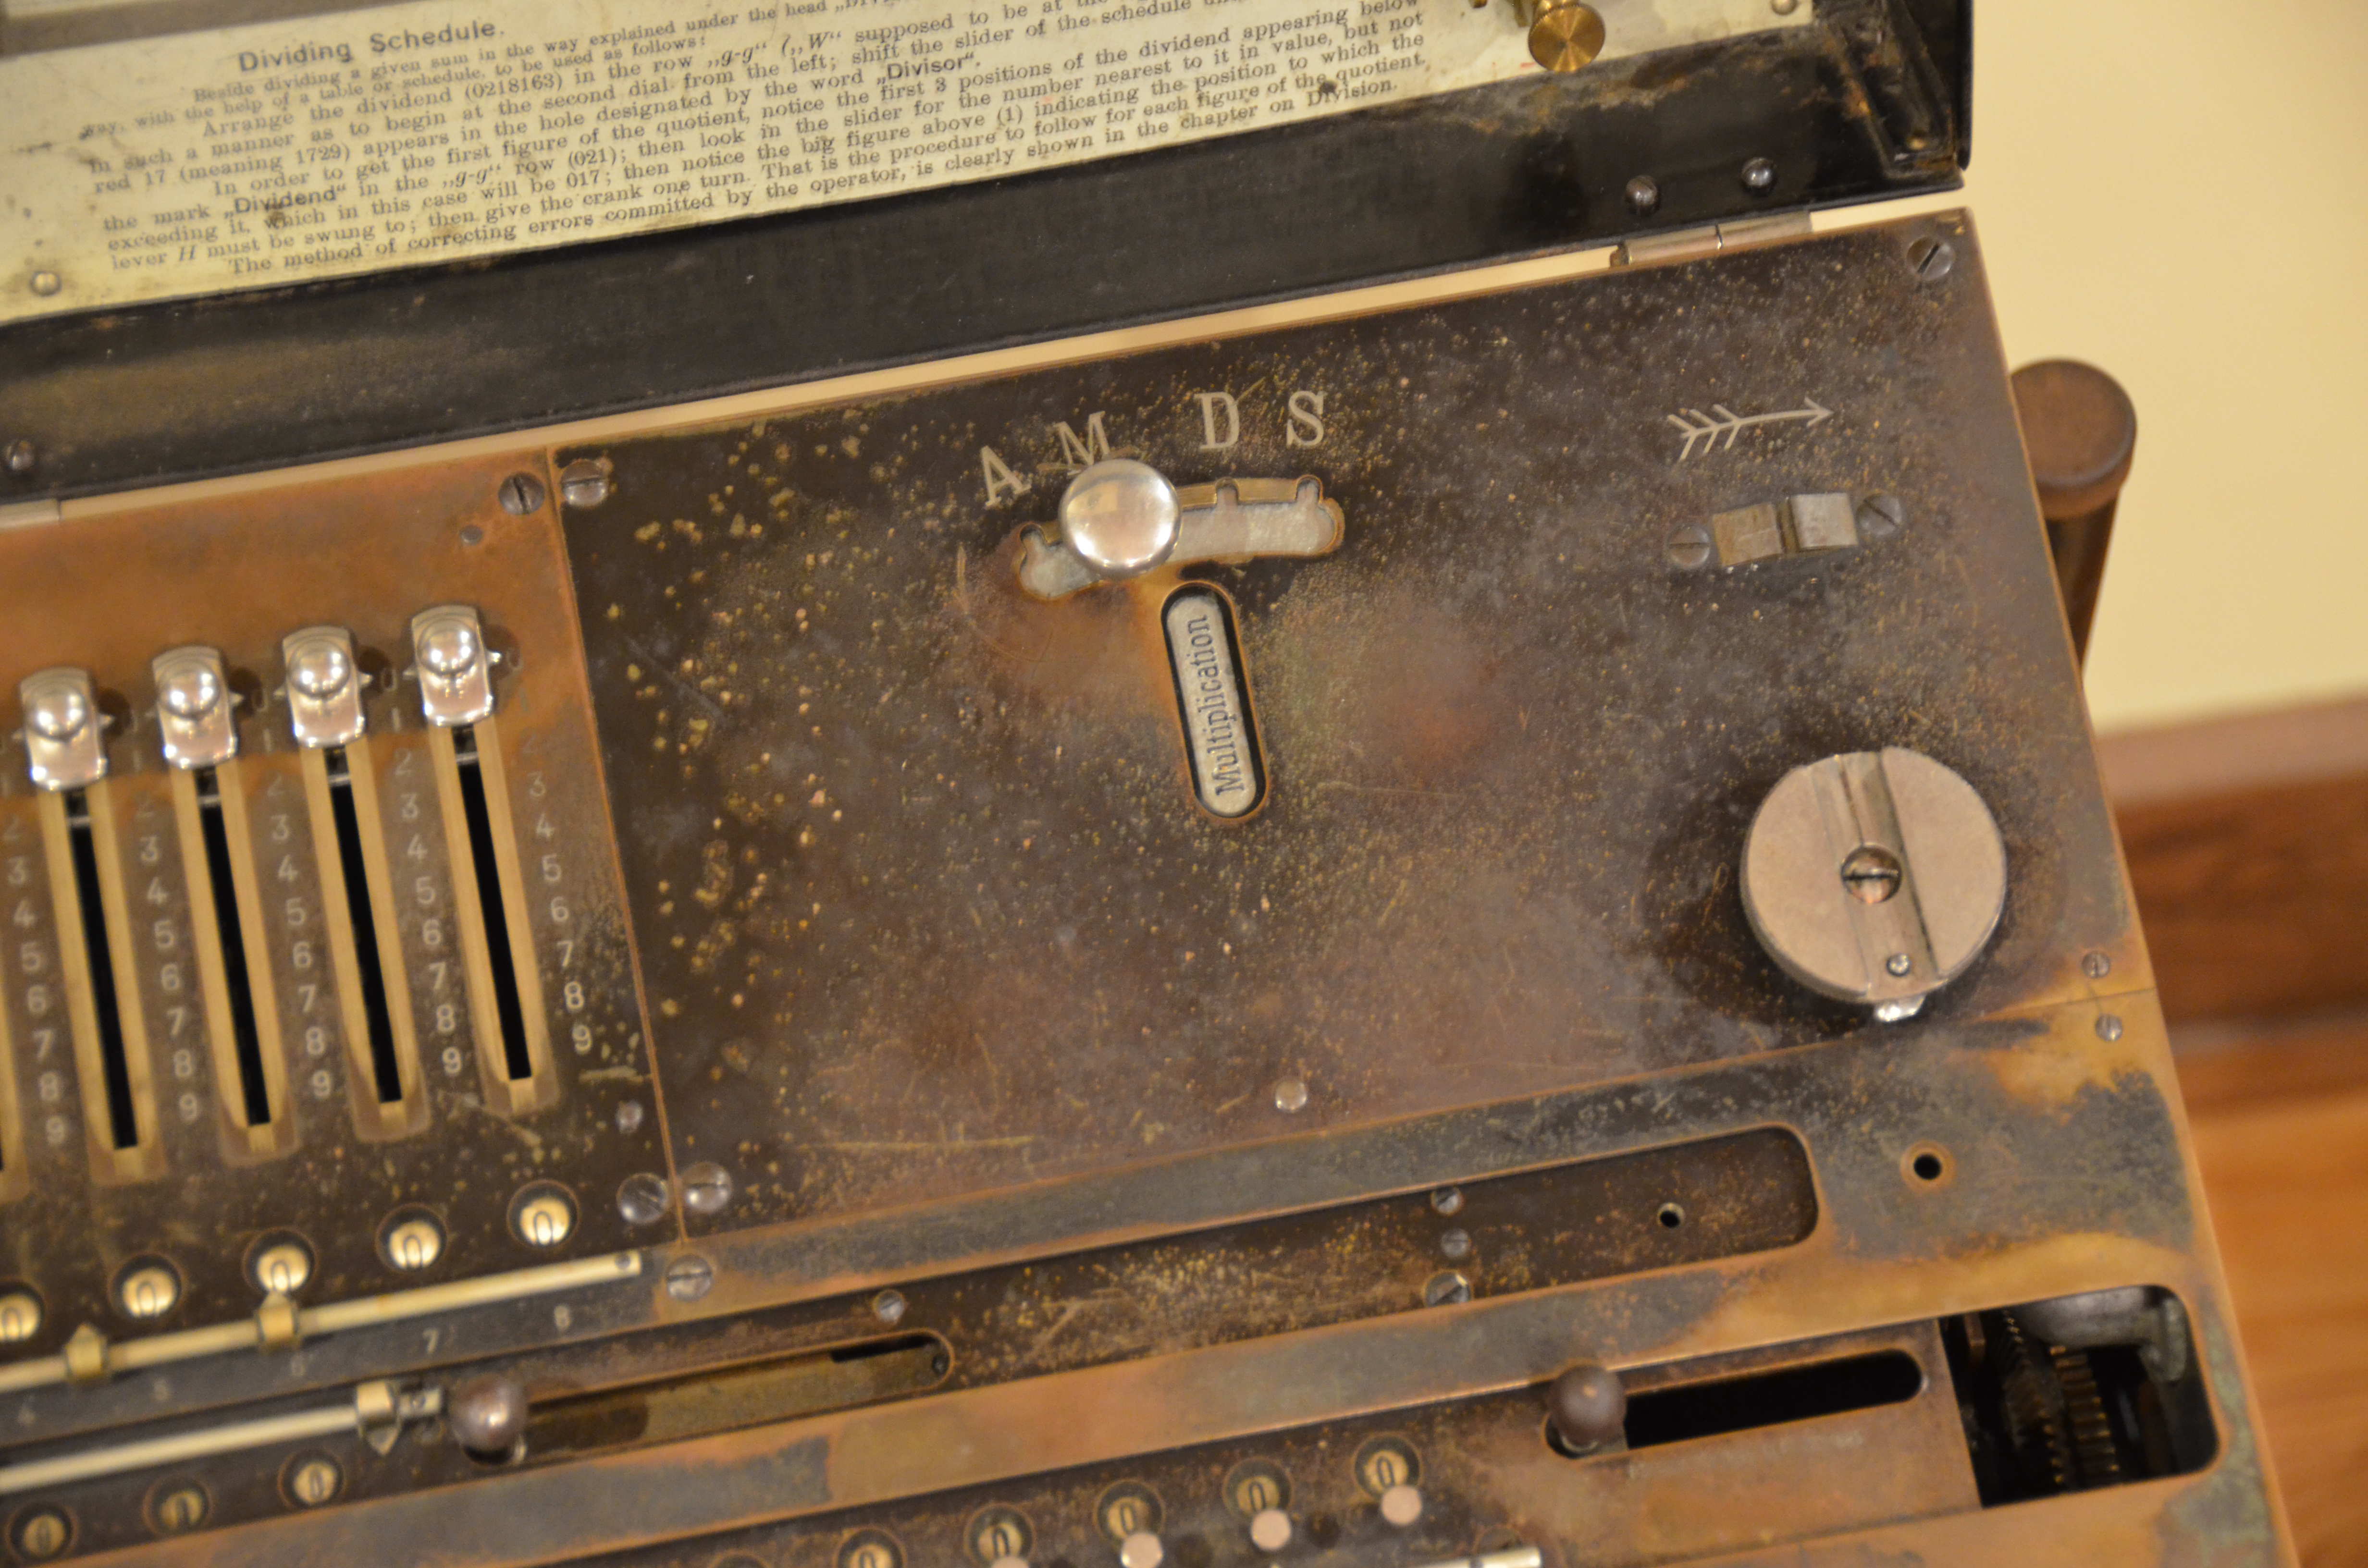
At the top right of the machine is the crank plate. On the left, is a selector for selecting addition, multiplication, division, or subtraction. Beside this, is where the crank handle sits in manual operation, or just a small steel wheel when the crank is removed for motorized operation. Above the wheel, is an arrow indicating the direction to turn the crank and two small metal plates used to stop the handle in the home position when being manually cranked.
Carriage
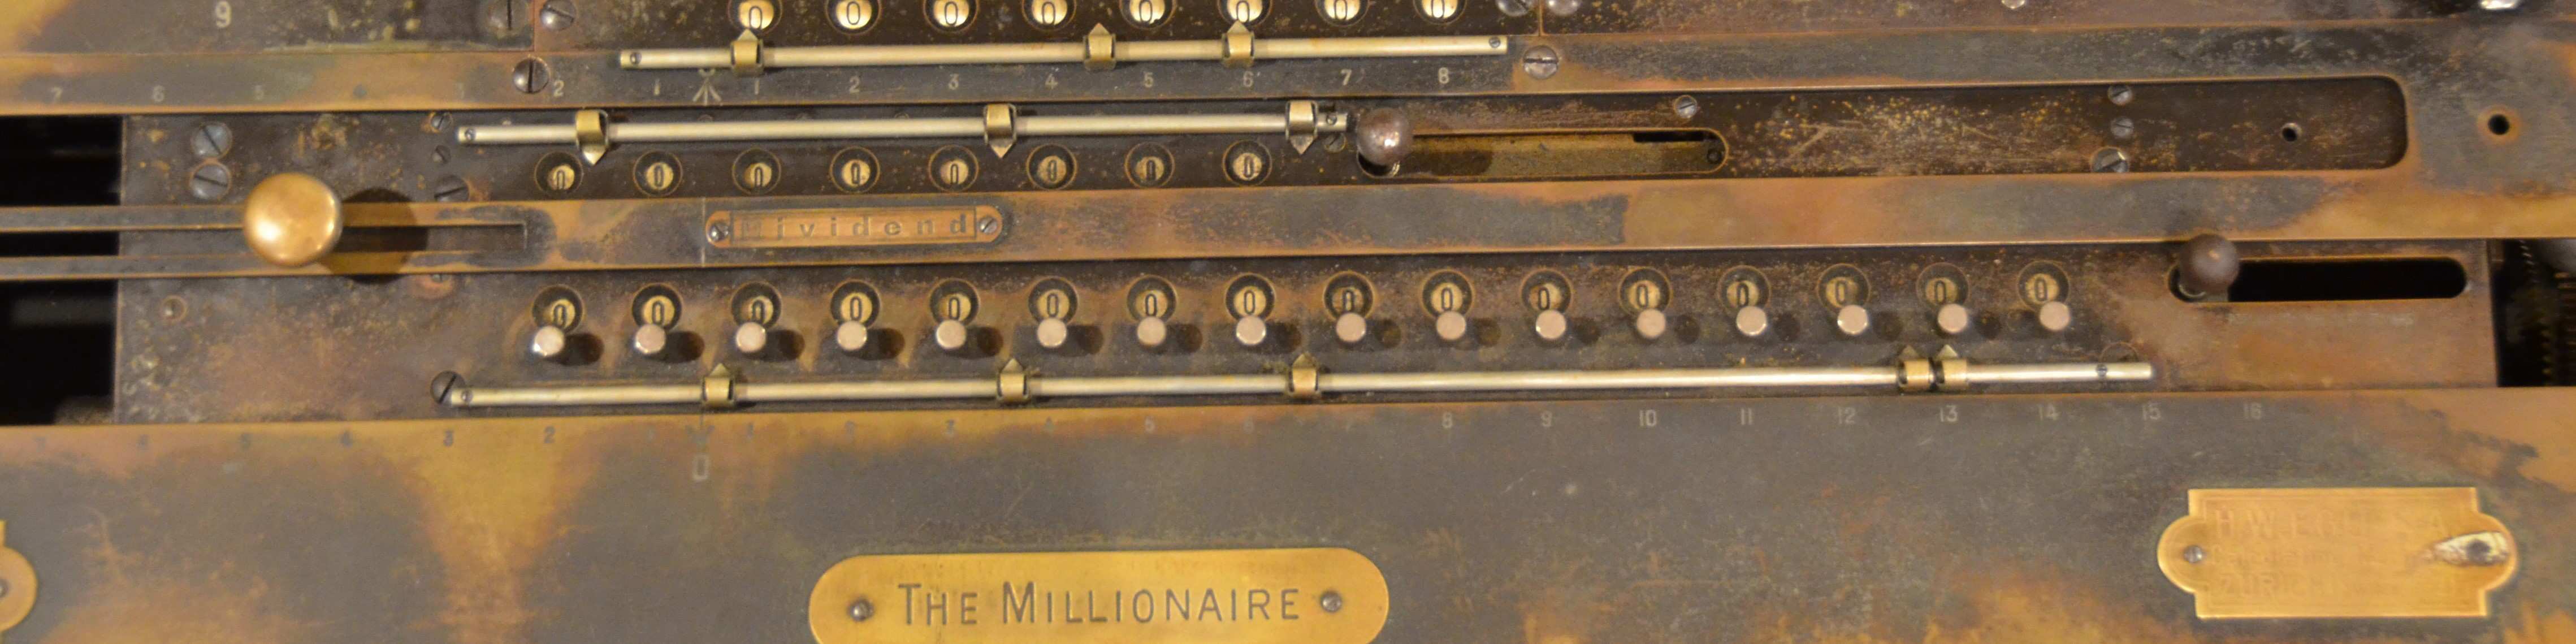
The carriage can travel the full length of the machine and is quite heavy. At the top of the register is an eight digit counter register. The counter register does not have a tens carry mechanism and is disengaged during addition or subtraction. Below the counter register is the accumulator register. It does have tens carry and it can underflow. The carriage also has a bell that dings when there is an overflow or when the carriage reaches it’s leftmost position. Both registers have decimal sliders. Beside each register is a clearing lever for that register. On the far right of the carriage is the carriage movement knob. Pushing down the knob allows the carriage to be moved.
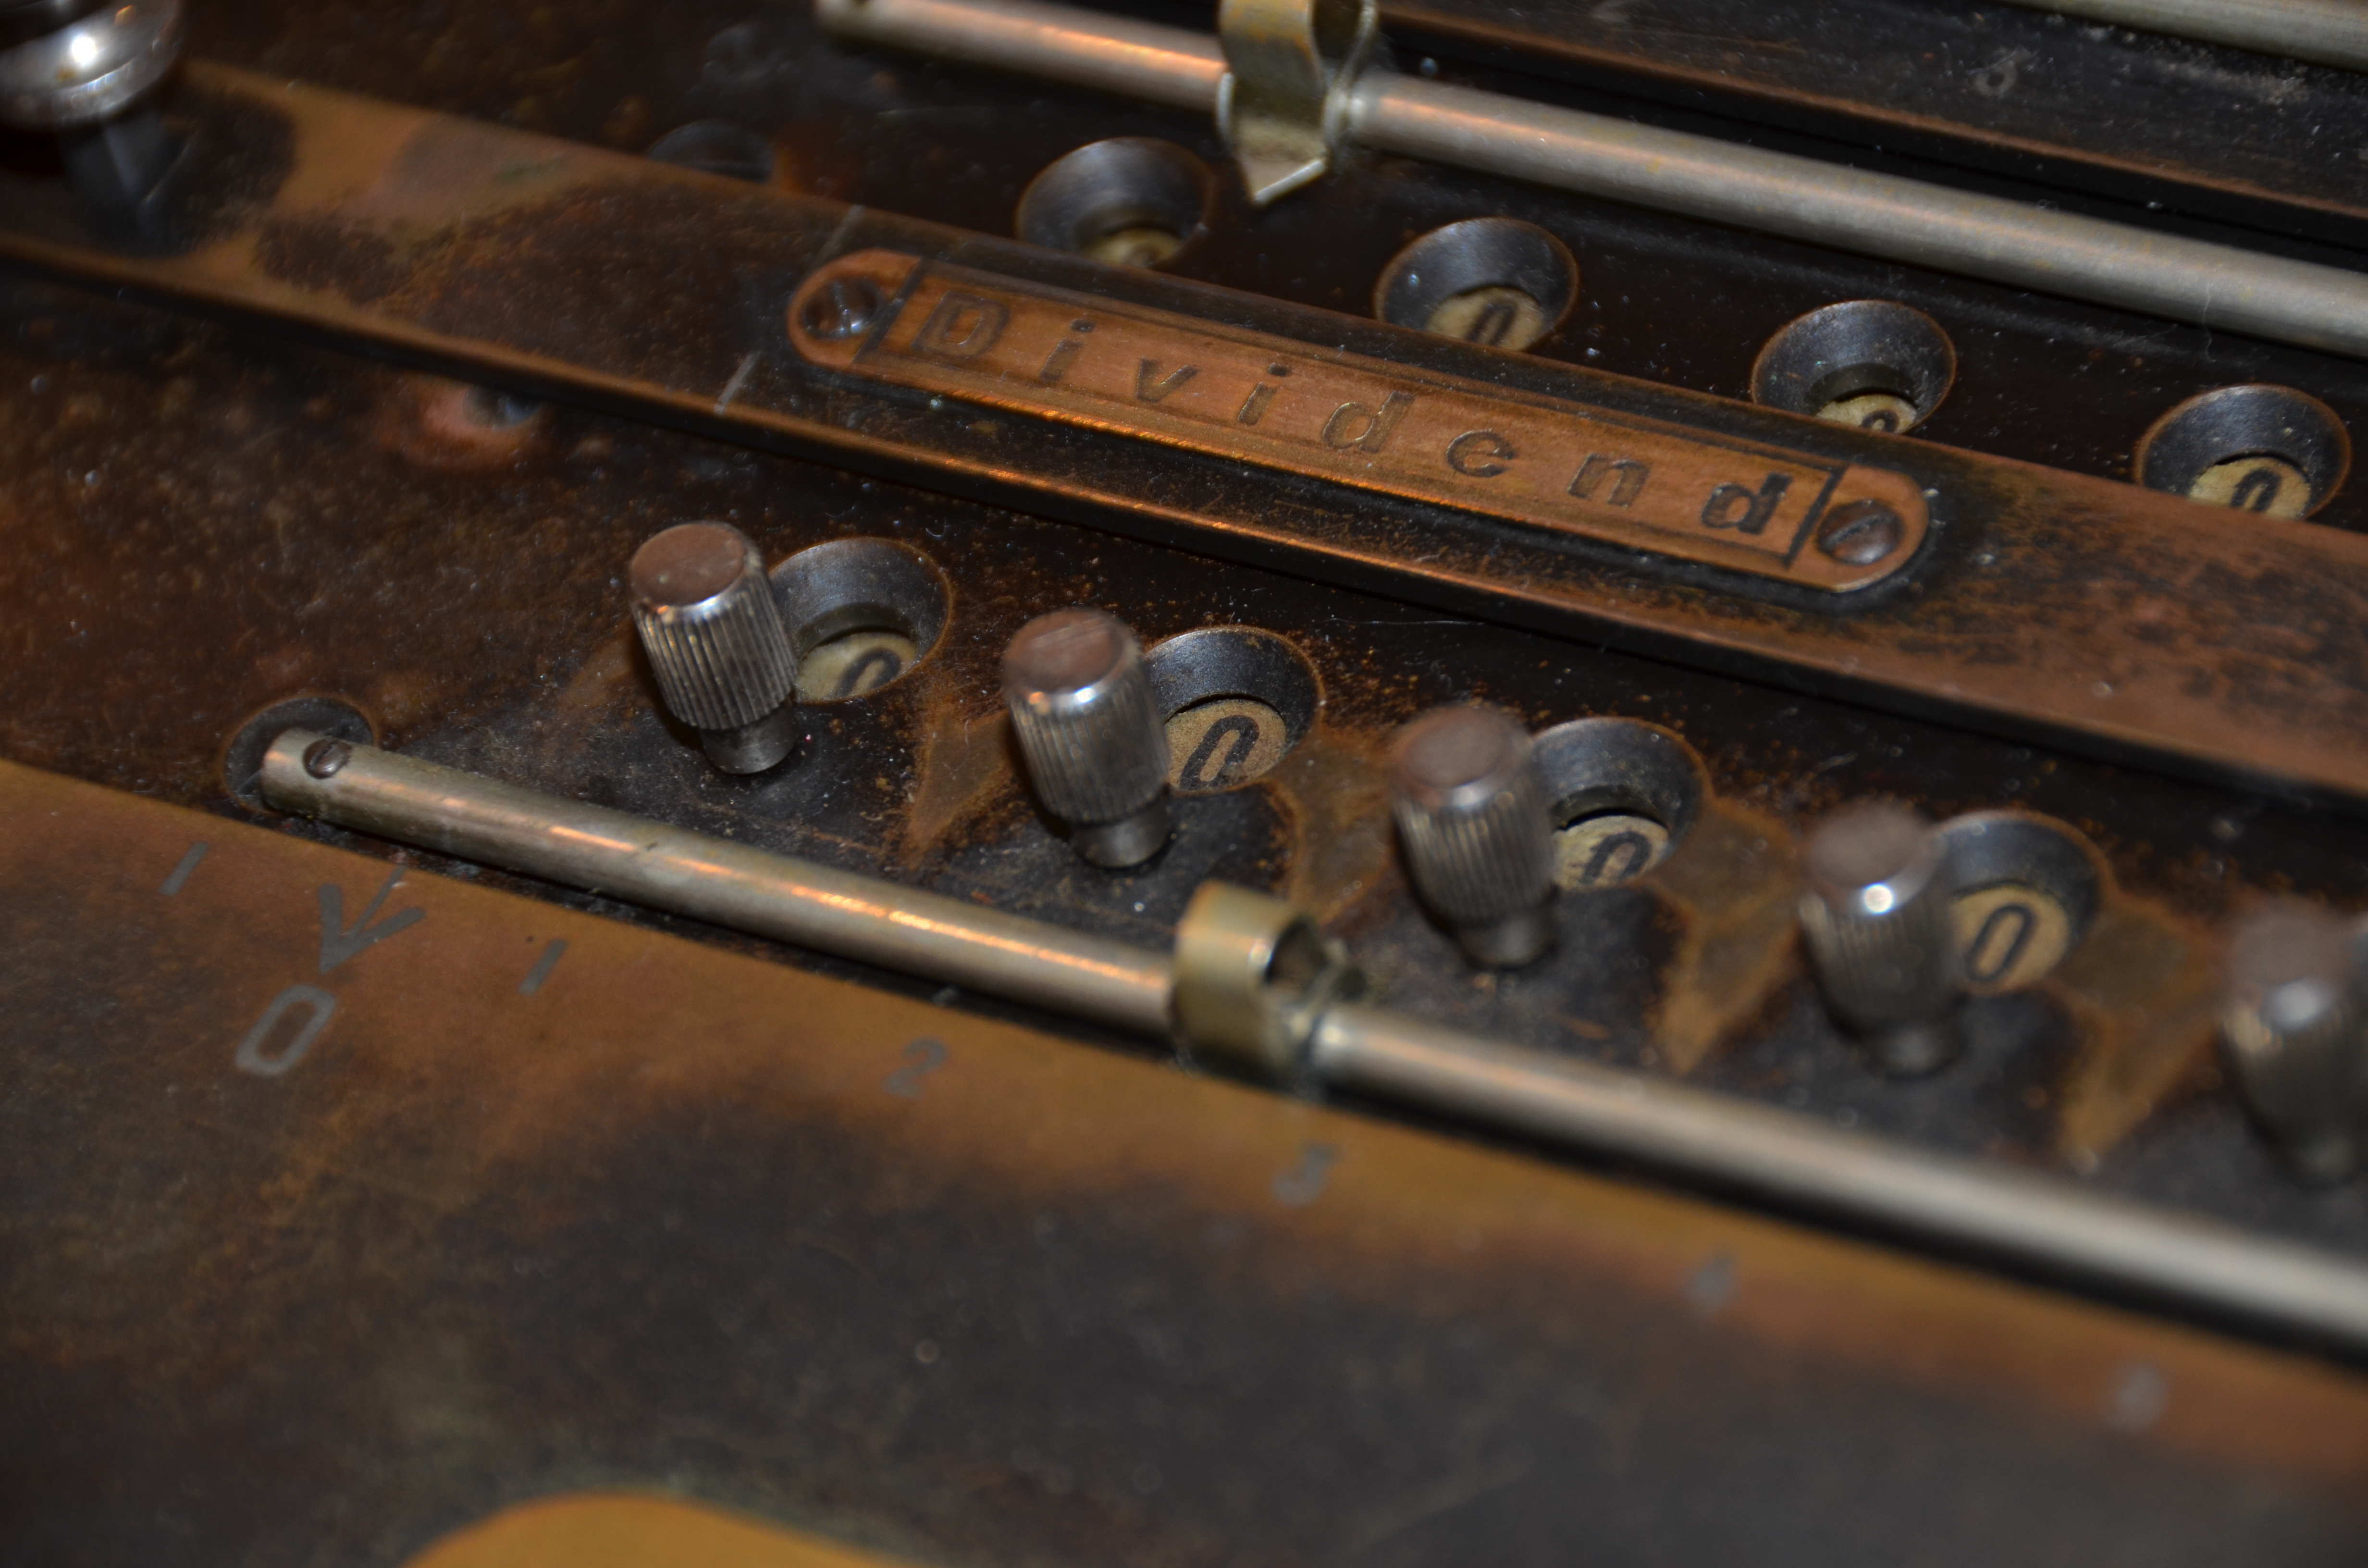
The carriage also has knobs below the accumulator register used for entering digits into the register.
Operation
Manual vs. Motorized
Operation in manual mode and electric mode is very similar. If manually using the crank, the button on the multiply lever must be pressed, then the crank knob can be lifted and the crank rotated. The multiplier button can be released once the crank has begun turning. If the button is held, the machine can continuously be cranked.
If the machine is to be used in motorized mode, first the handle must be removed and placed in the lid. THIS IS IMPORTANT. If not, the crank handle lock will stop the machine, most likely kicking the drive belt off of the motor, but, it’s a lot of force and you don’t want the possibility of damaging any parts. Once the handle is removed, turn the motor on via the switch. The motor will turn on and continuously runs until turned off. The button on the multiplier lever is used to cycle the machine.
Addition
First, set the selector knob to addition. Then, simply set the digit to be added using the input sliders, set the multiplier lever to 1 and press the button on the lever to cycle the machine (If using manually, then crank to cycle it). The carriage should not move and the counter register will be disengaged. The multiplier lever does have to be set to 1 for addition and subtraction. This due to how the multiplication lookup table works. See the Multiplication Lookup Section.
Subtraction
Set the selector knob to subtraction. Then, again set the digit to be subtracted using the input sliders, set the multiplier lever to 1 and press the button on the lever to cycle the machine. The carriage should not move and the counter register will be disengaged. If a number larger than the number in the accumulator is subtracted, the register will underflow and the bell will sound.
Multiplication
First, set the selector for multiplication. Next, add the multiplicand into the input register. Then, move the multiplication lever to the first digit of the multiplier. Finally, cycle the machine. The product will be in the accumulator, the counter will show the multiplier, and the carriage should shift to the left. For multiple digit multipliers, just repeat for the next digits in the multiplier, and so on, and so forth.
Division
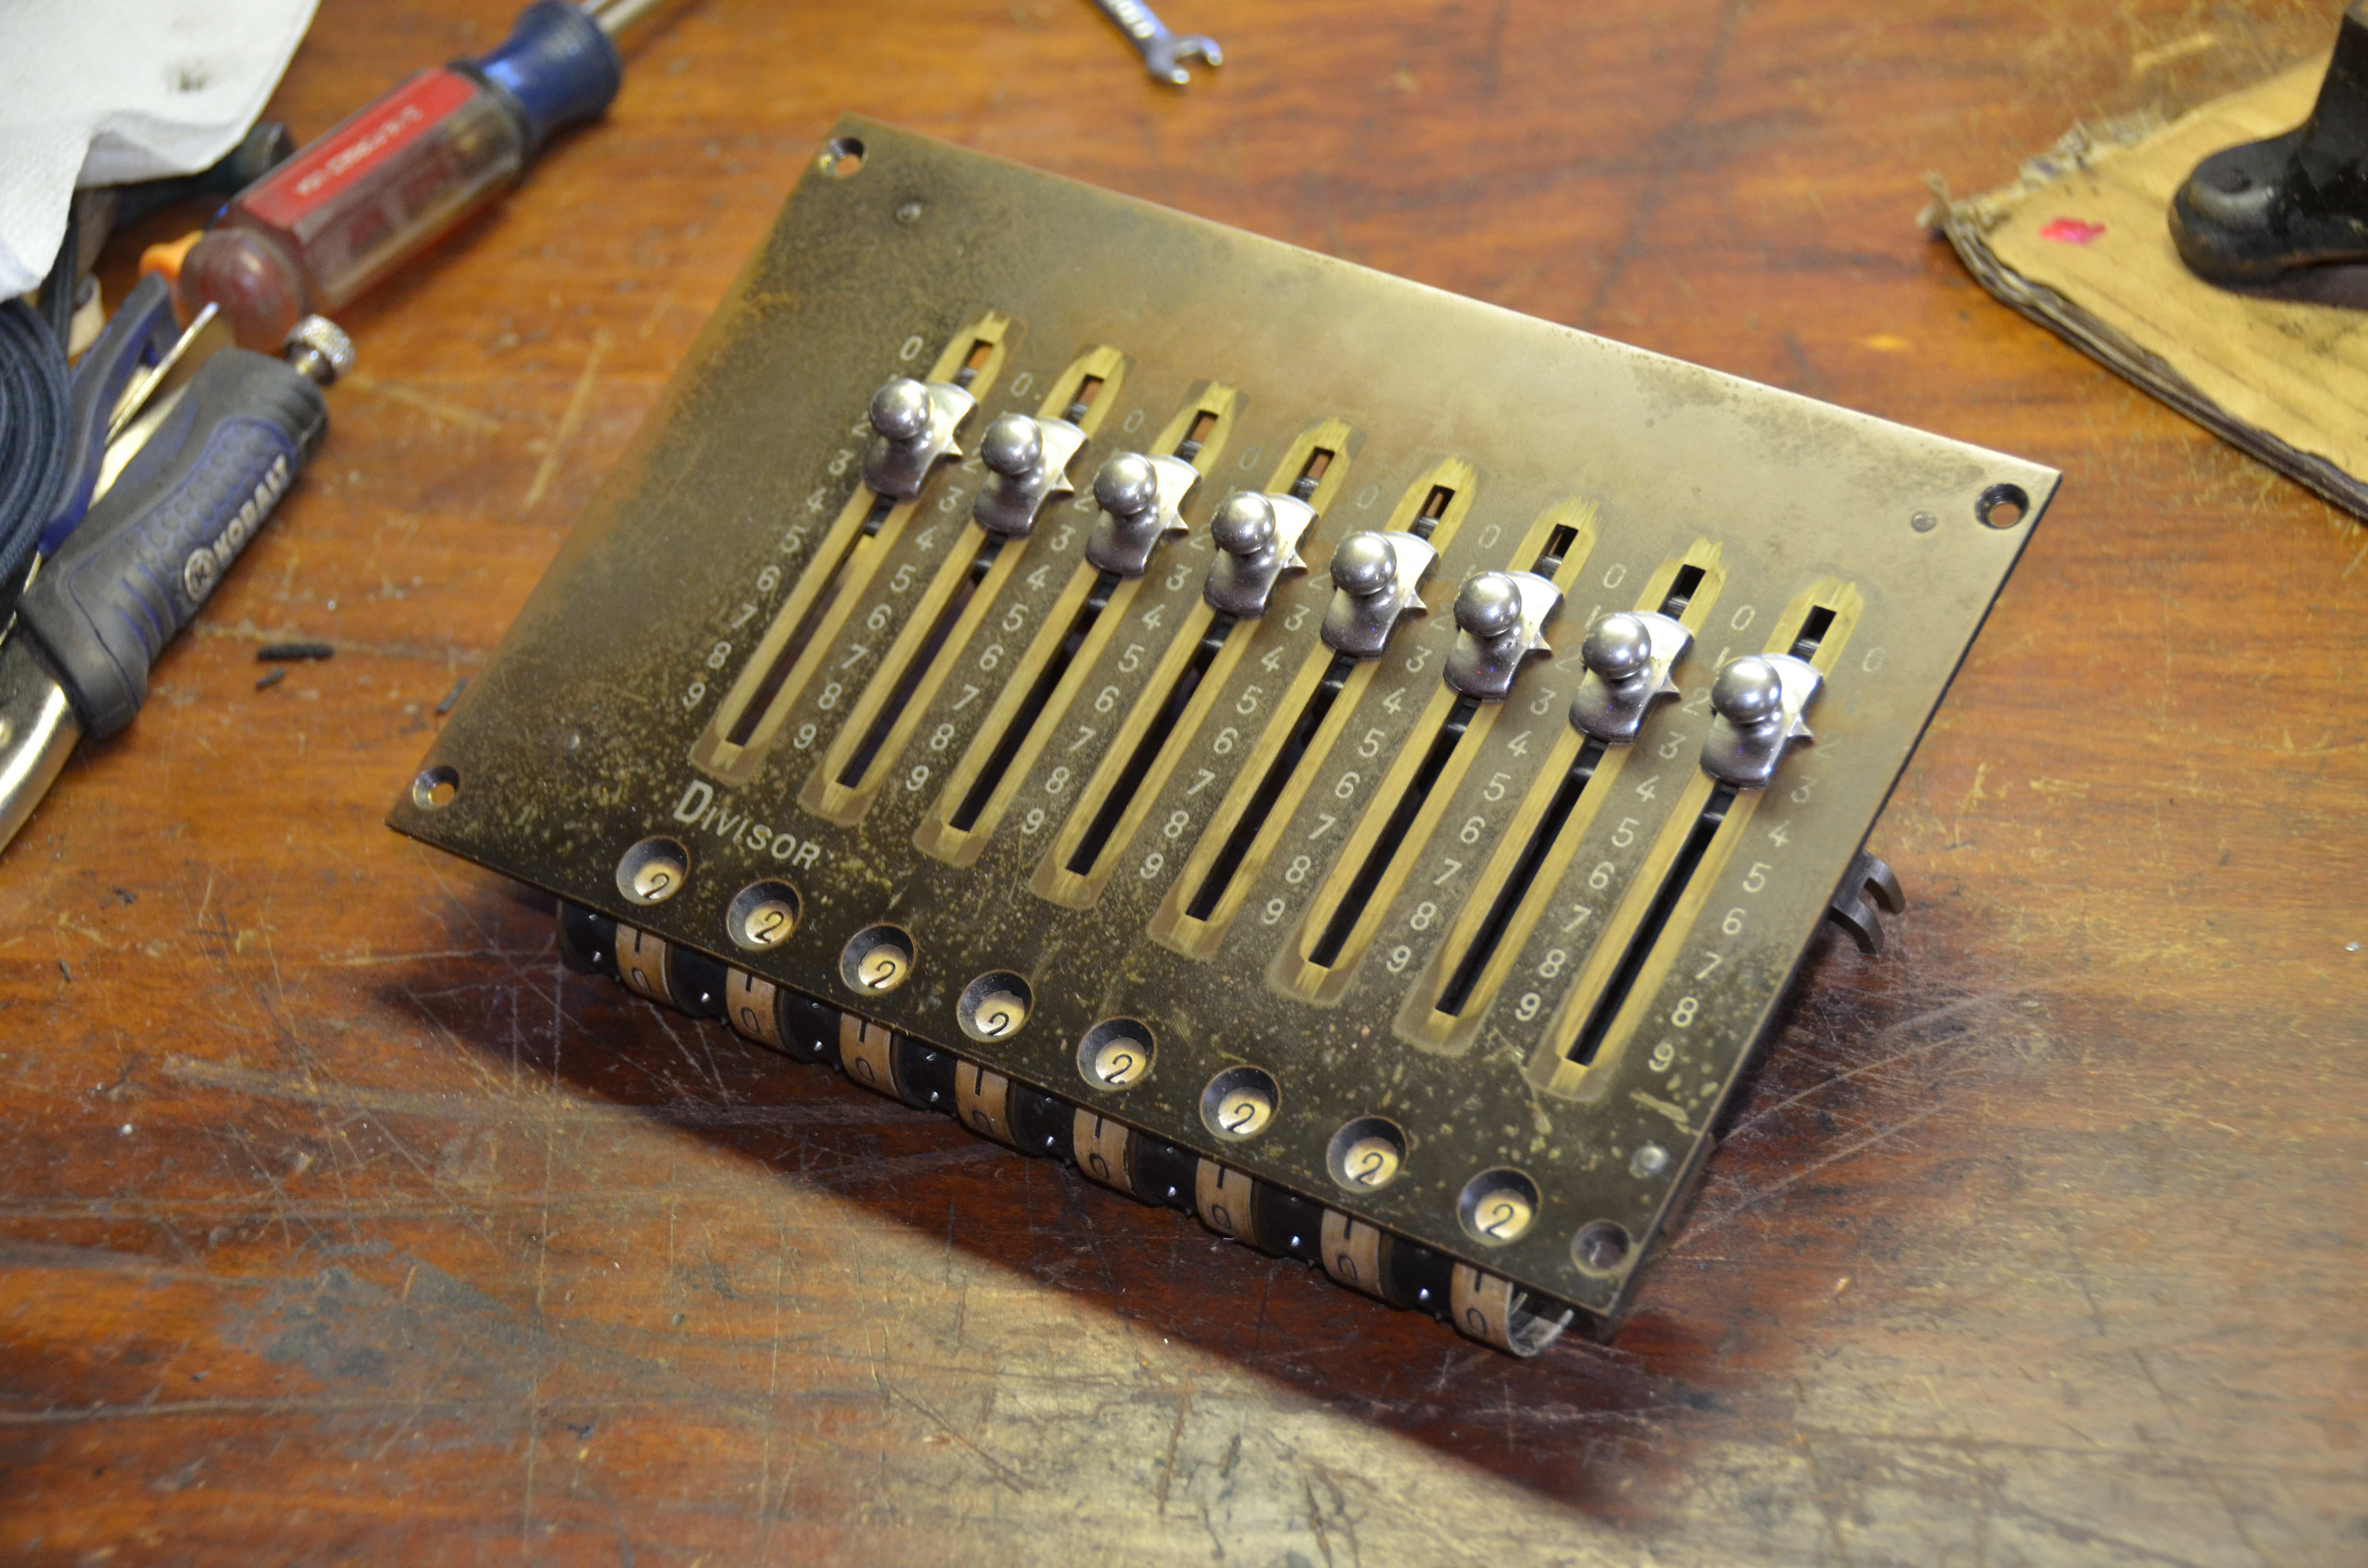
Division on this machine is more involved. For example, 1096 divided by 133. The best way to do this is to utilize the table given in the lid of the machine.
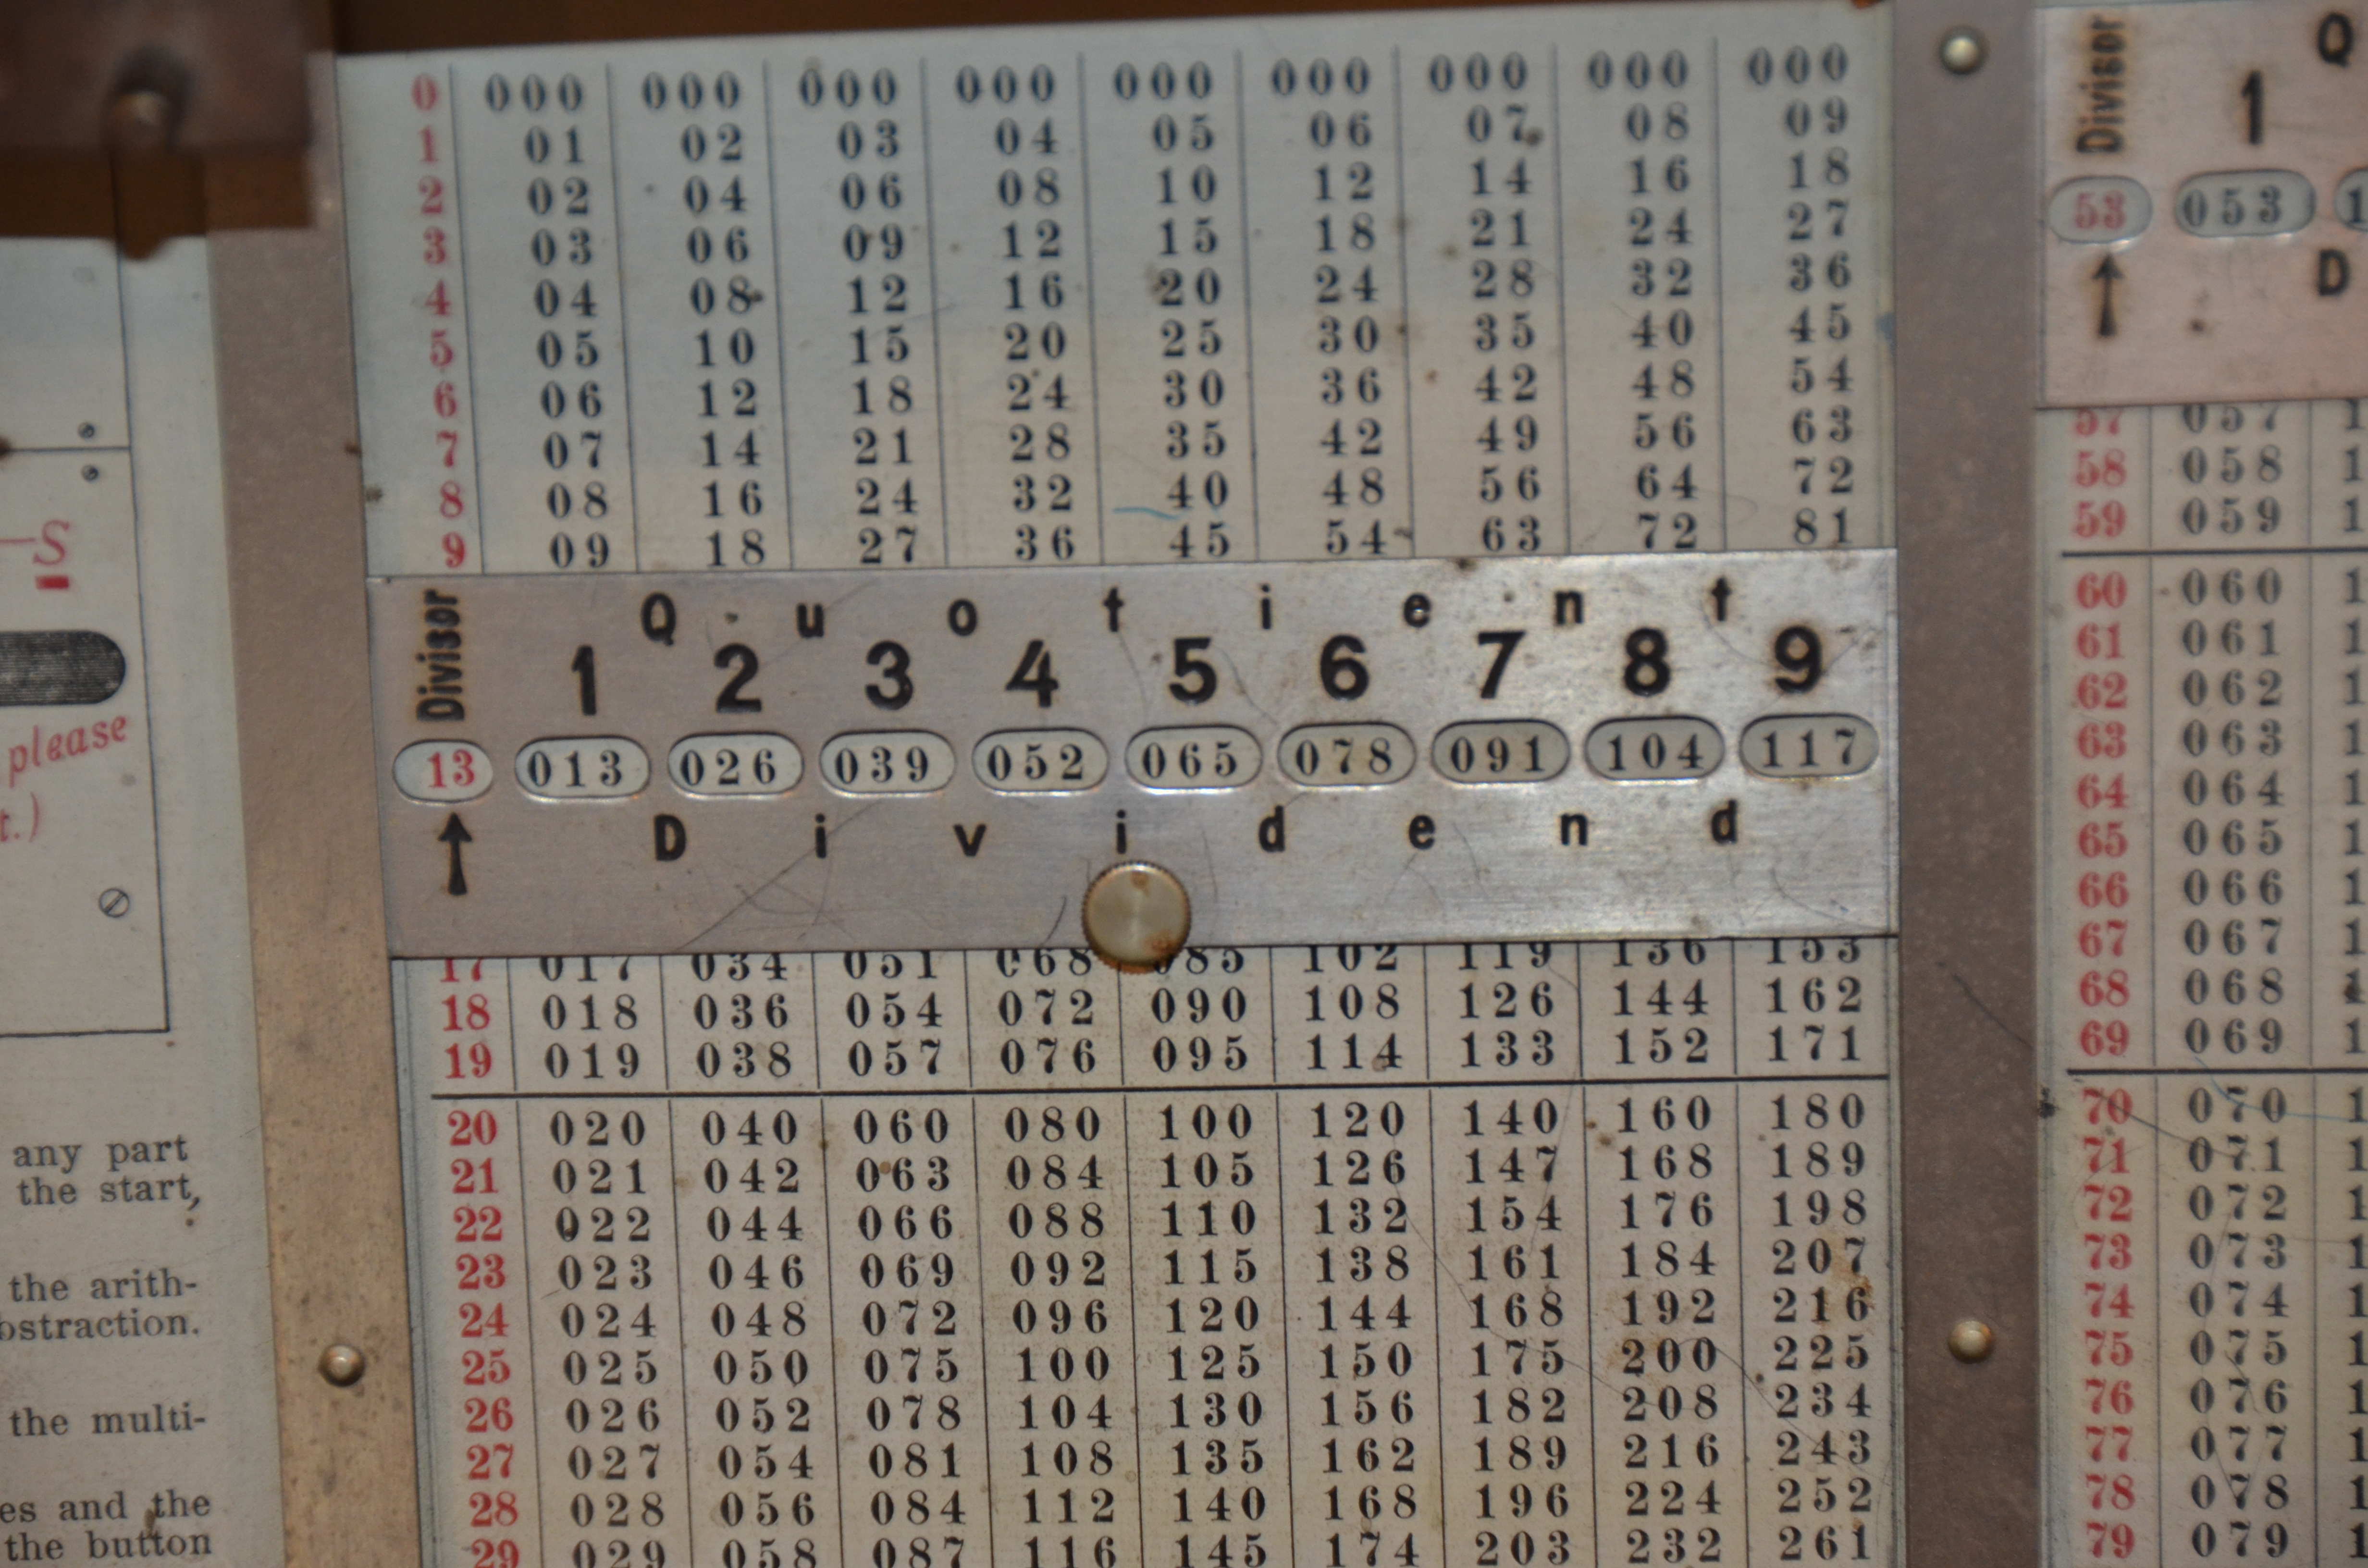
First, we need to setup division. Start by setting the slider over the table using the first two digits of the divisor, 13, using the circle on the slider marked Divisor. Next, with the carriage in it’s rightmost position, enter the dividend in the leftmost position using the twirlers below the accumulator. It should be entered below the plate that says “Dividend”. Then, set the divisor on the leftmost side using the input sliders. Make sure the selector knob is set to division. Now you can begin the division process.
For this, one can simply use the table. Looking at the accumulator, look at the three digits to the right of the line beside the Dividend plate. Compare them to the numbers found in the Dividend circles on the slider in the lid to find the first digit of the quotient. 109 is in the accumulator. 109 falls between the 8 and 9 quotient positions in the slider. So, we go with the number lower than or equal to the first three digits in the accumulator. So, press 8 using the multiply lever and cycle the machine. The carriage will shift to the left and 8 will be in the counter. Again, look at the three digits to the right of the marked line. This time it’s 054. That falls between 2 and 3 in the slider. So press 2 using the multiply lever and cycle the machine. Now 008 is in the accumulator and right of the the marked line. 008 is below 013 which is quotient digit 1. So this is 0. Enter 0 using the multiply lever. Now 080 in the accumulator. 080 is between 6 and 7 on the slider, so 6 is entered. Continue this until the carriage reaches it’s leftmost position and the bell dings. You will find 8.2406015 (with decimal calculated mentally) in the counter - the correct quotient!
Errors can happen using this method due to how the table works. It could underflow. If it does, the bell will sound before the carriage is in the leftmost position, indicating an error. To correct it, set the selector to addition. Set the multiply lever to 1 and cycle the machine. This adds the divisor back and corrects the underflow. Set the selector back to division and continue as normal with the division process.
Motor
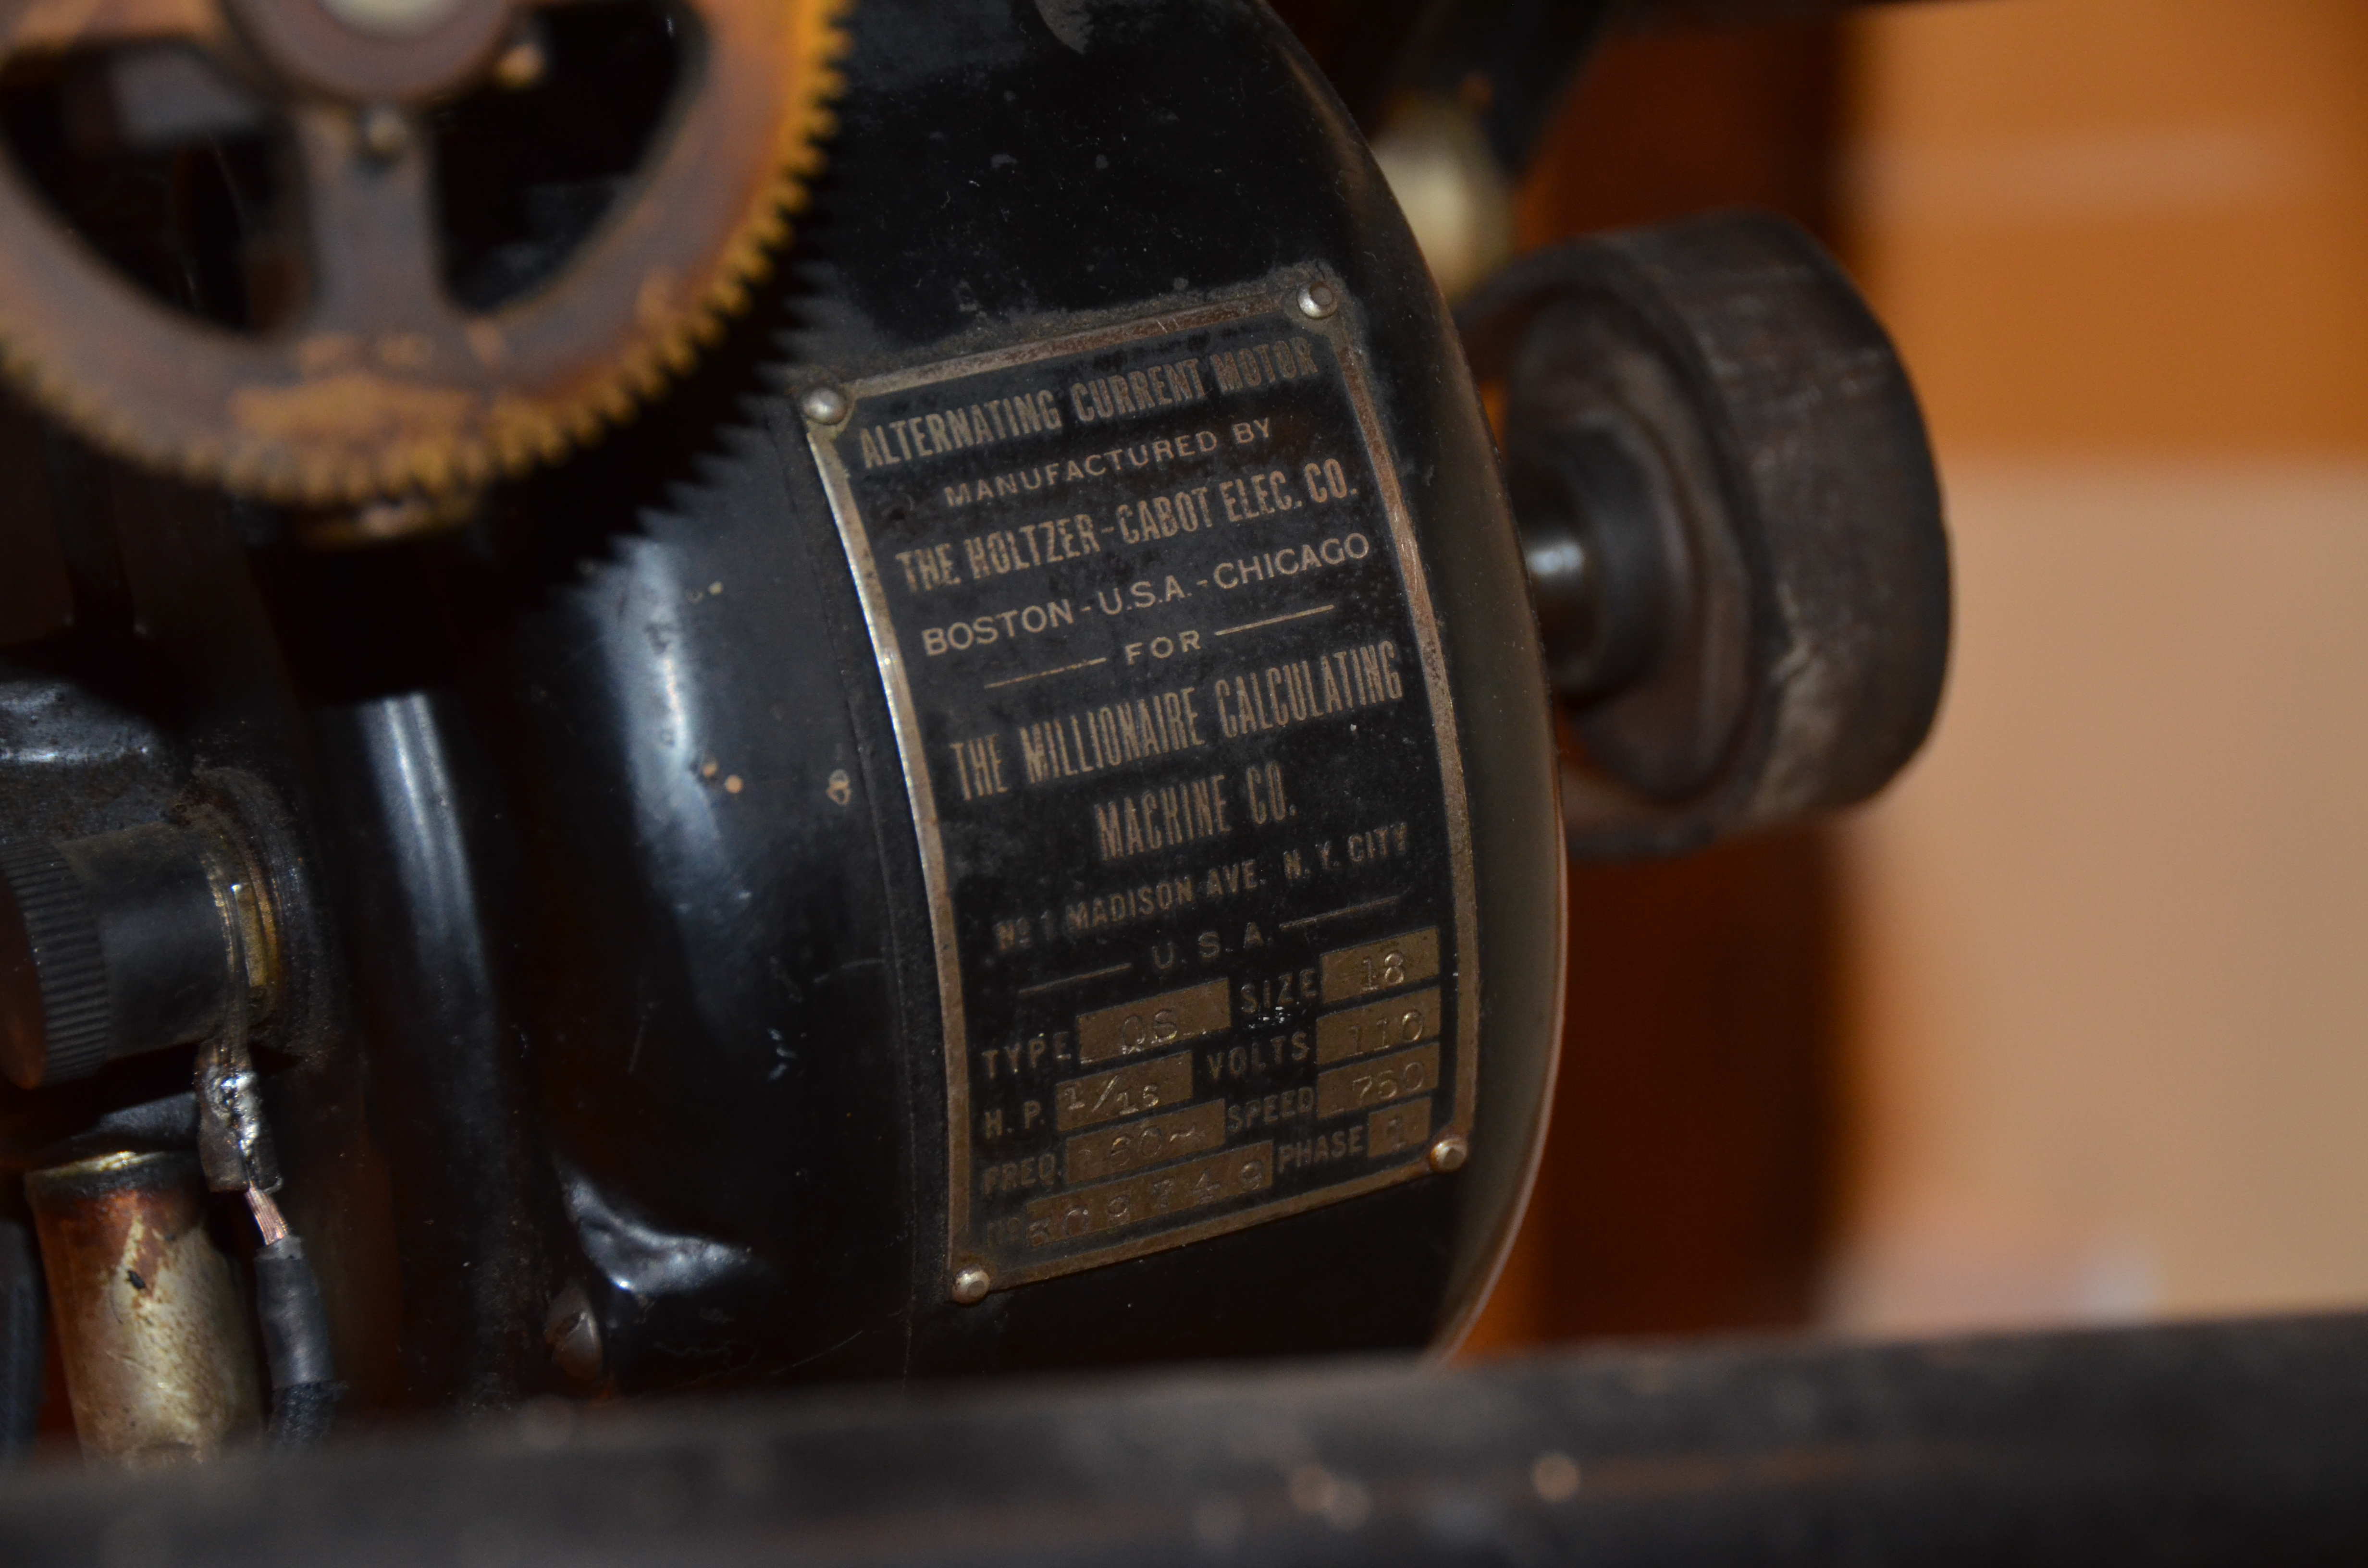
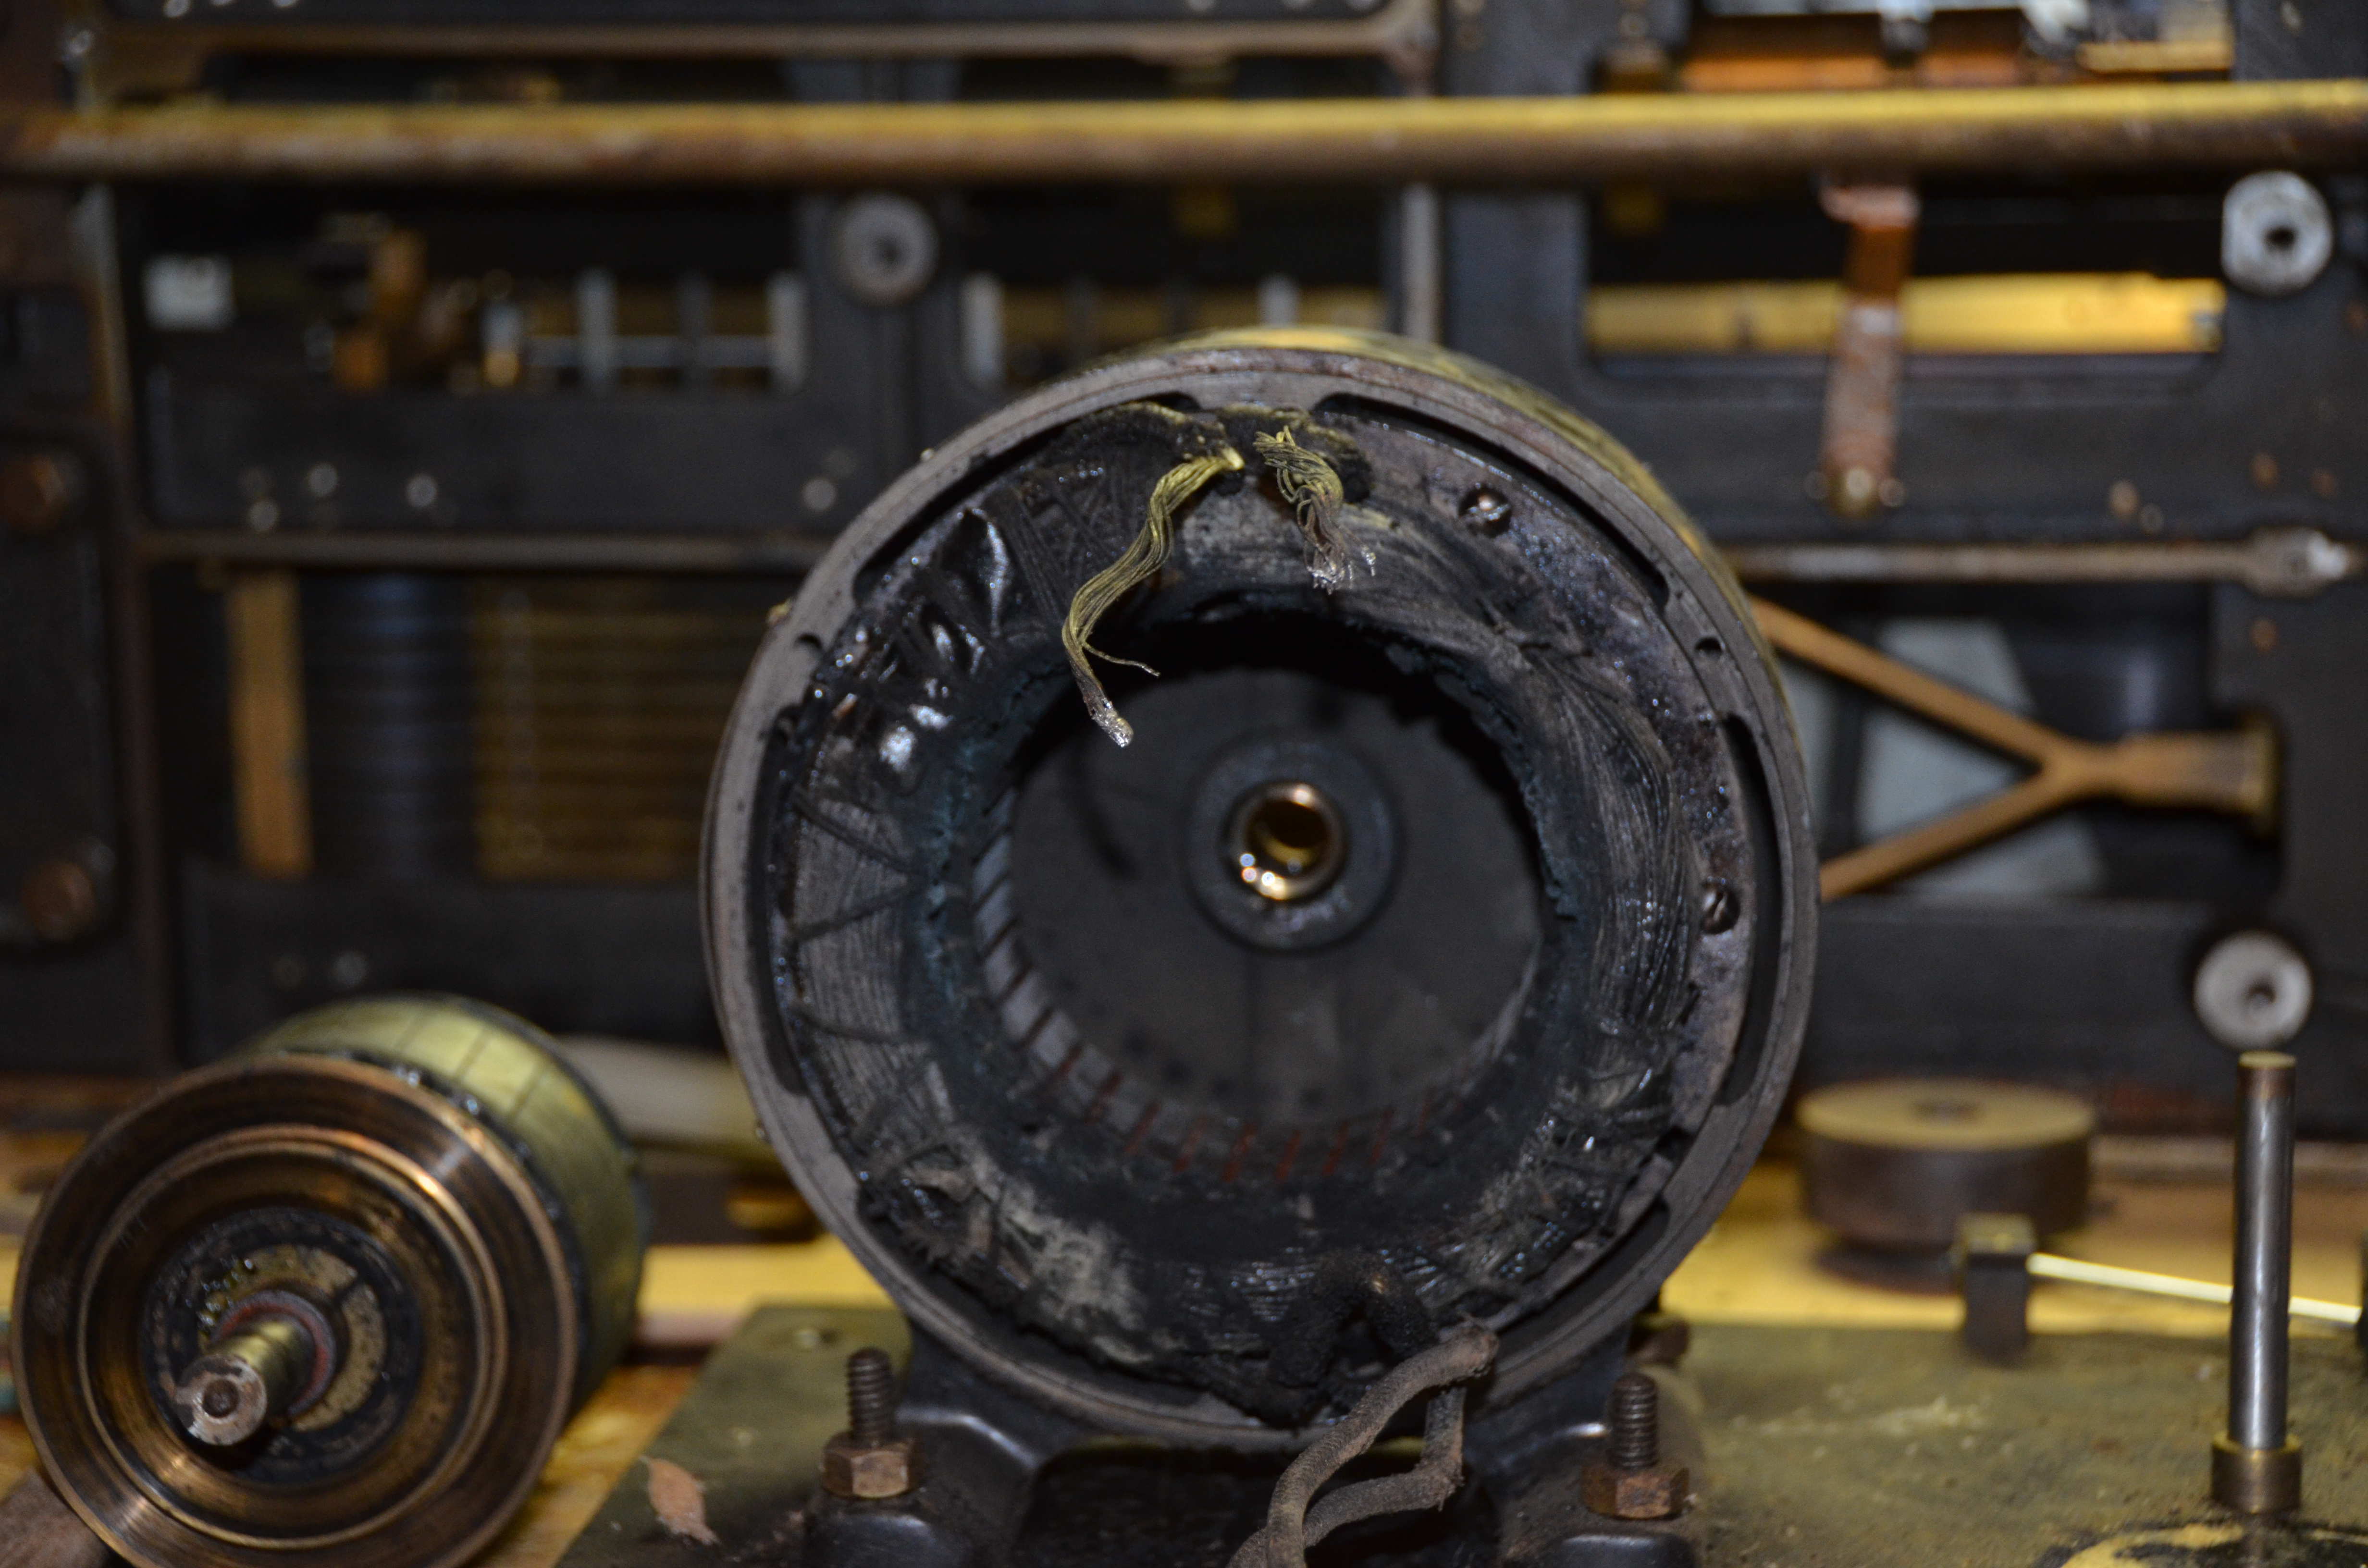
The motor was manufactured by Holtzer-Cabot Electric Company specifically for Millionaire machines. It is 1/15th horsepower, 110 volts, and 1750 rpm.
The switch that controls the motor is mounted upside down under the machine and goes directly to the motor.
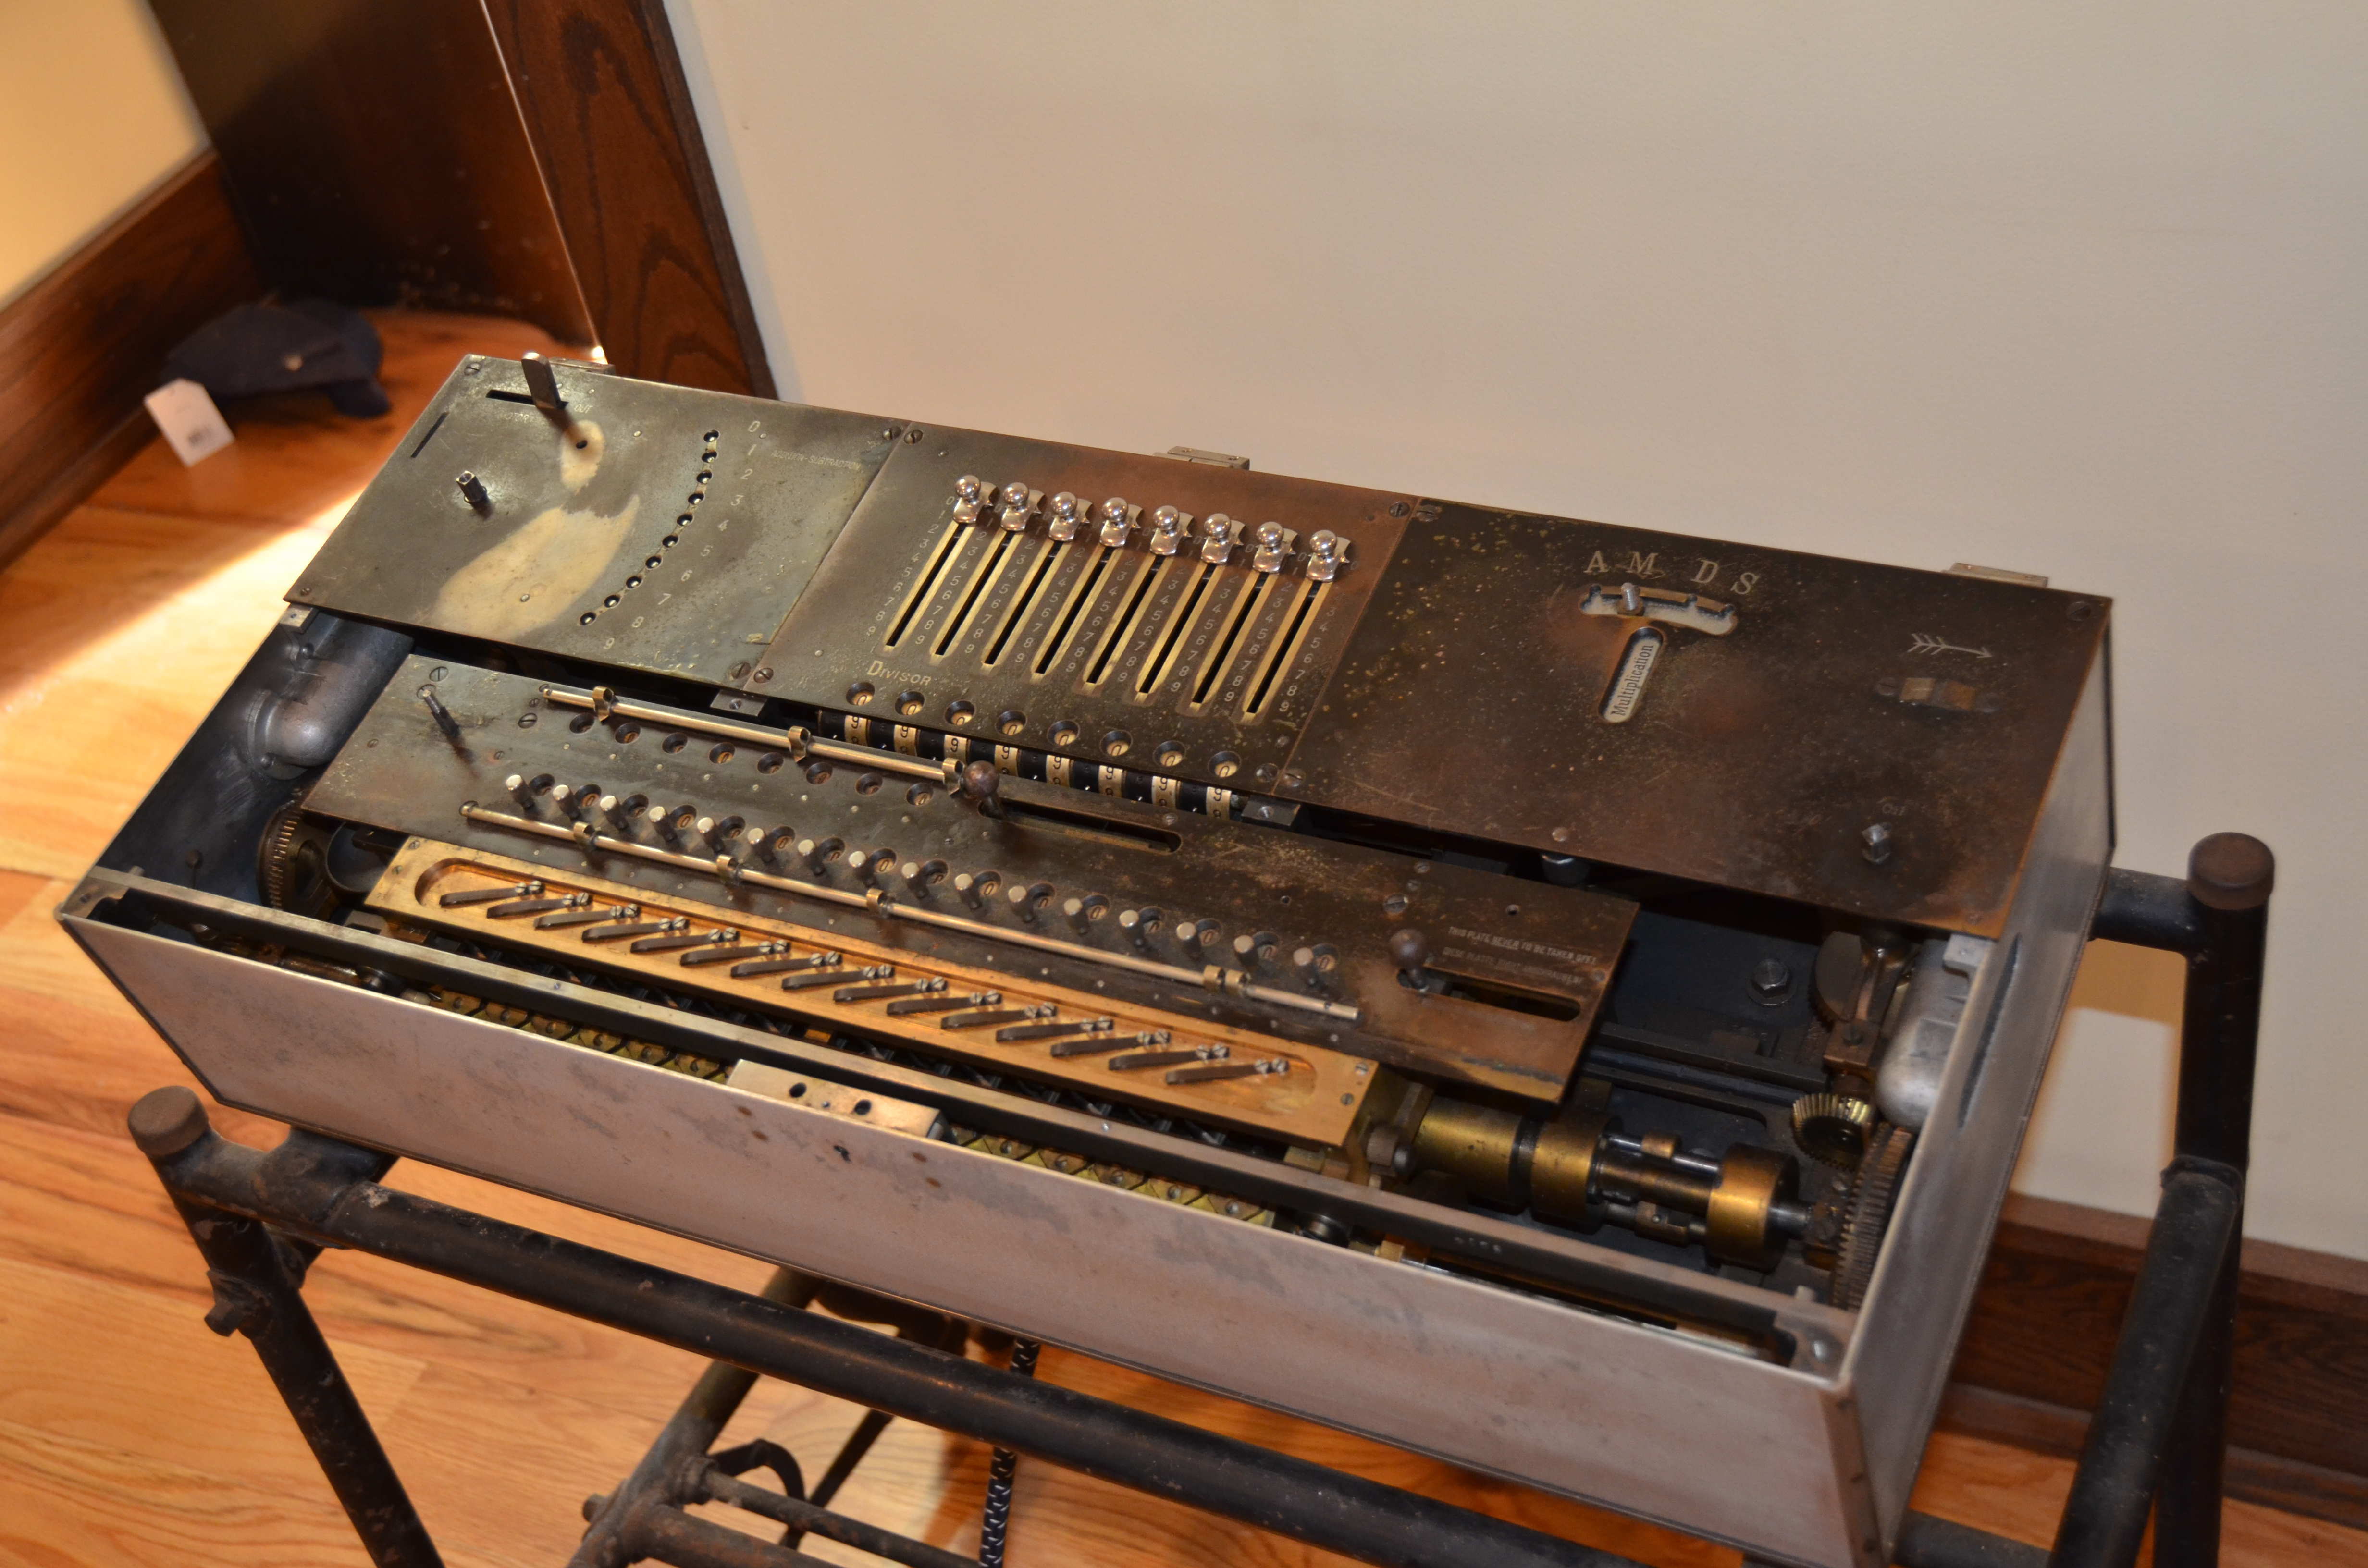
Removing Panels
To remove the outer panels from the machine, two flathead screwdrivers will be needed, a small and large one. The older screws used on this machine require very thin tips. I used an antique flathead and manually filed down a modern small flathead screwdriver.
First, remove the six screws holding the lid to the hinges on the rear panel.
Next, remove the multiply lever, the crank handle, as well as the selector know and carriage movement knob. Then, remove 5 small screws and 4 larges screws holding the lower panel on the top of the machine. Don’t miss the small screw between where the lock holes are located!
Then, remove the three large and single small screw from the crank plate.
Next, set all the input sliders to 2, remove the 4 large screws in the corner, and then the input plate and mechanism can be removed.
Then, behind the machine, remove the pin that connects the multiplier button to the motor switch.
To remove the multiplier plate, push this lever towards the rear of the machine to push it off the pin on the multiplier lever mechanism.
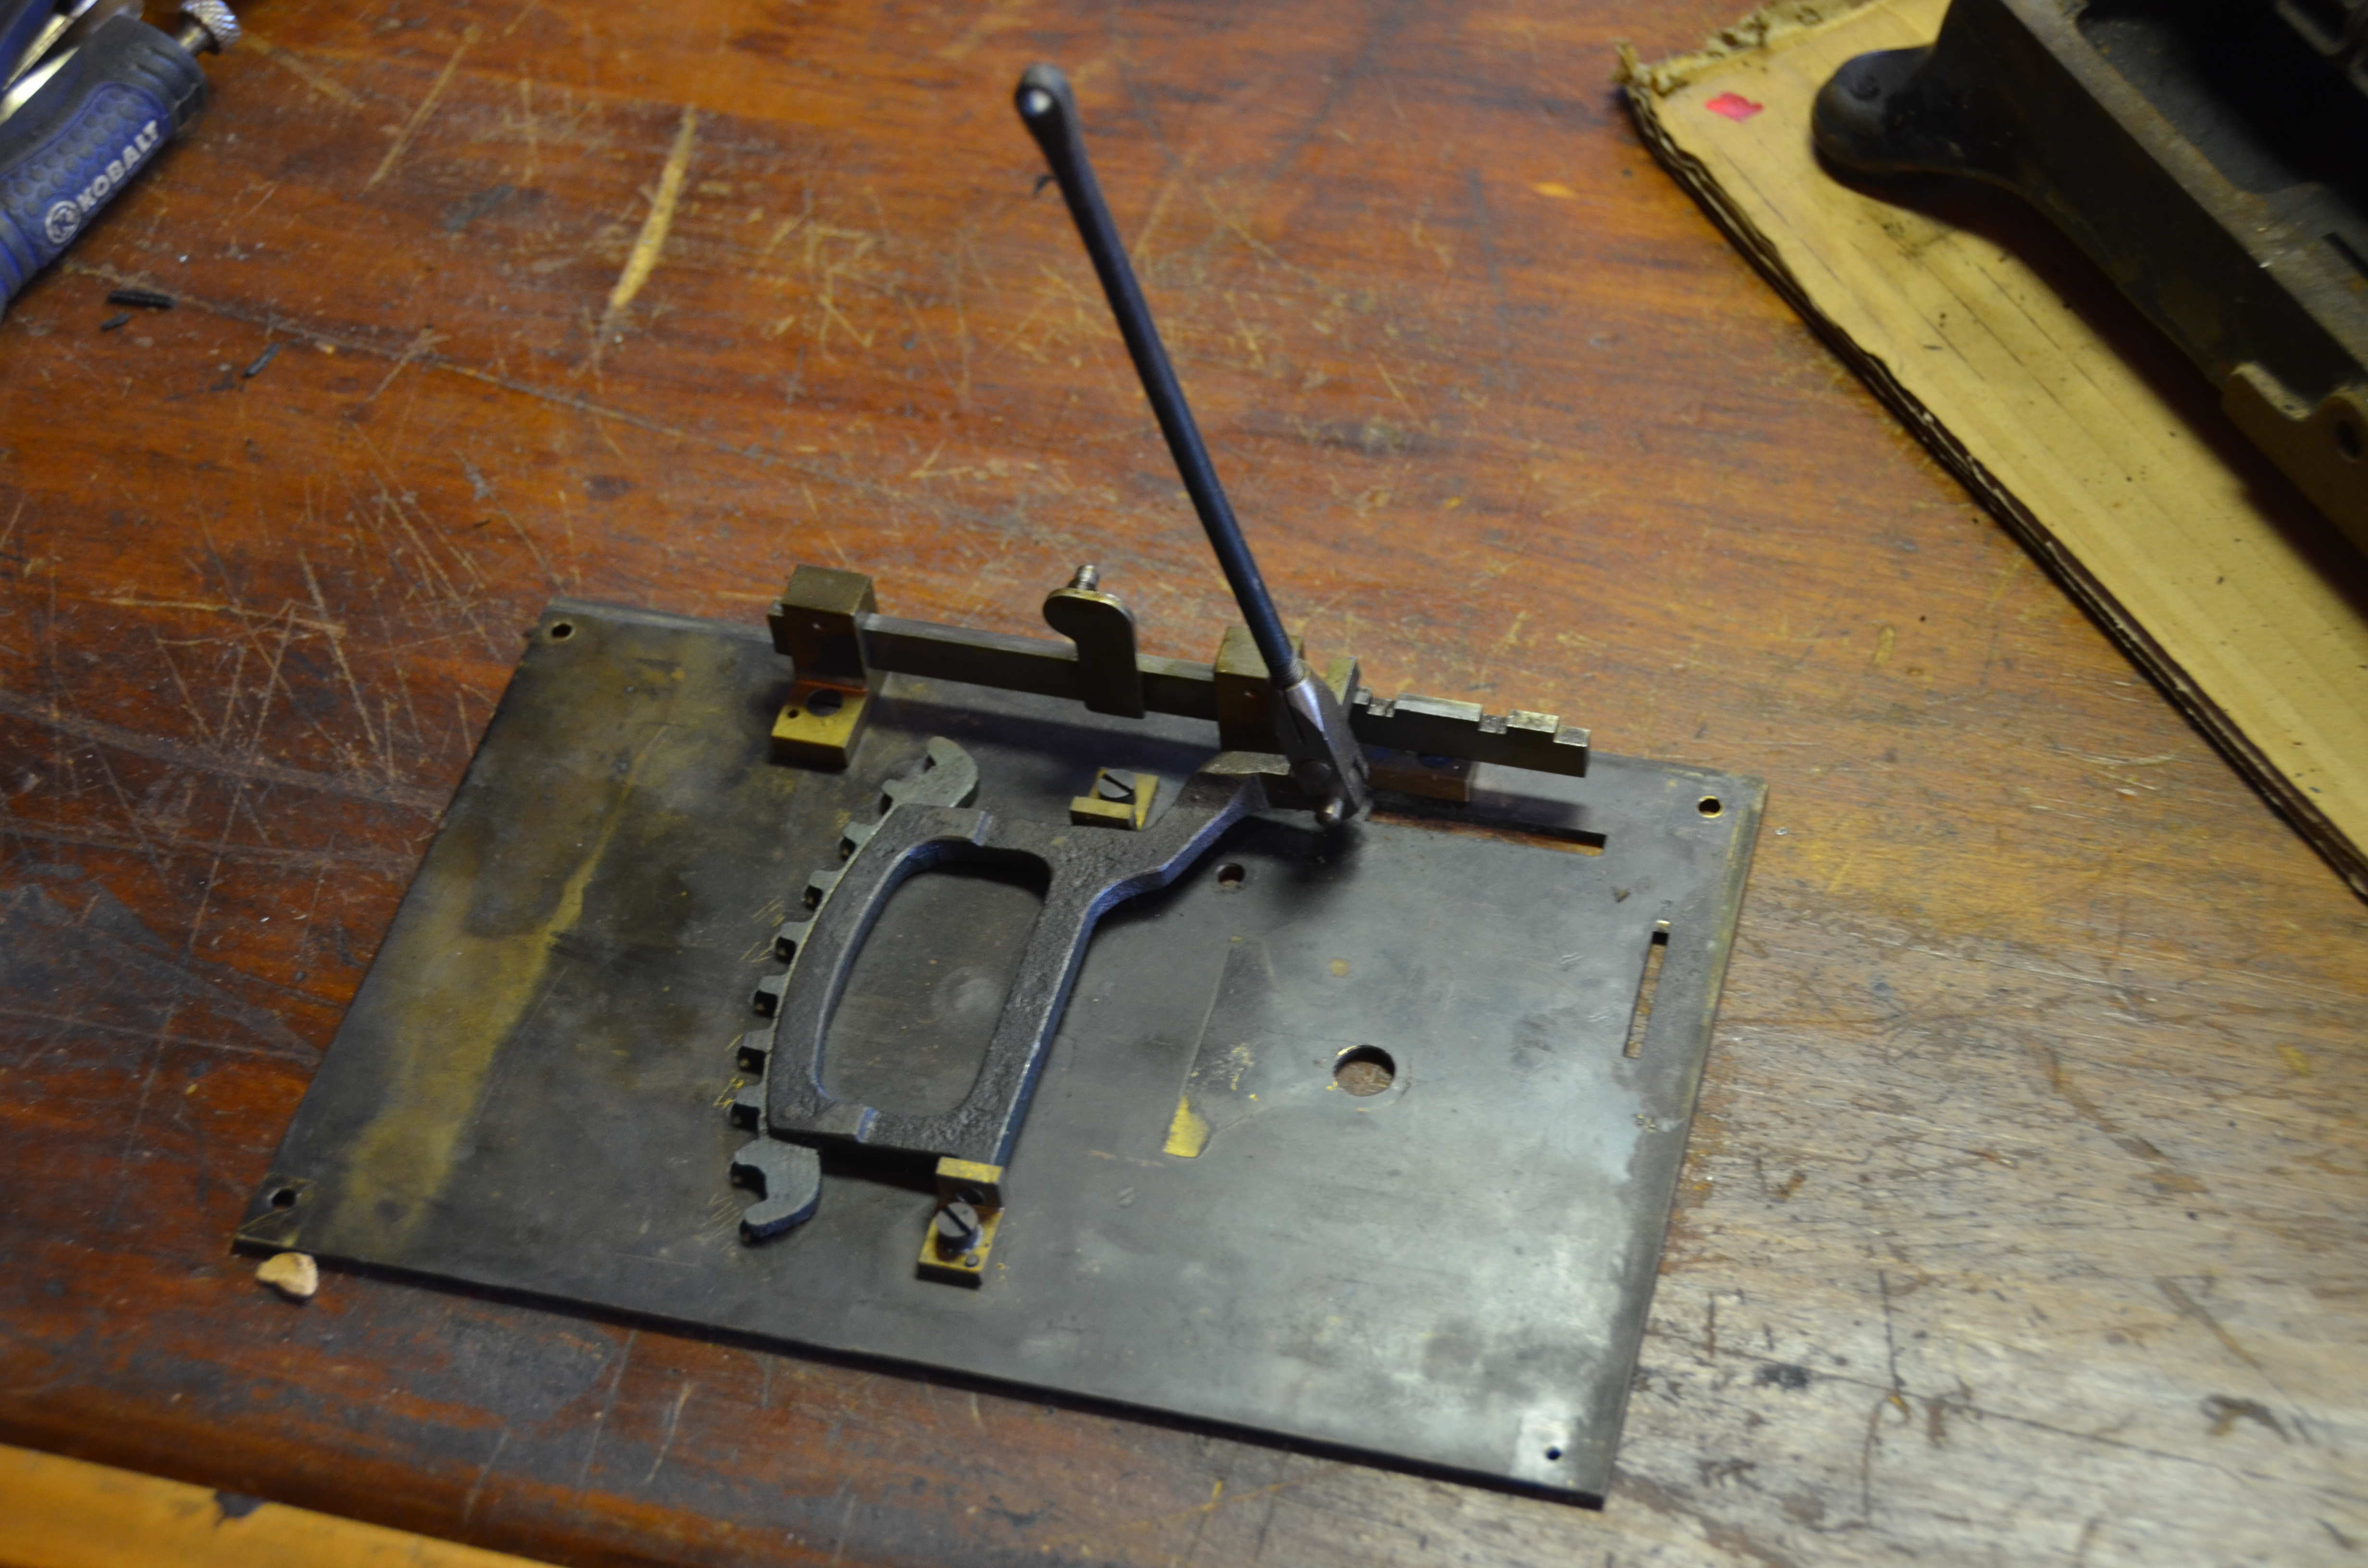
Remove the three large screws and single small screw in the multiplier plate and the plate can be removed by pulling it straight up with the mechanism attached to it’s underside.

Behind the machine again, remove the two large screws holding in the rear plate. Once removed, the rear plate can be pulled straight up and out of the machine. All the others can be removed without removing more screws.
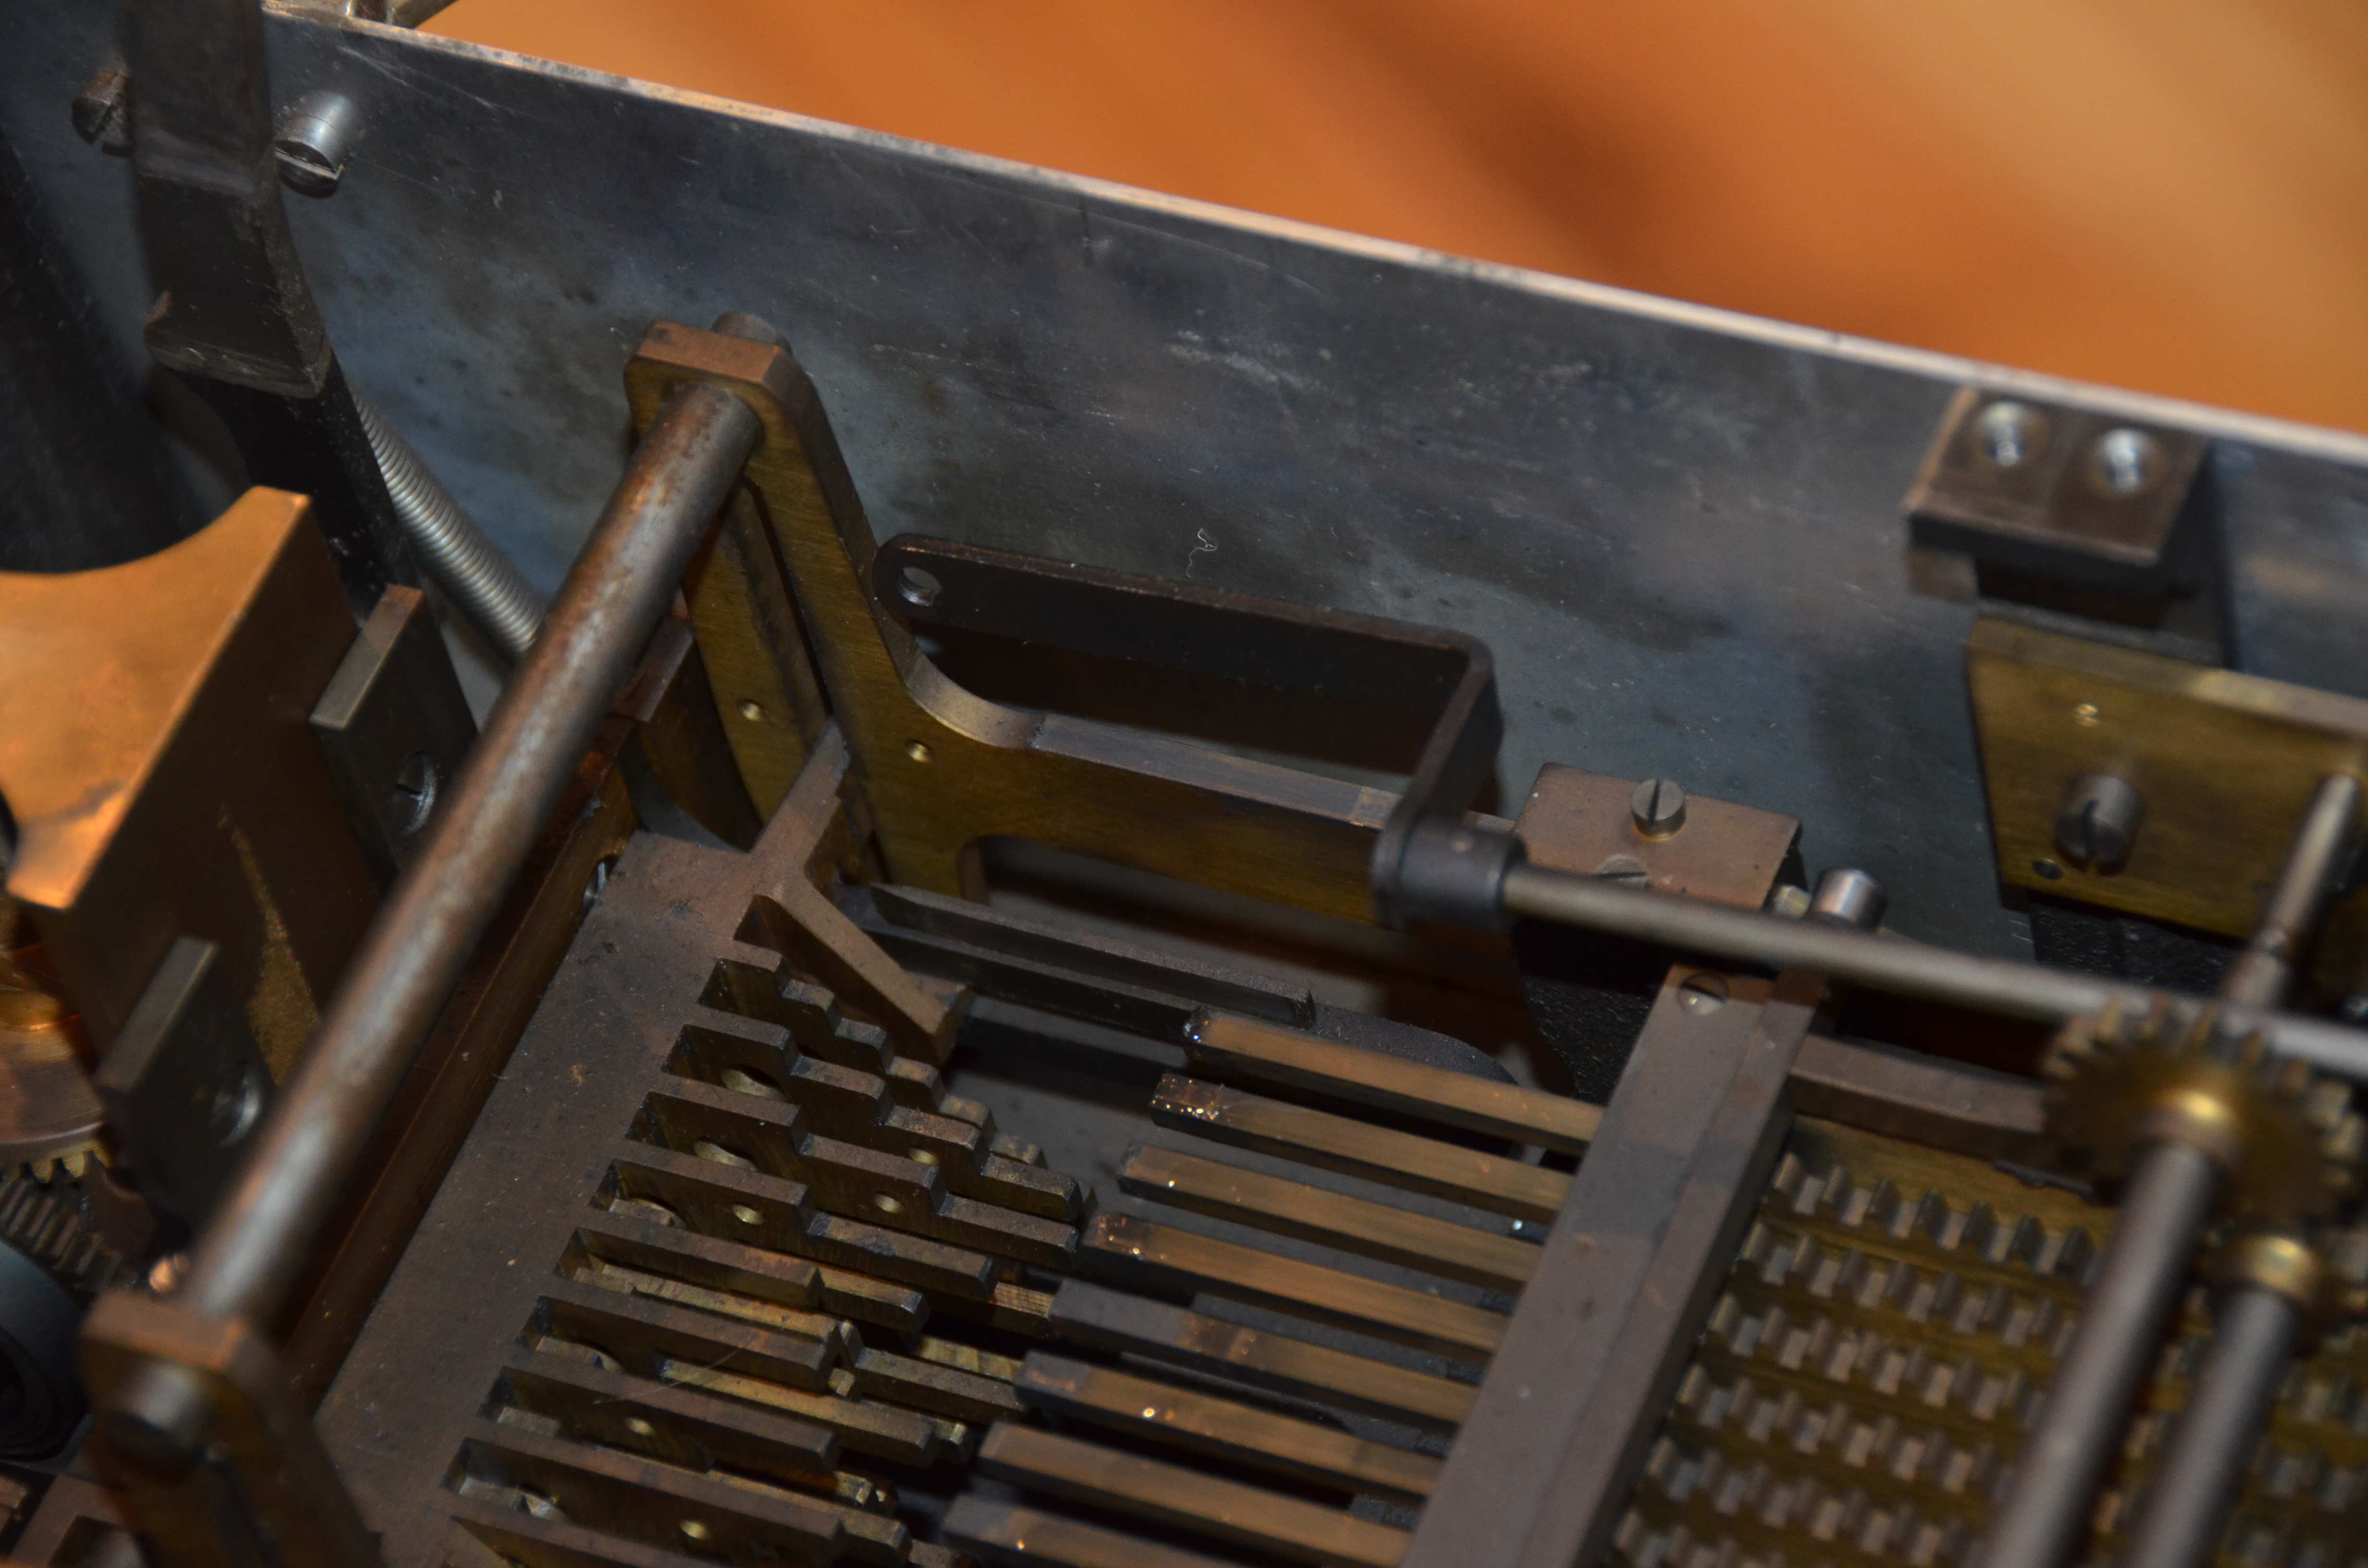
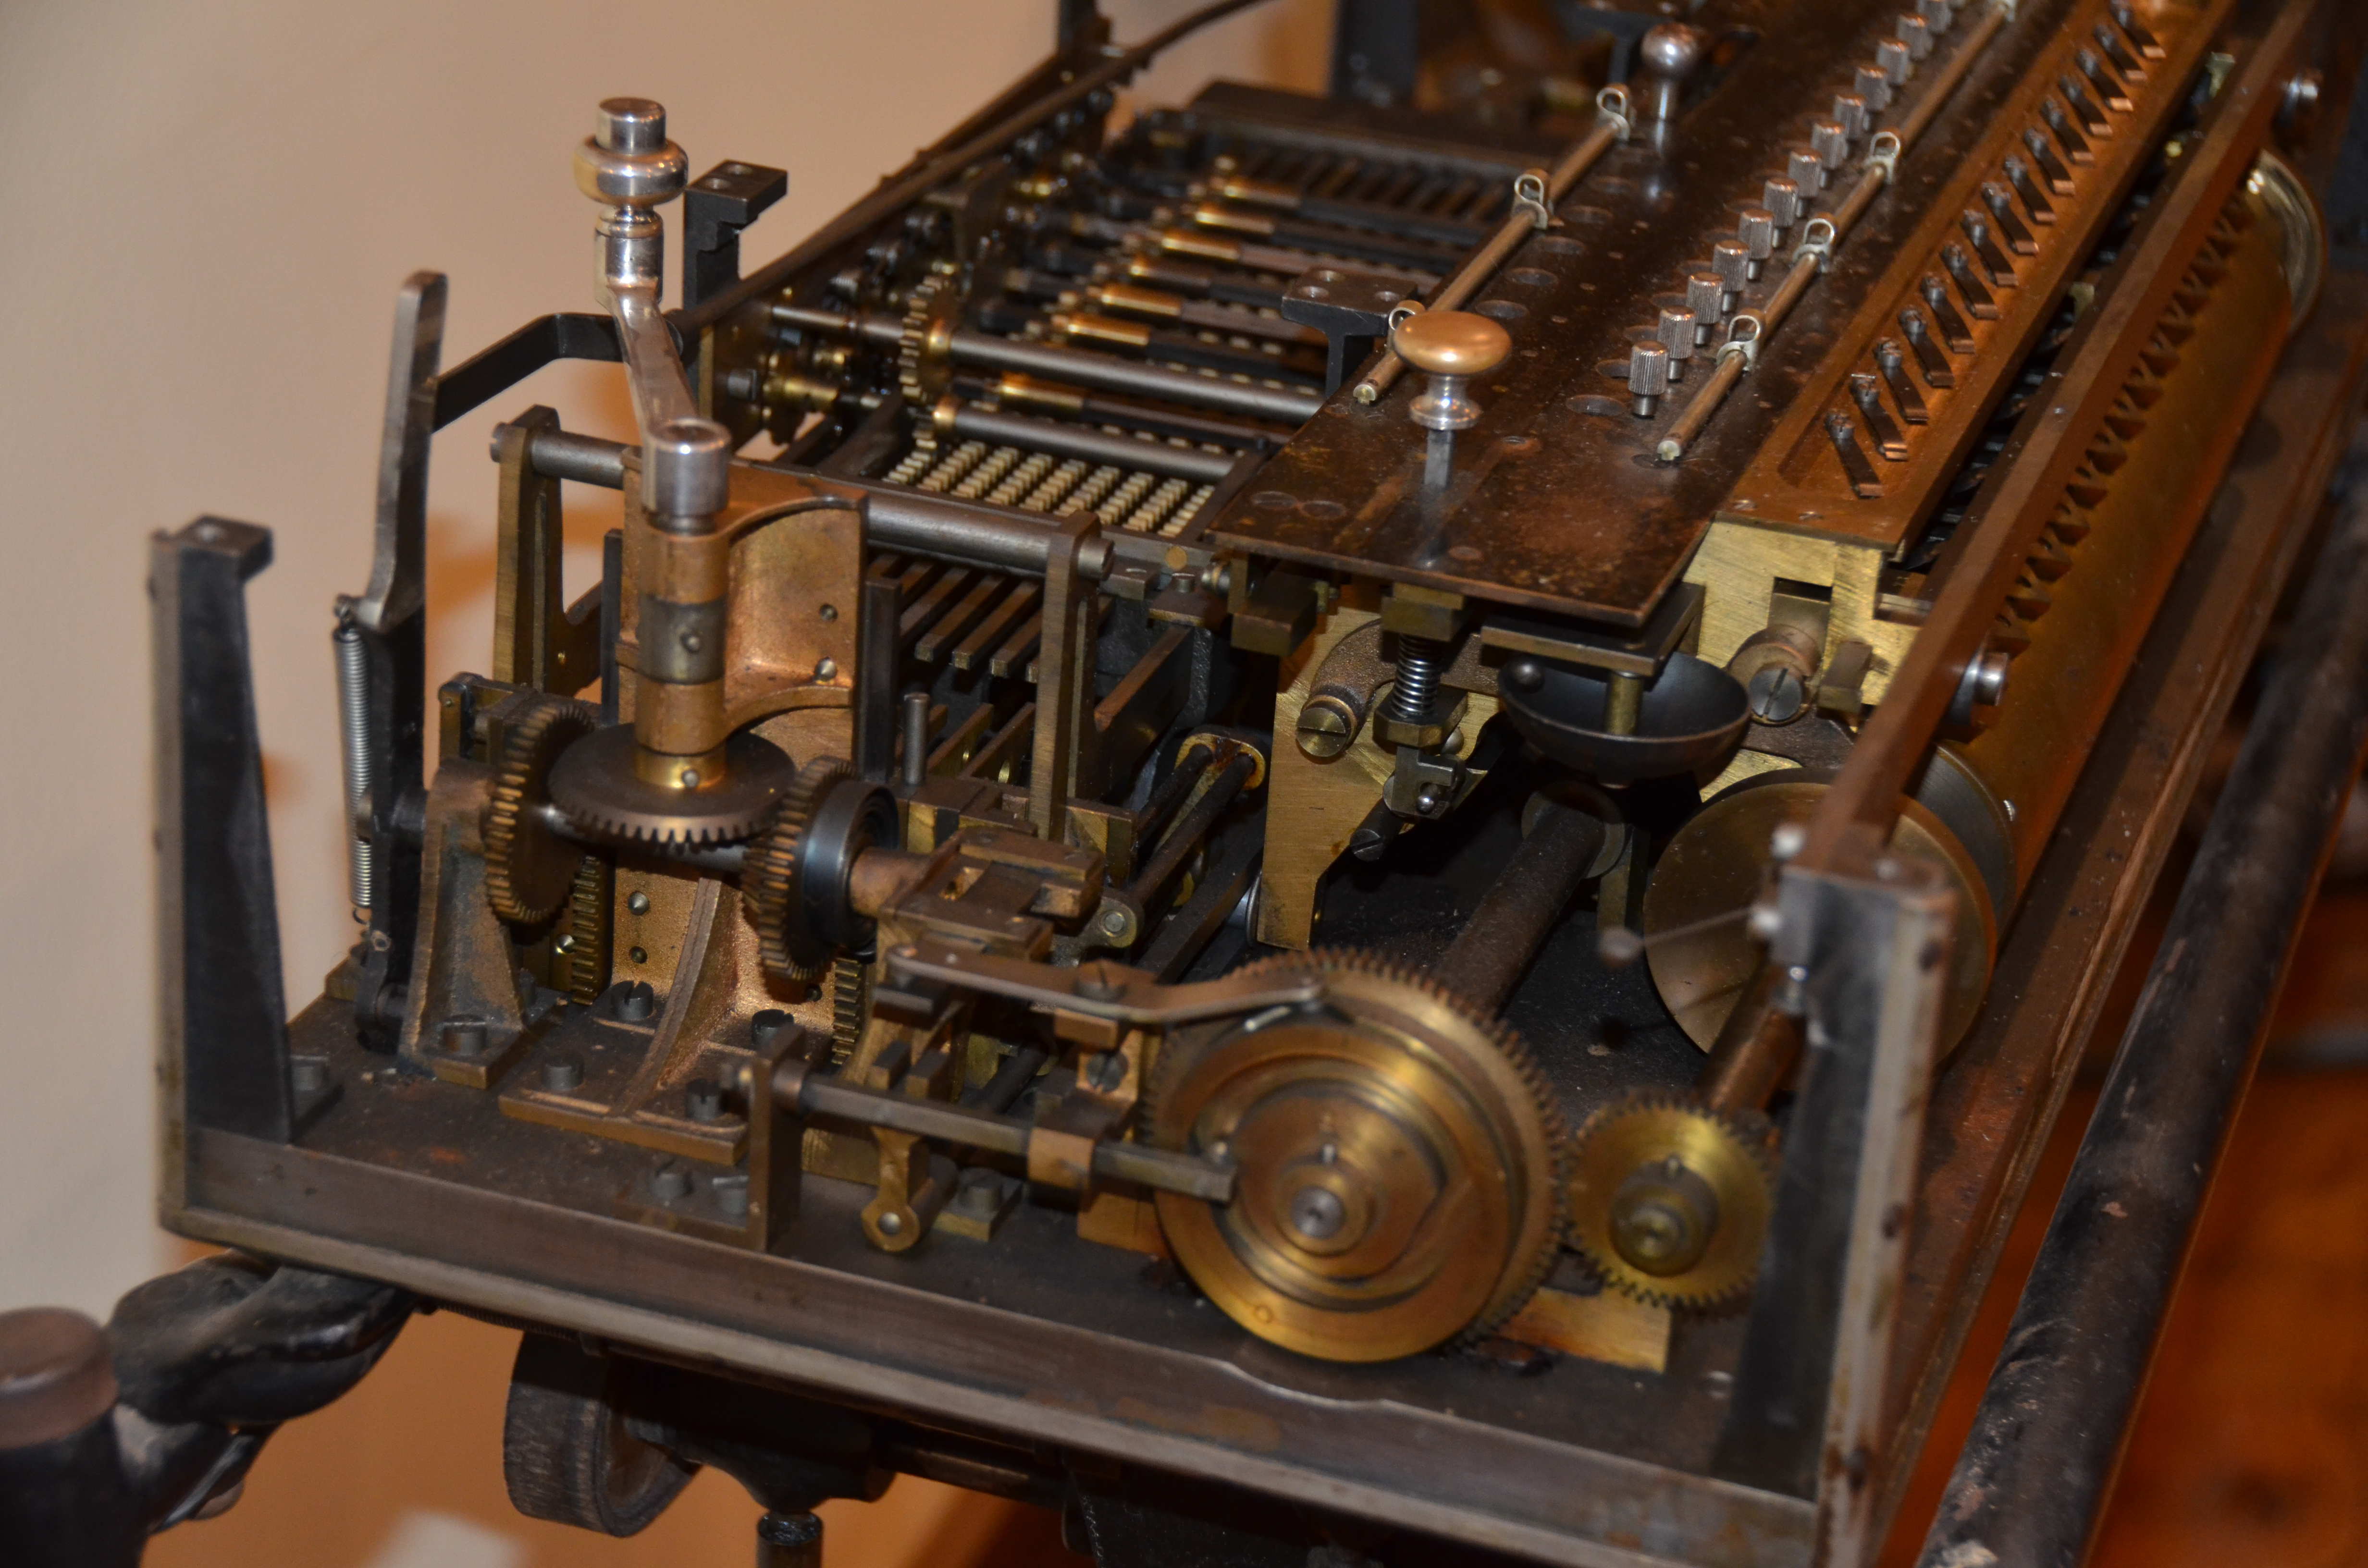
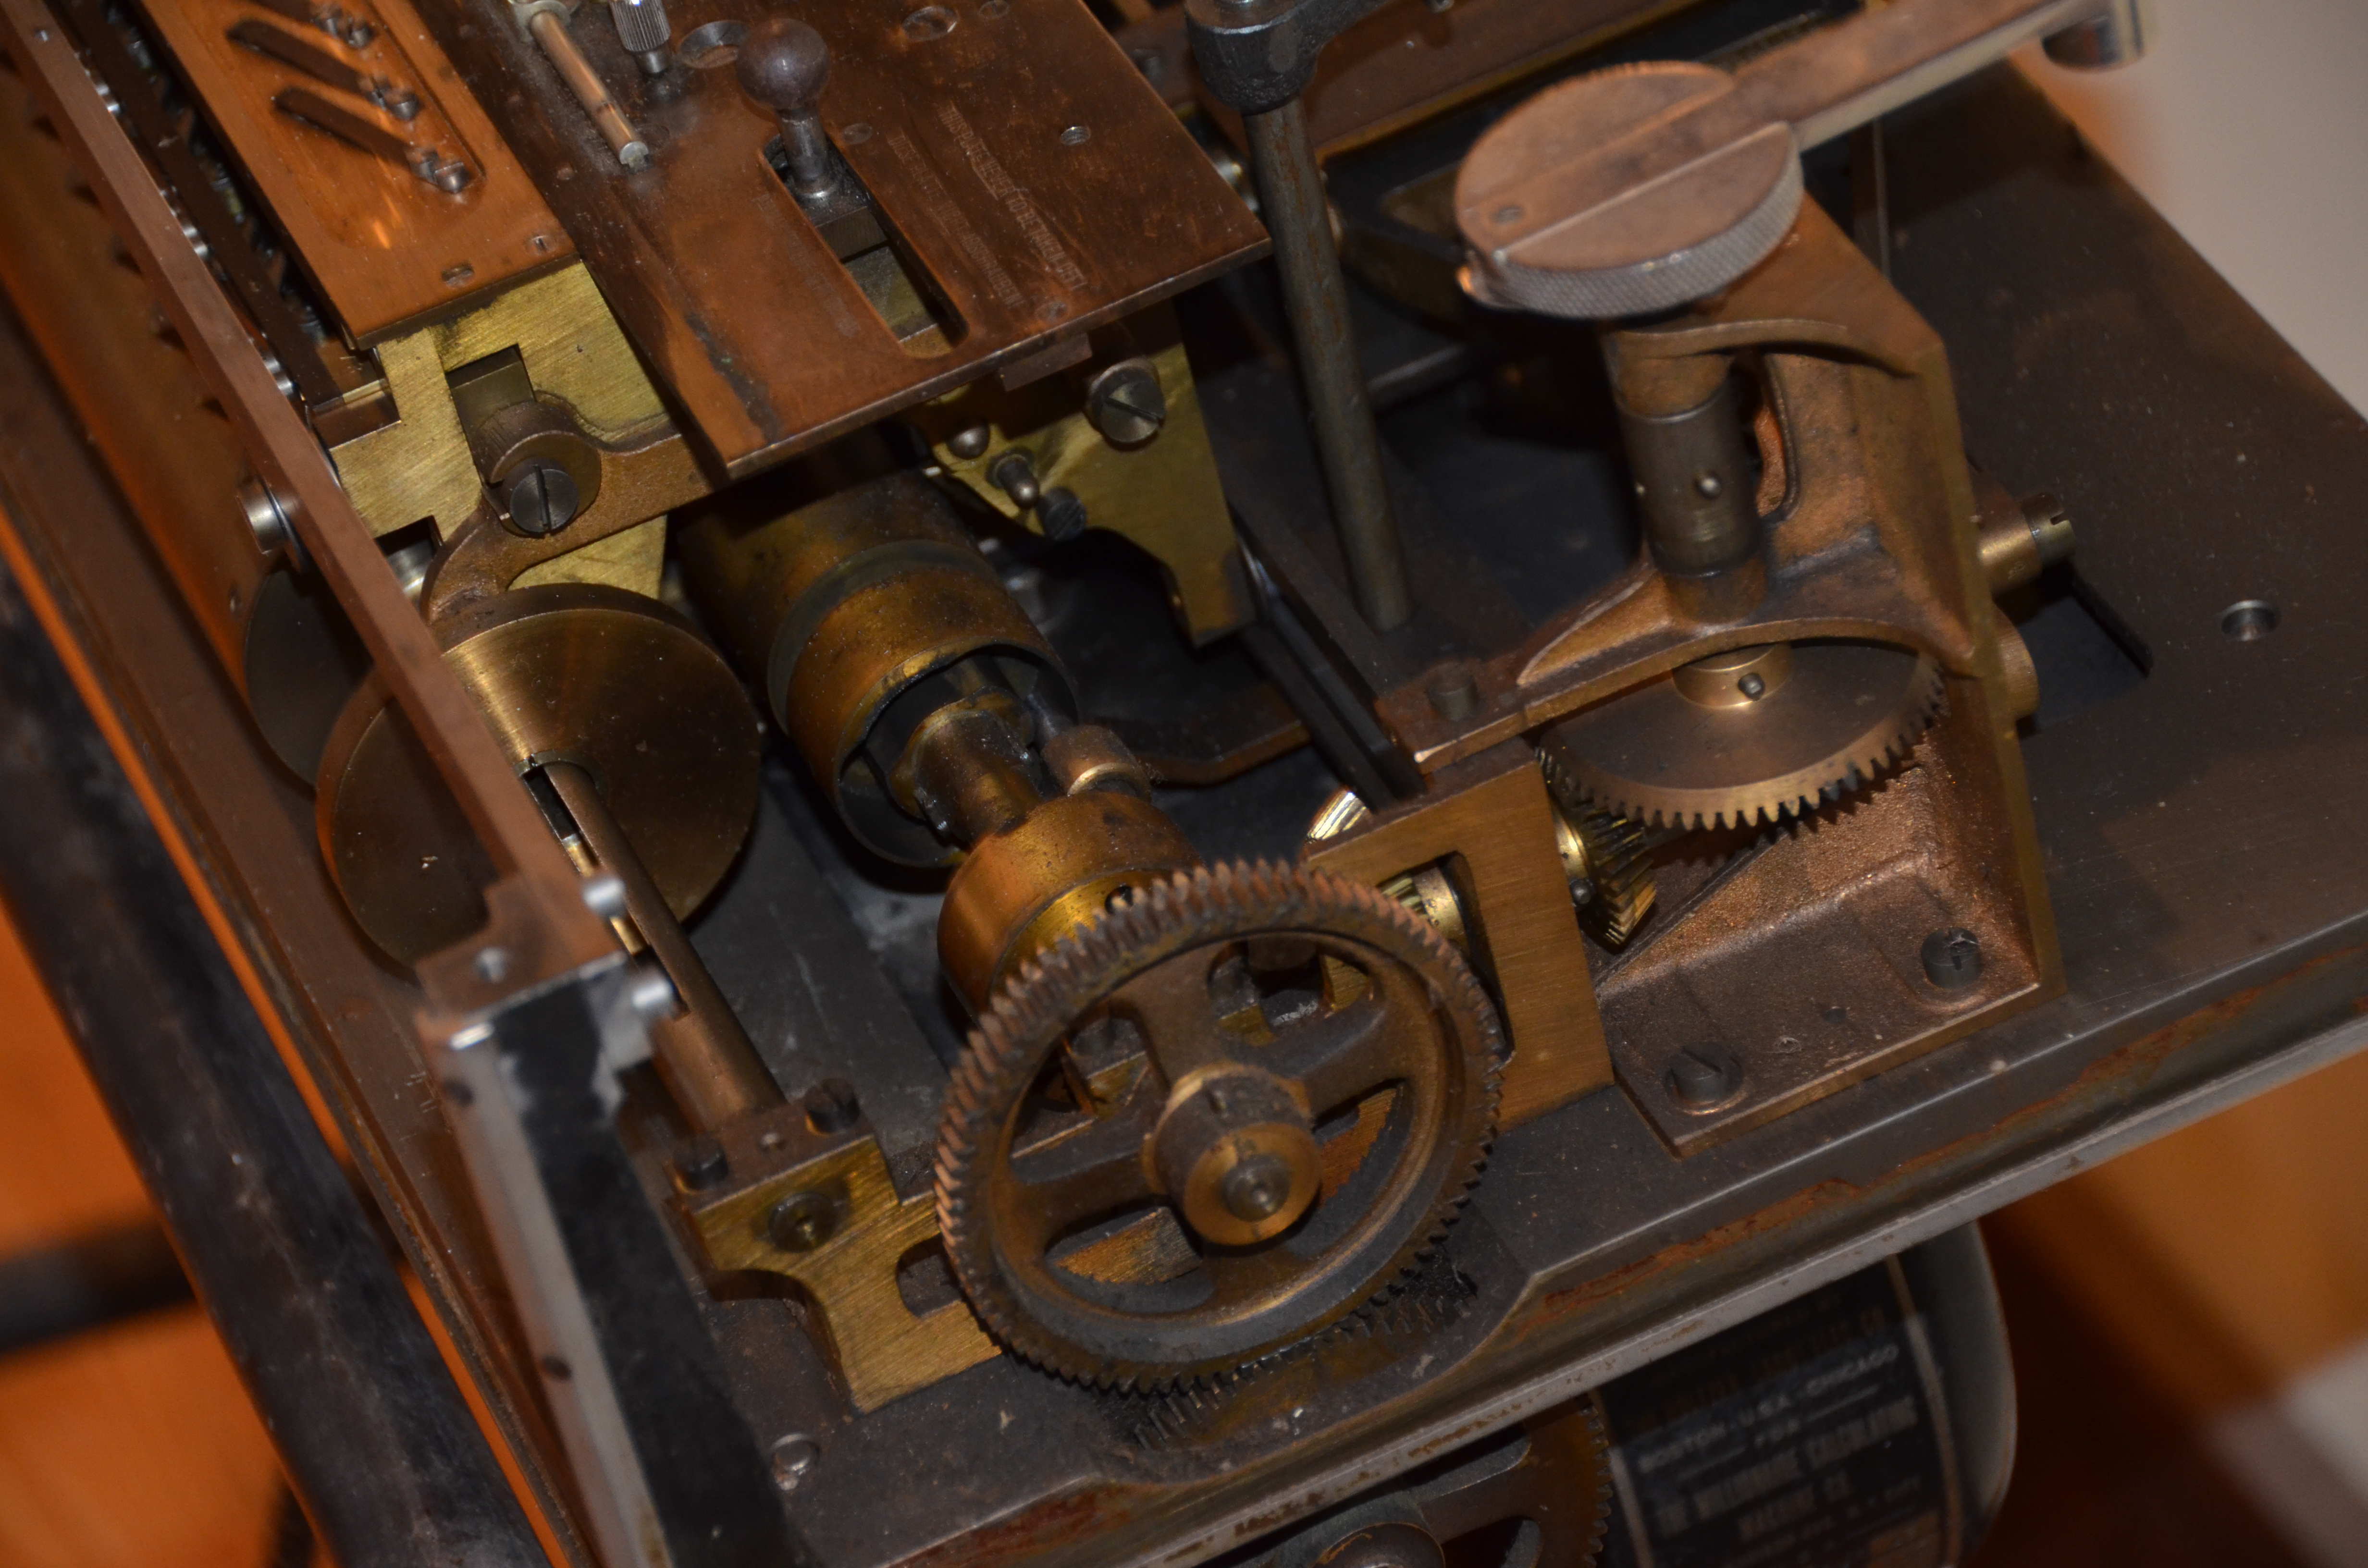
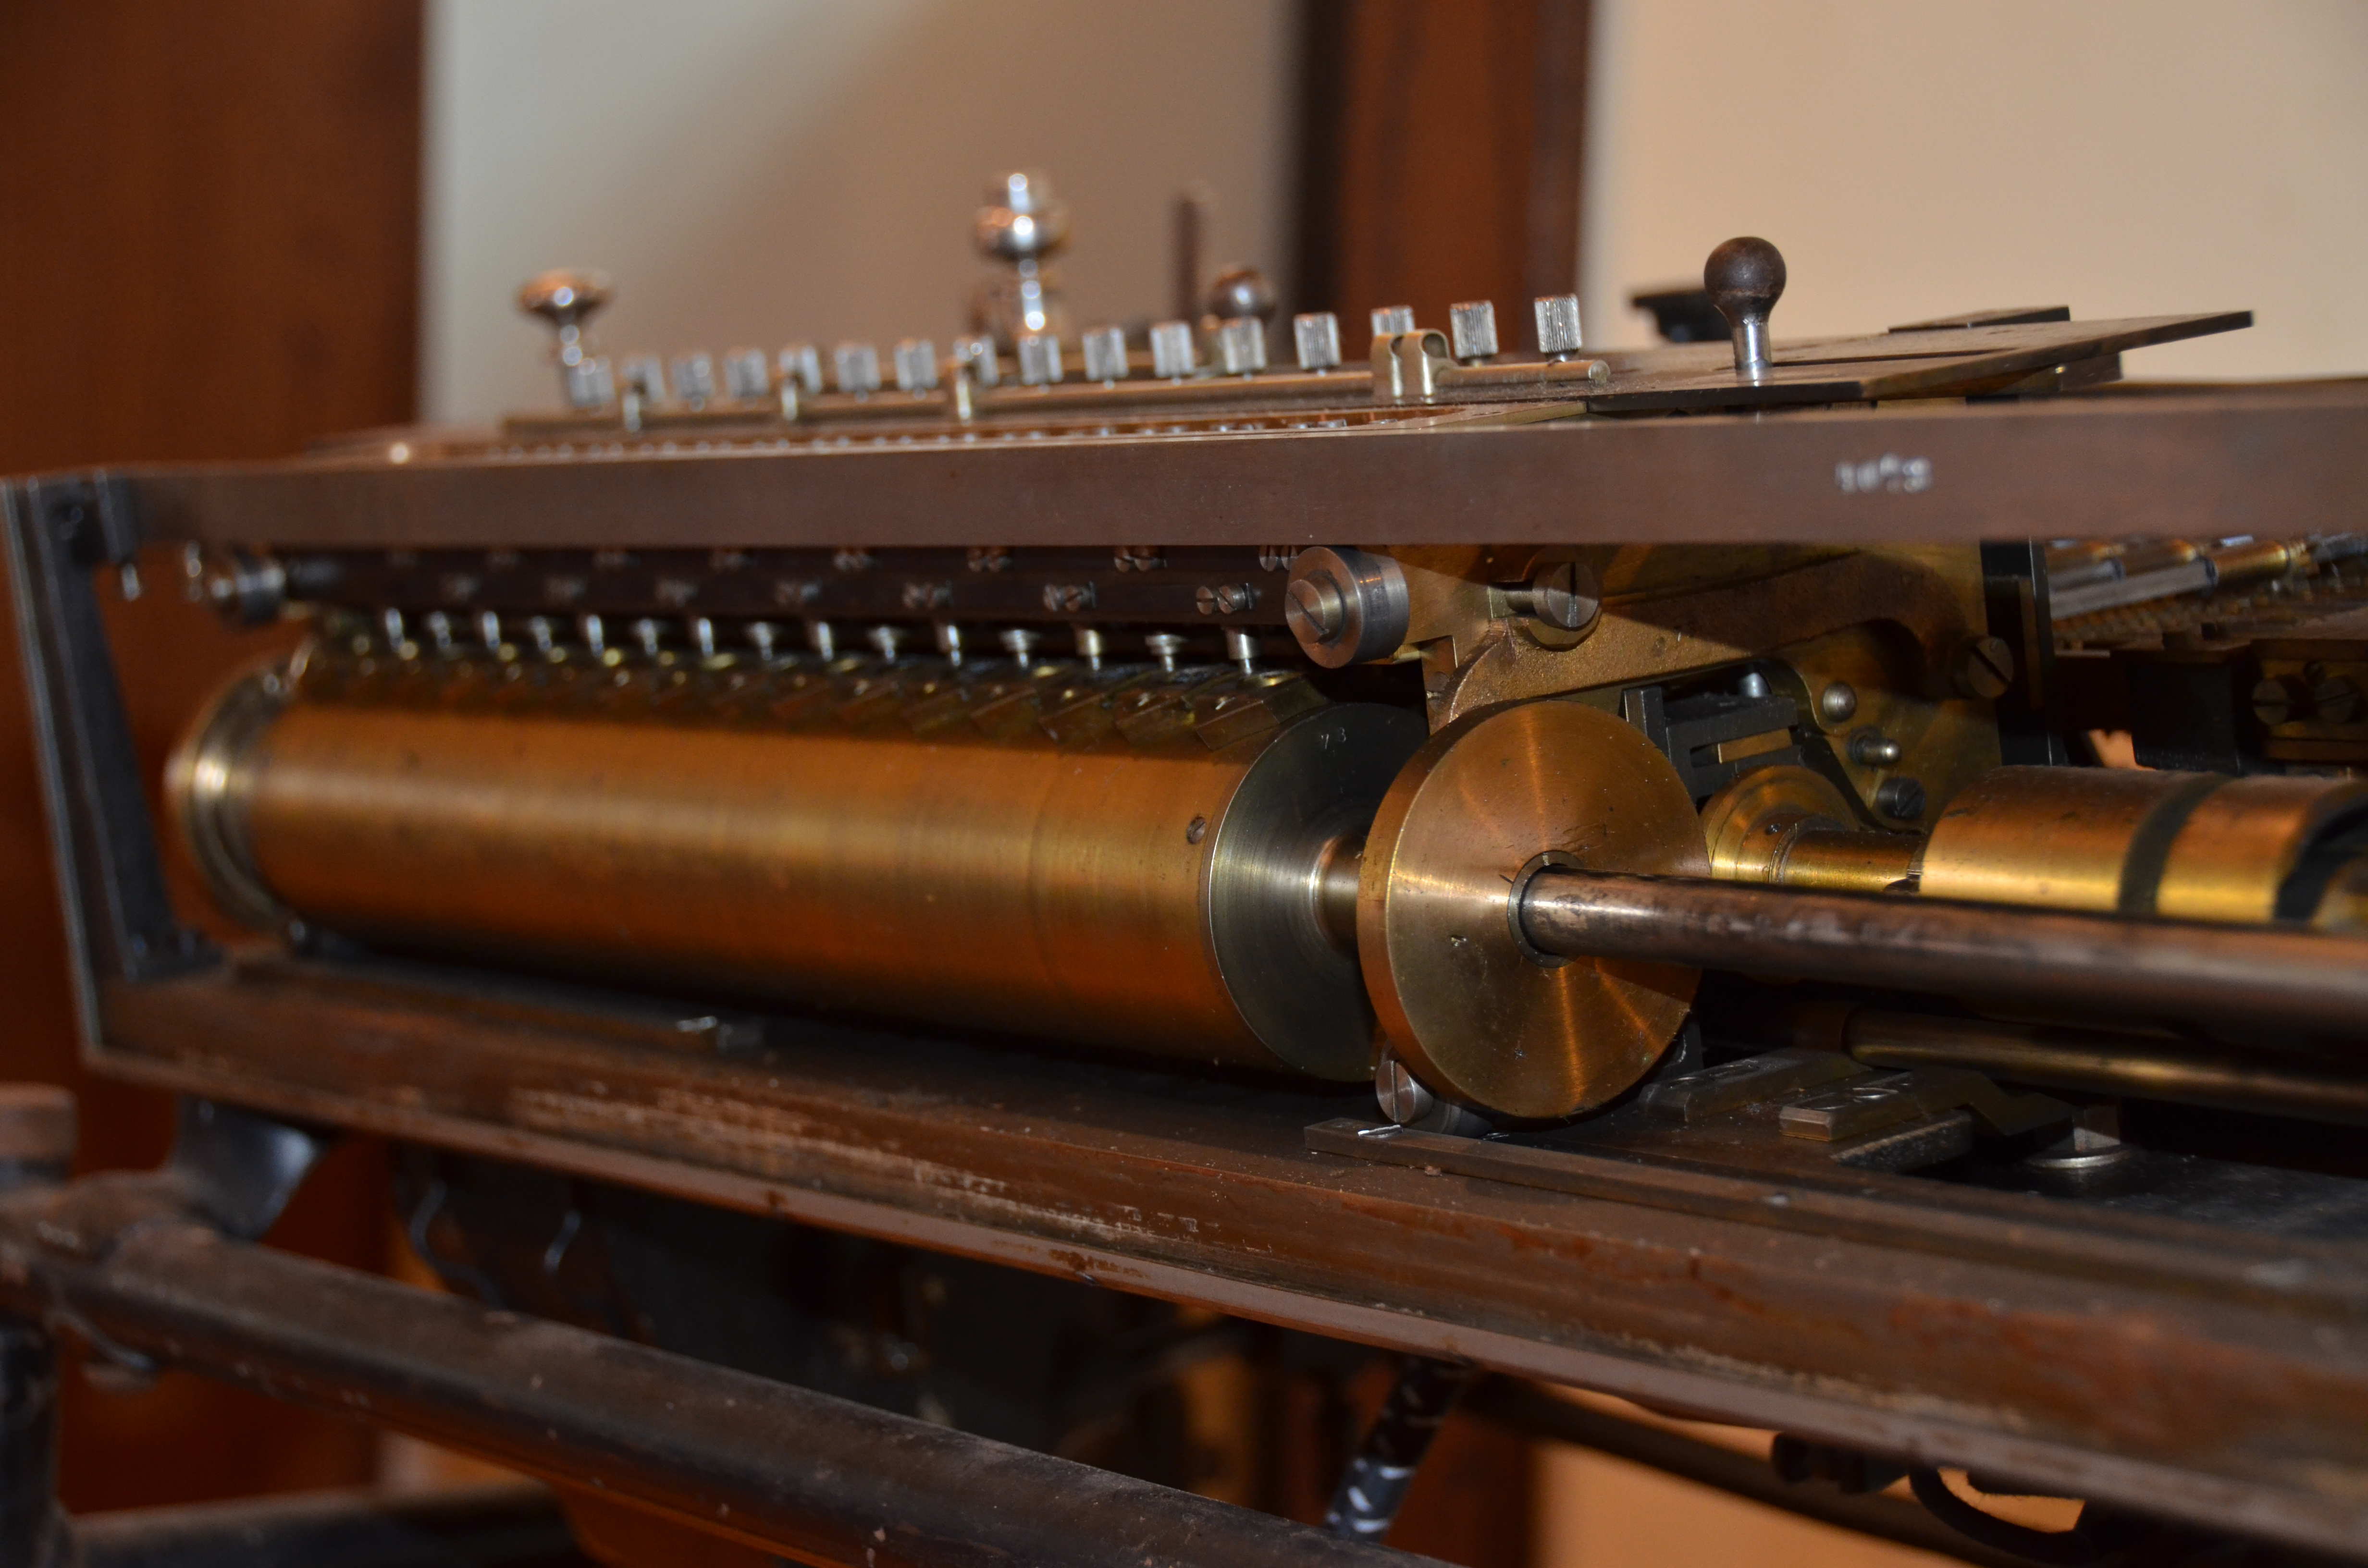
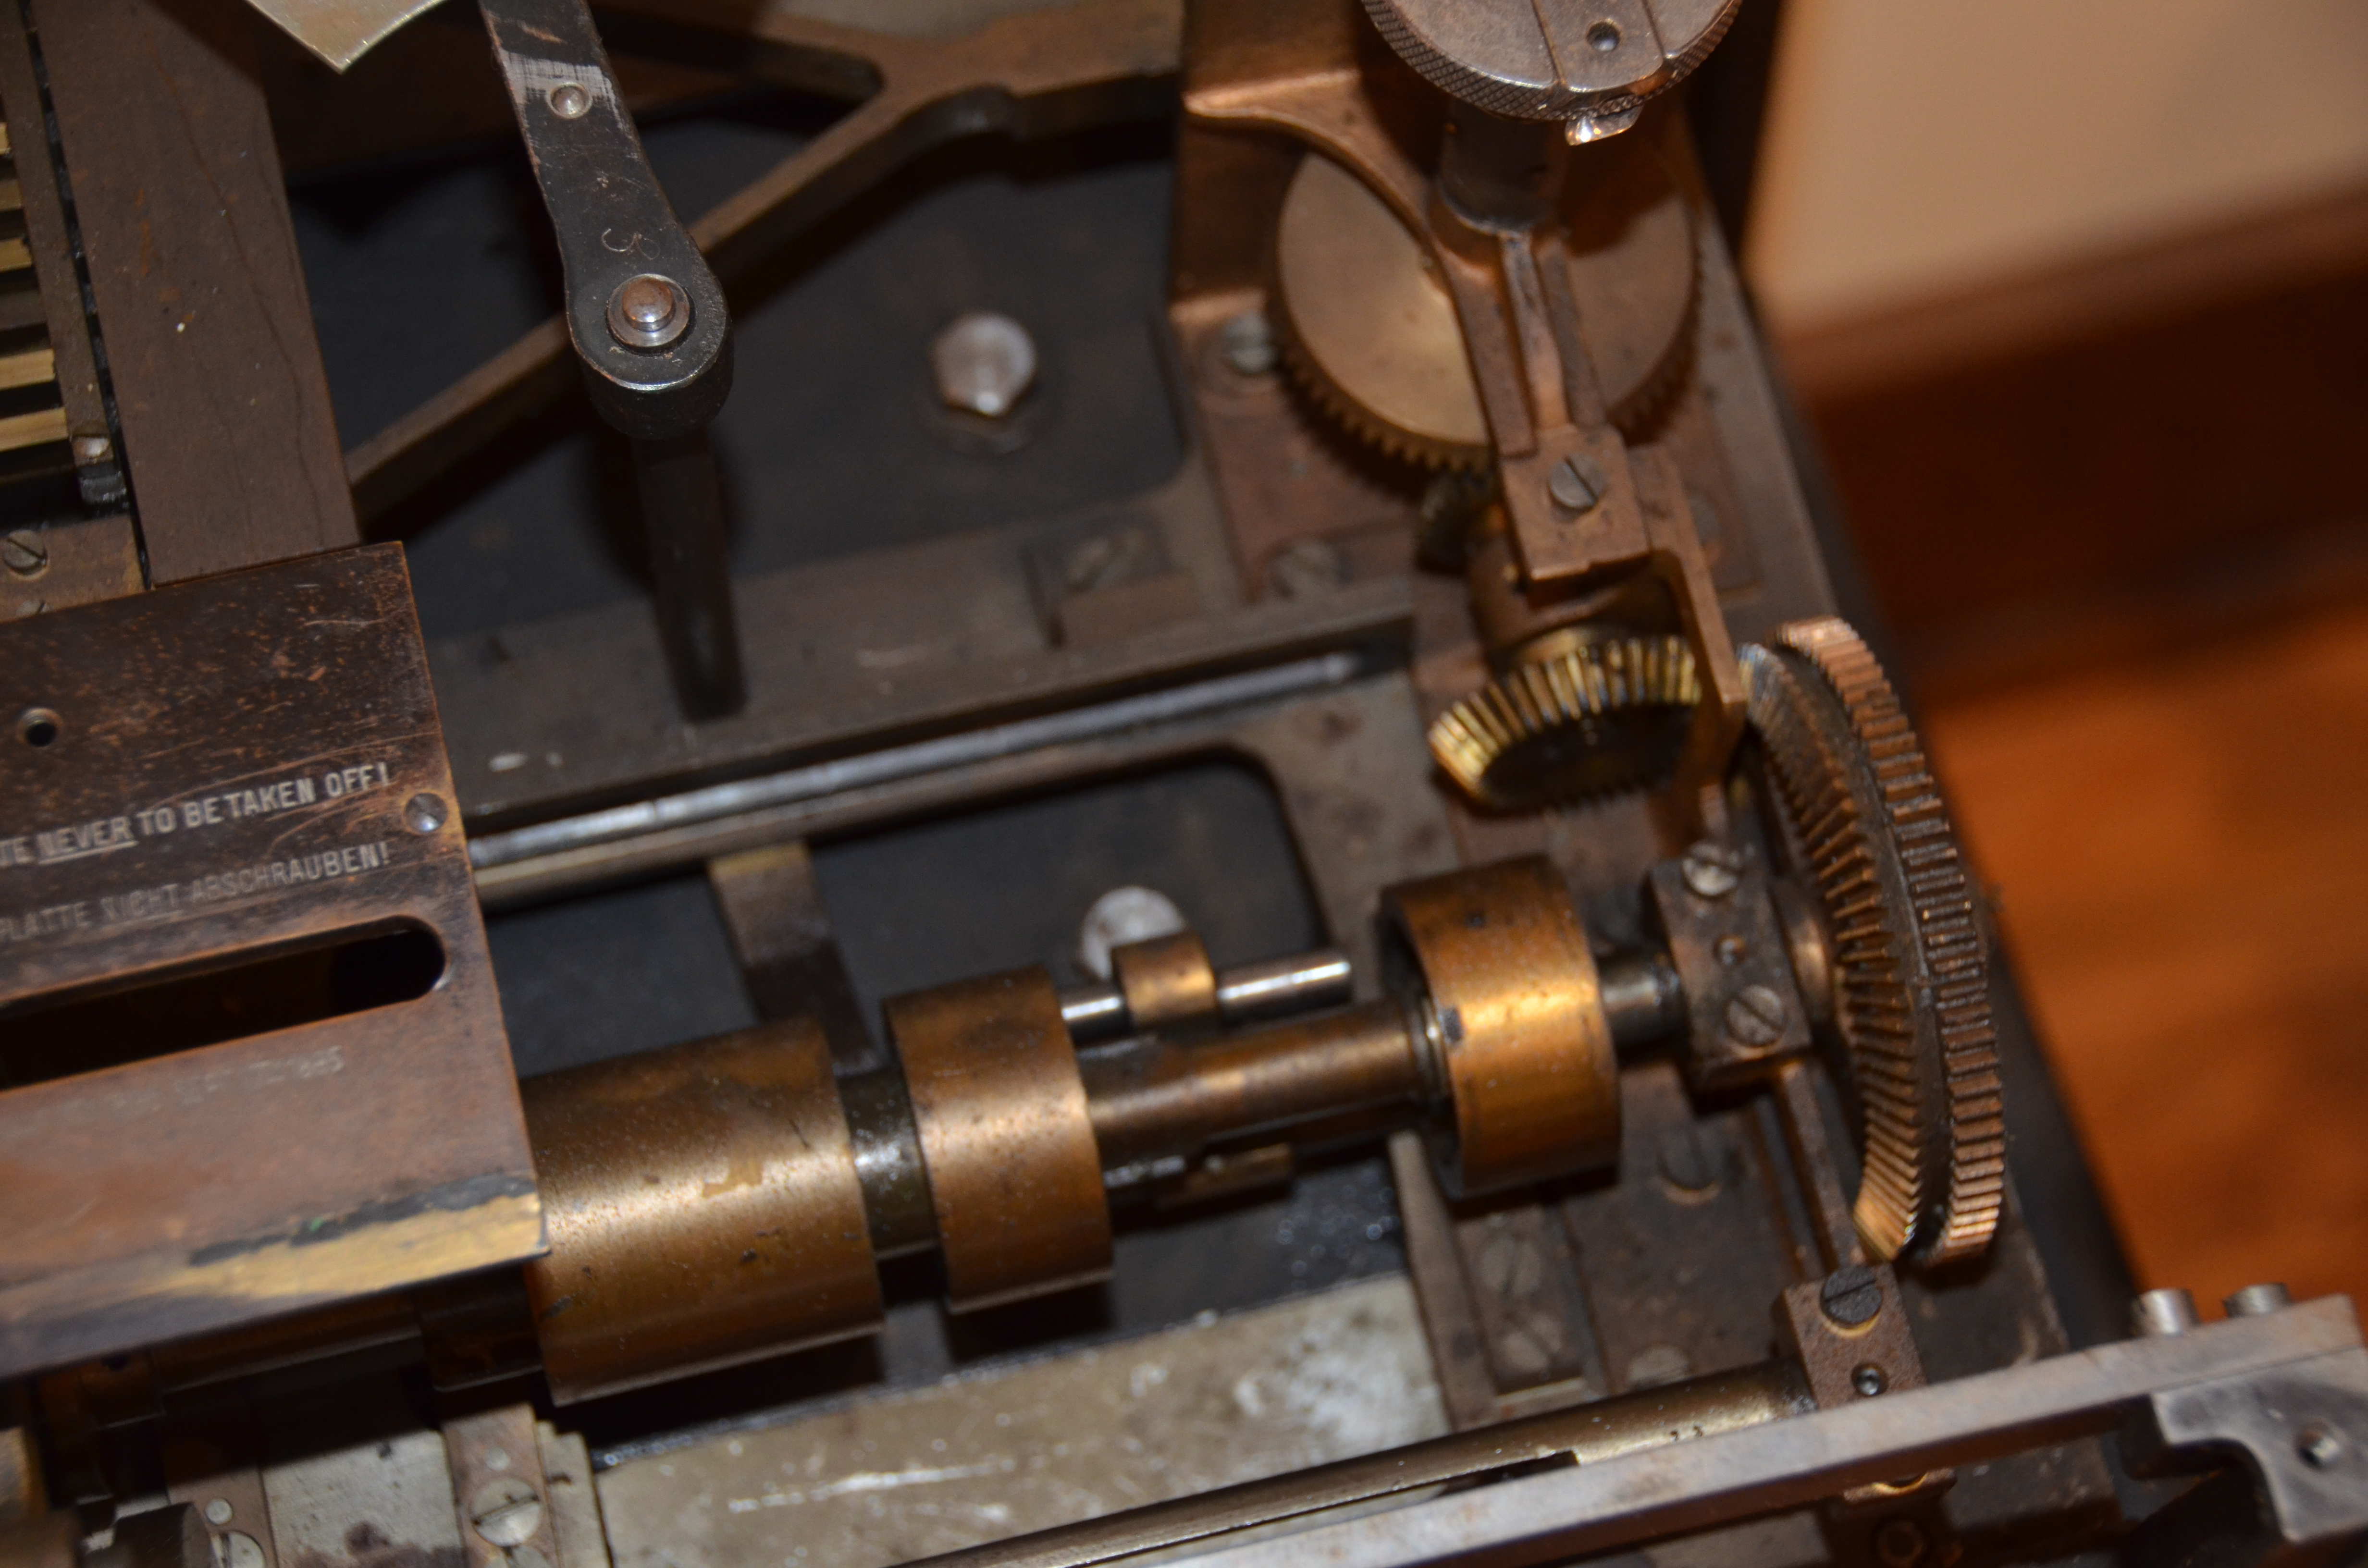
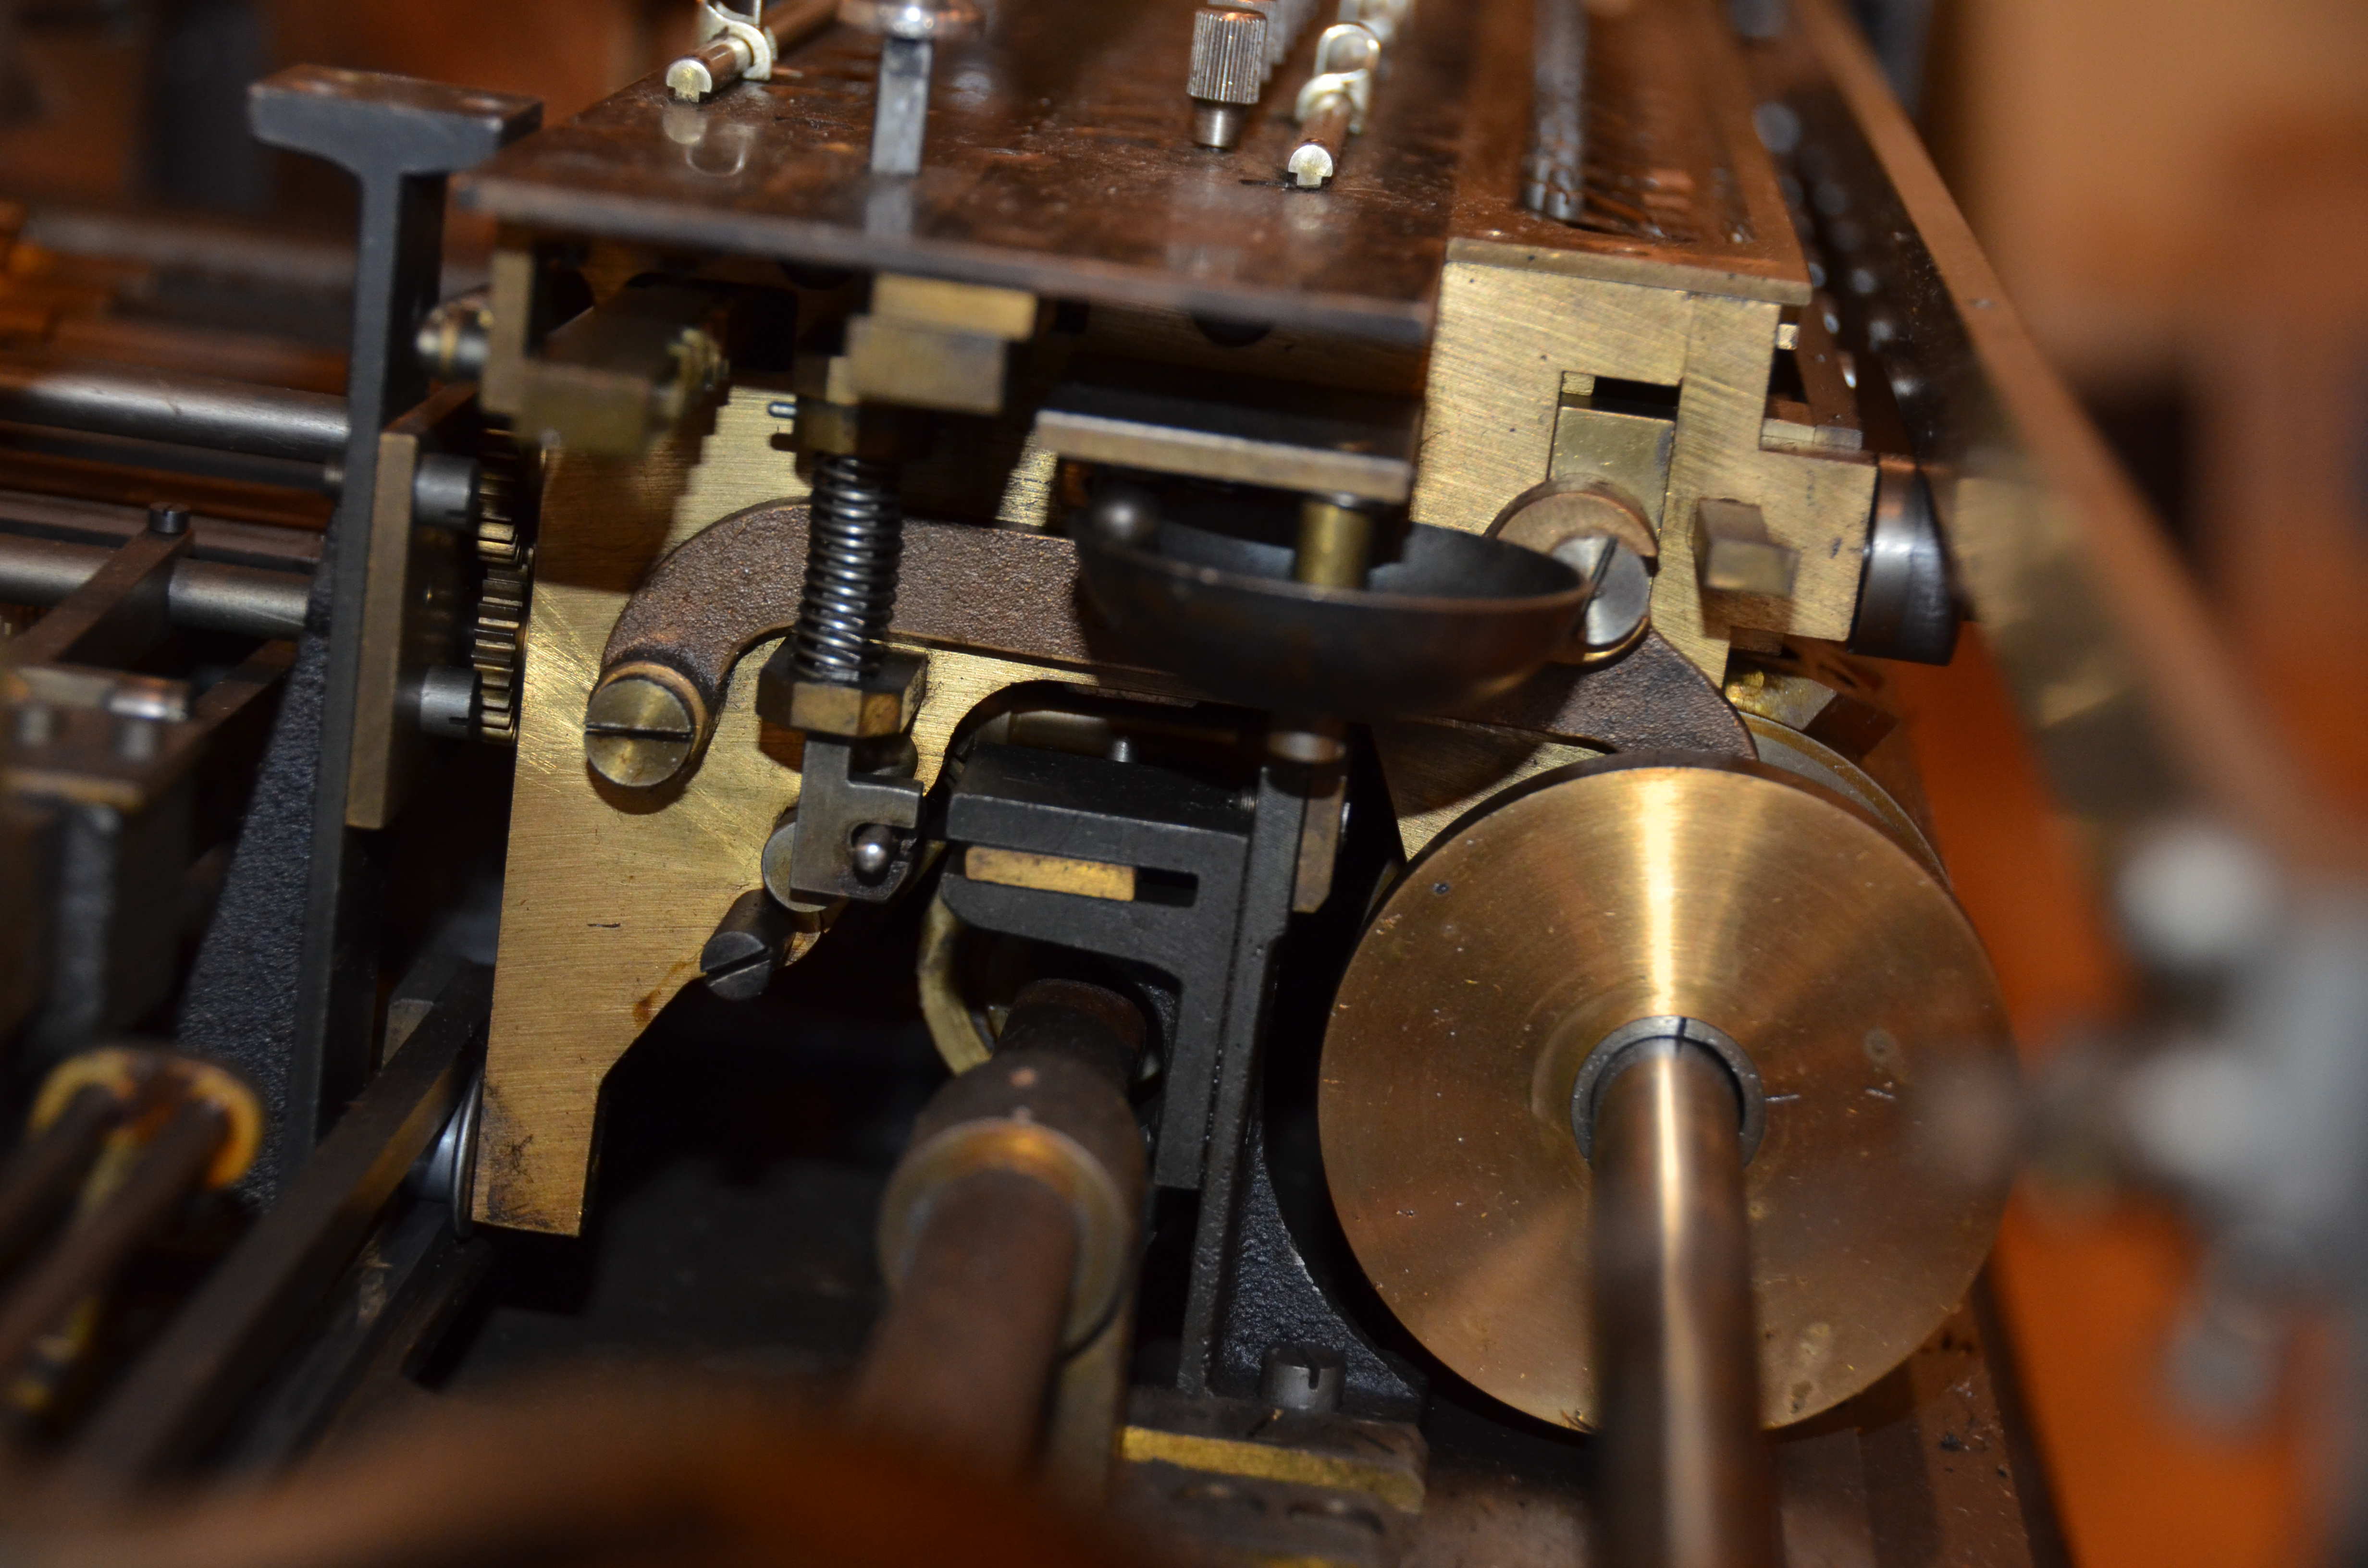
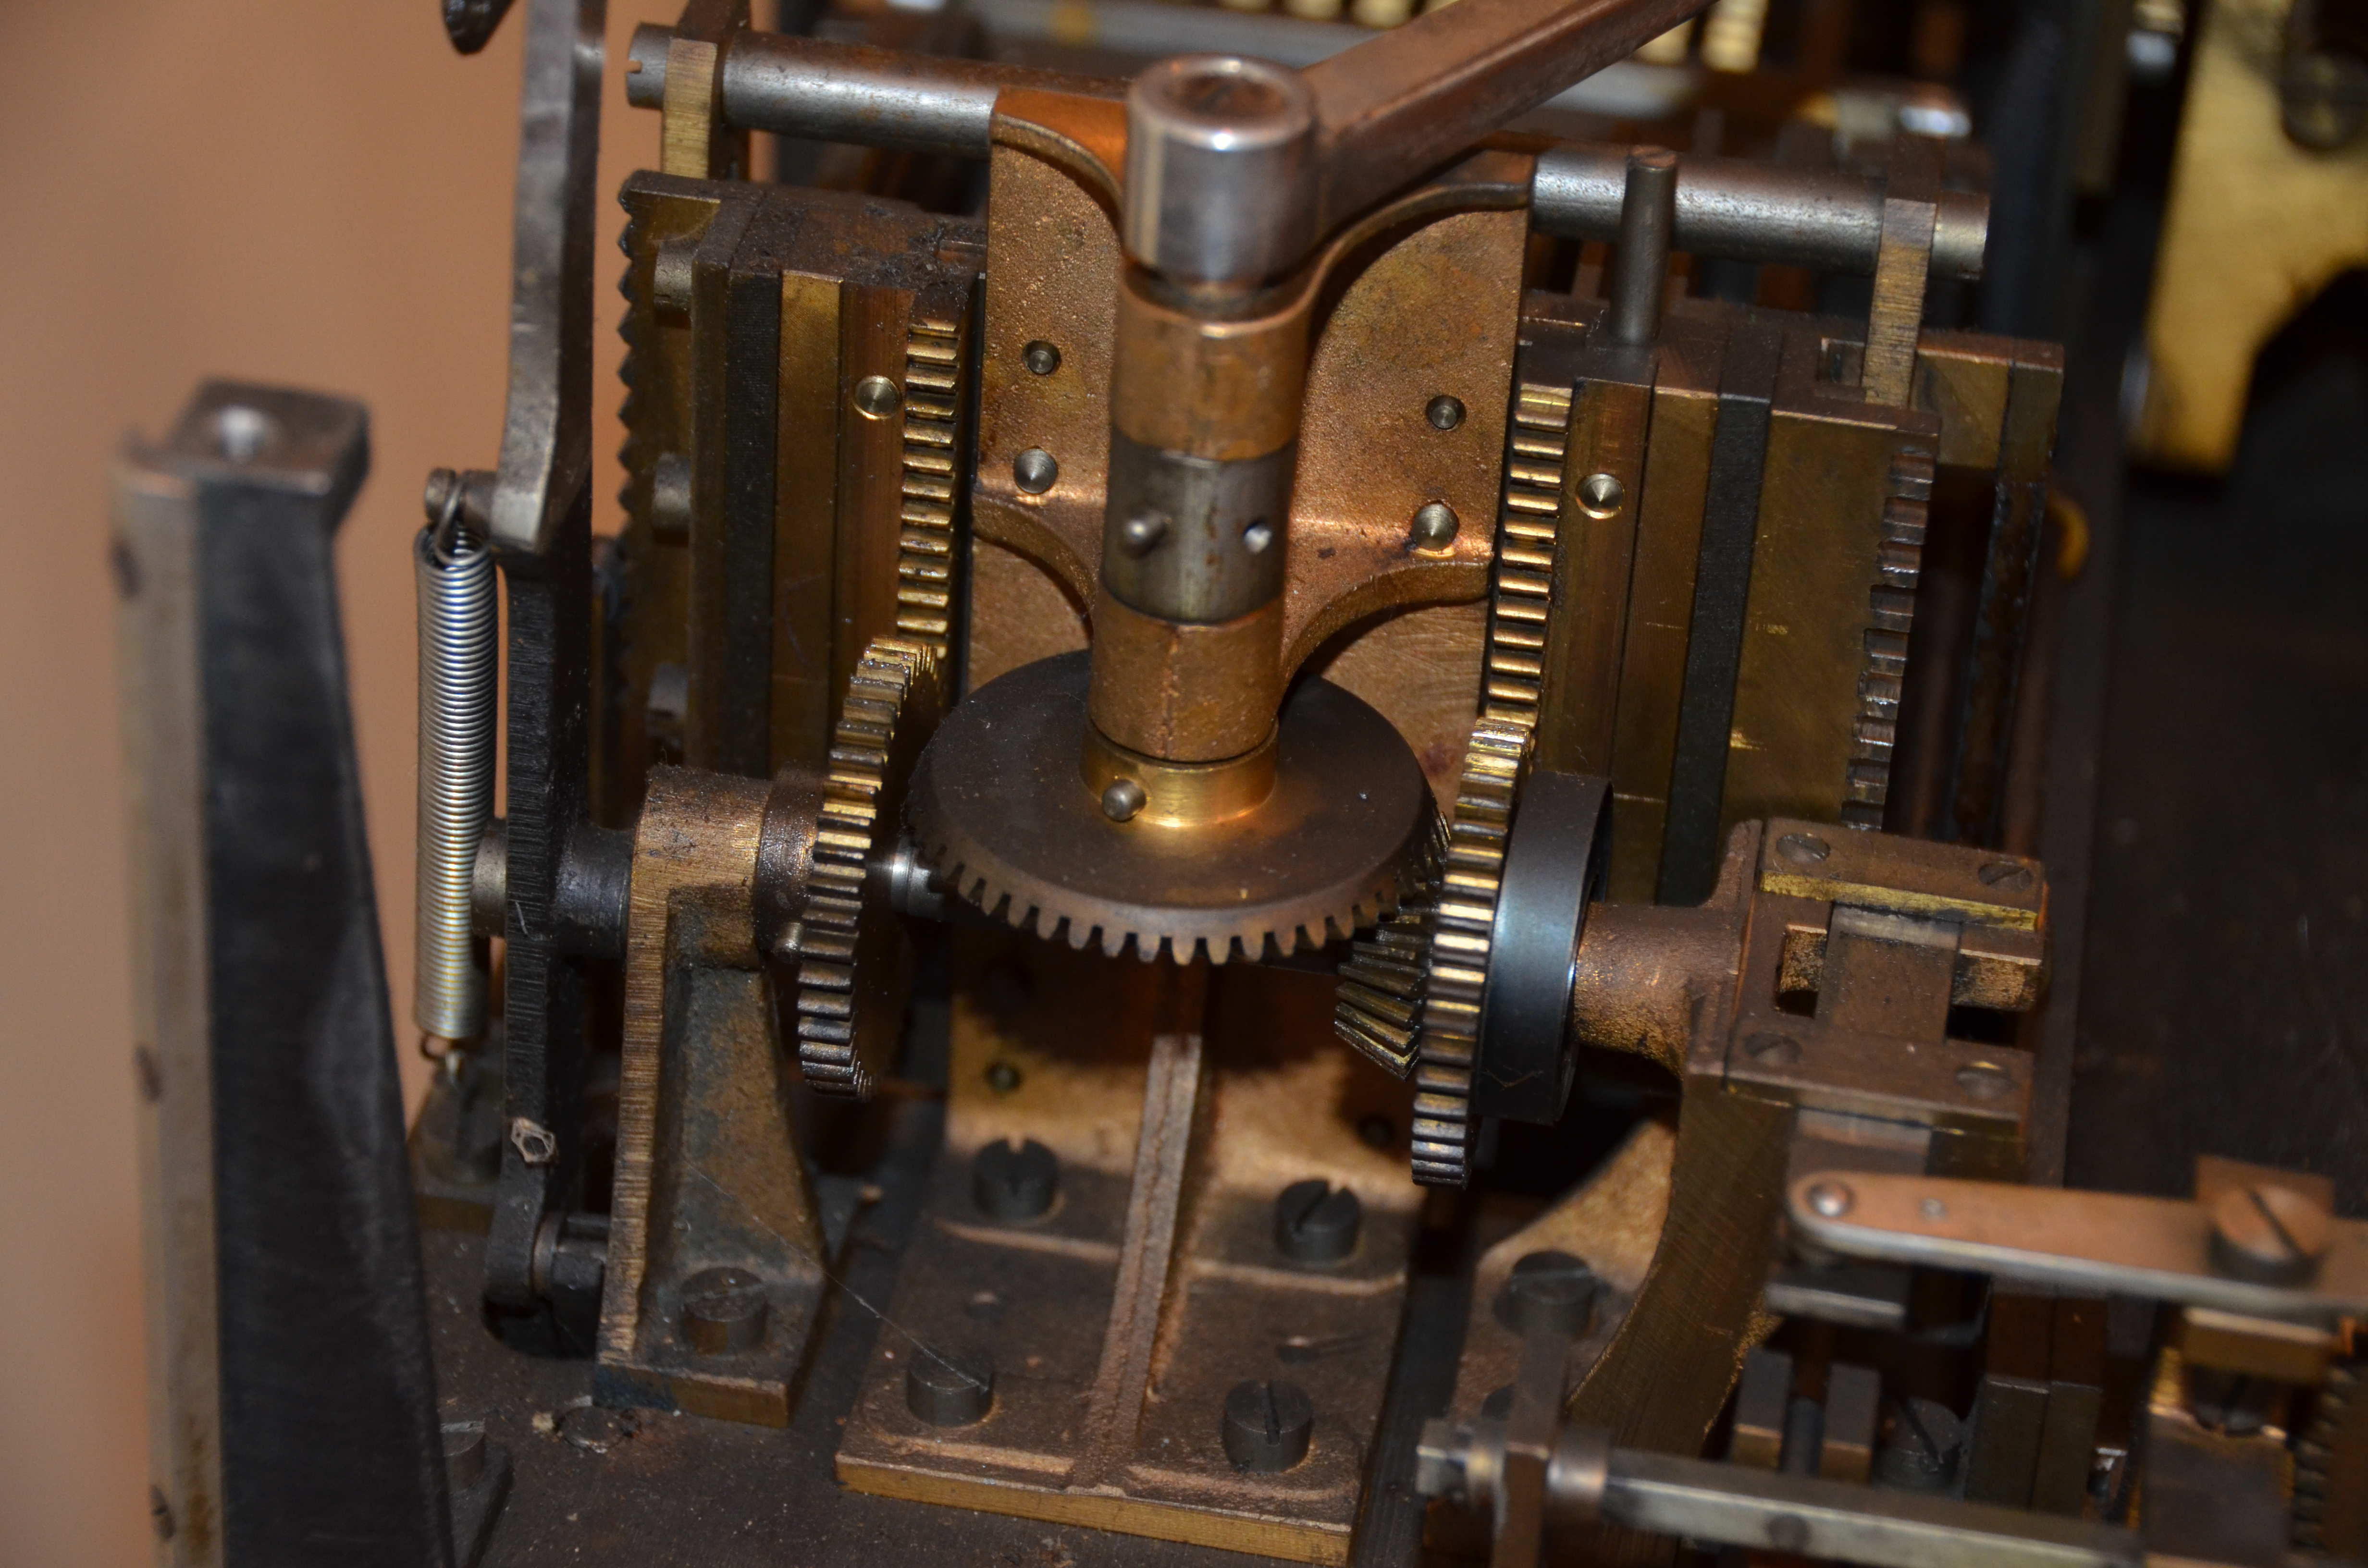
Internal Pictures
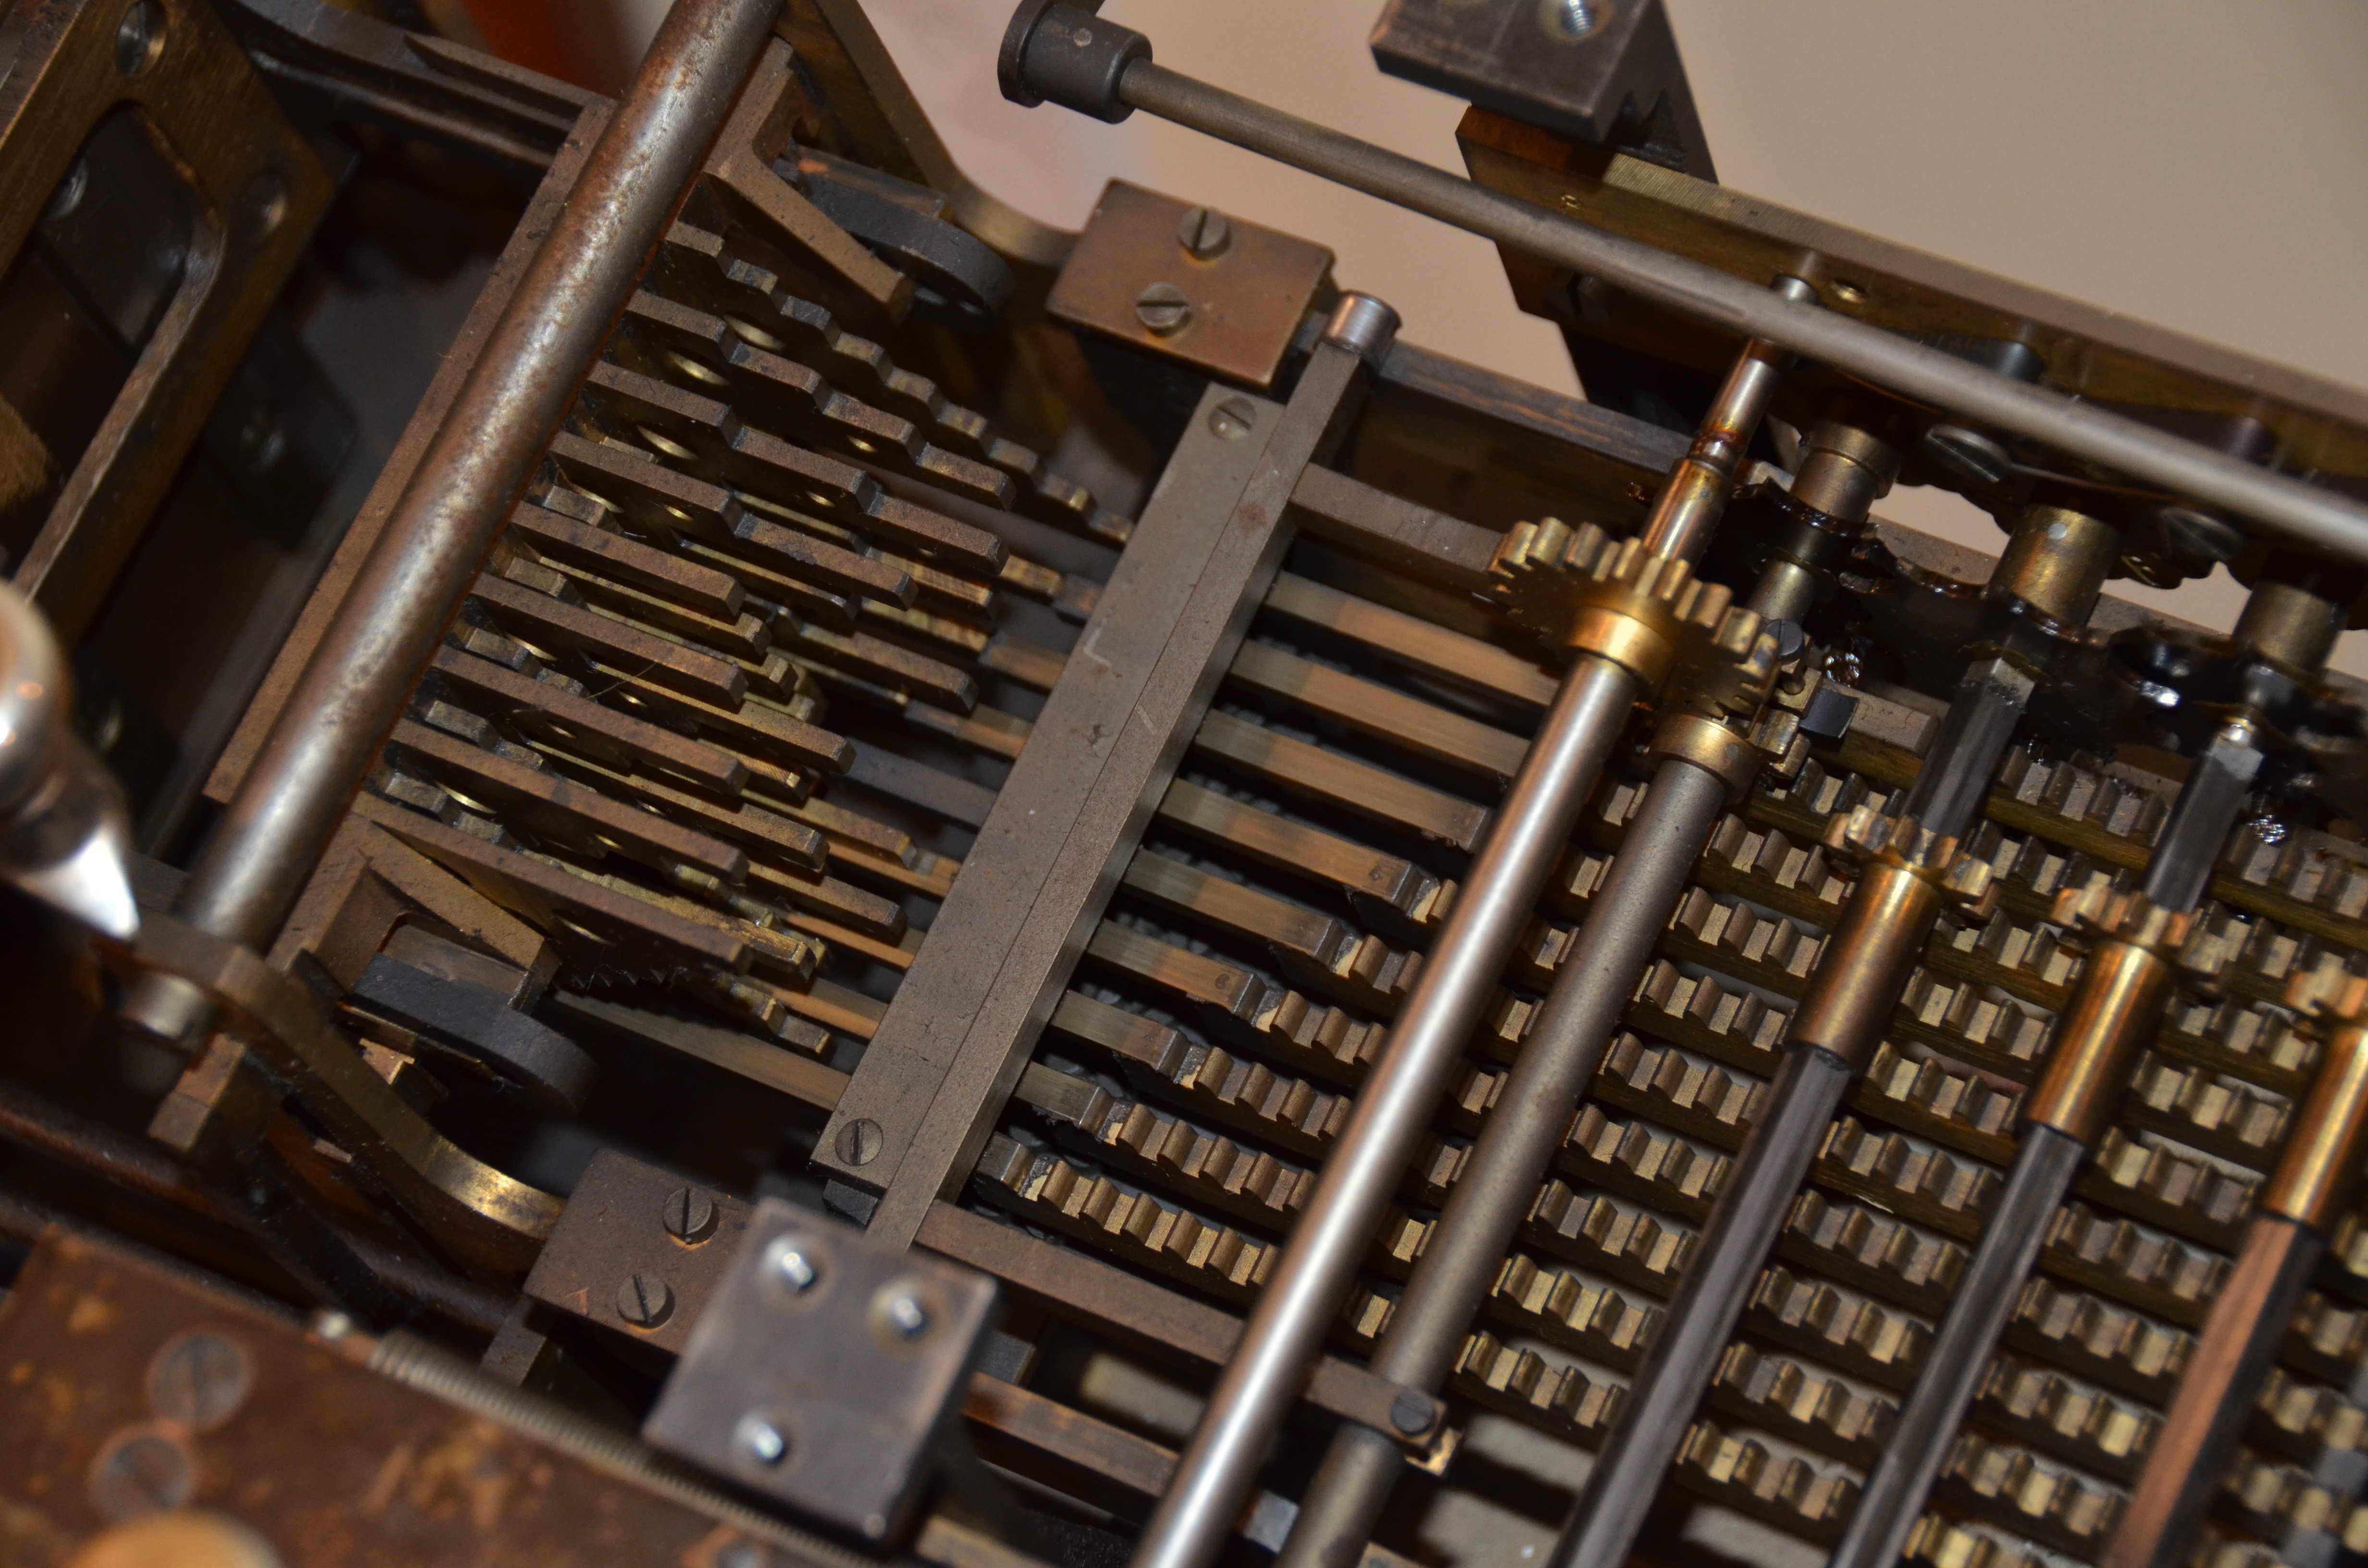
This machine has truly beautiful brass mechanisms.
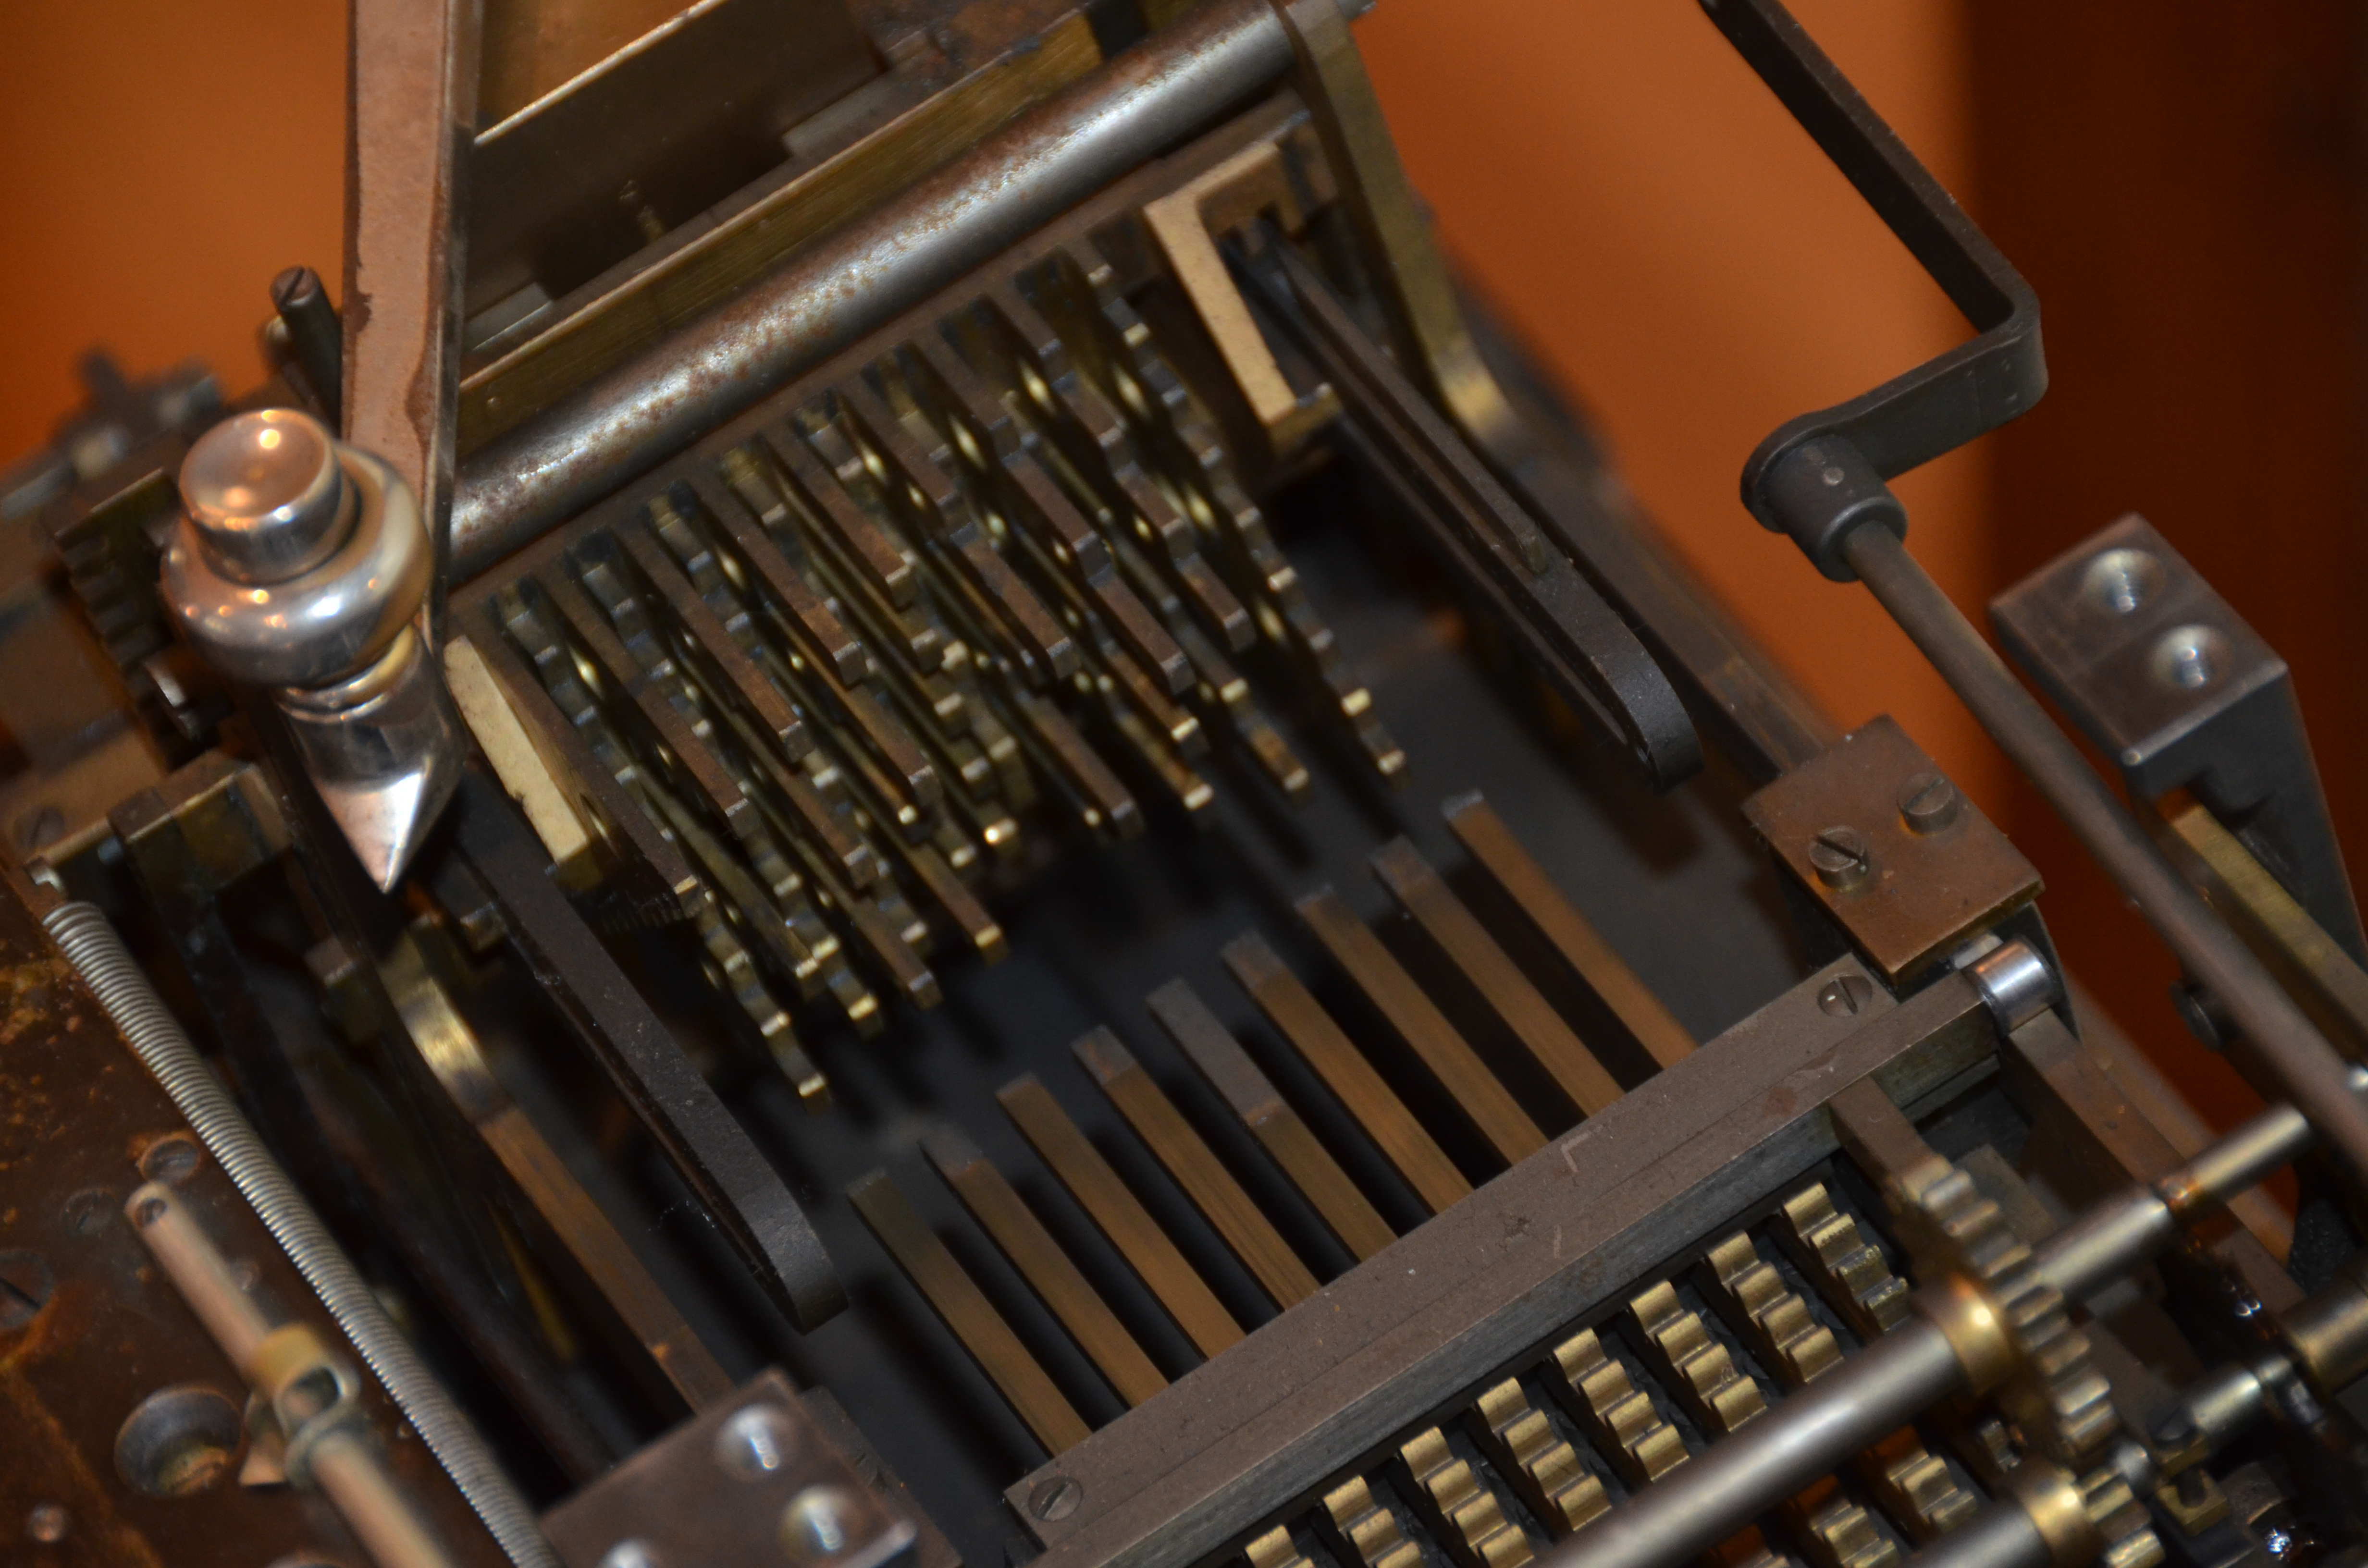
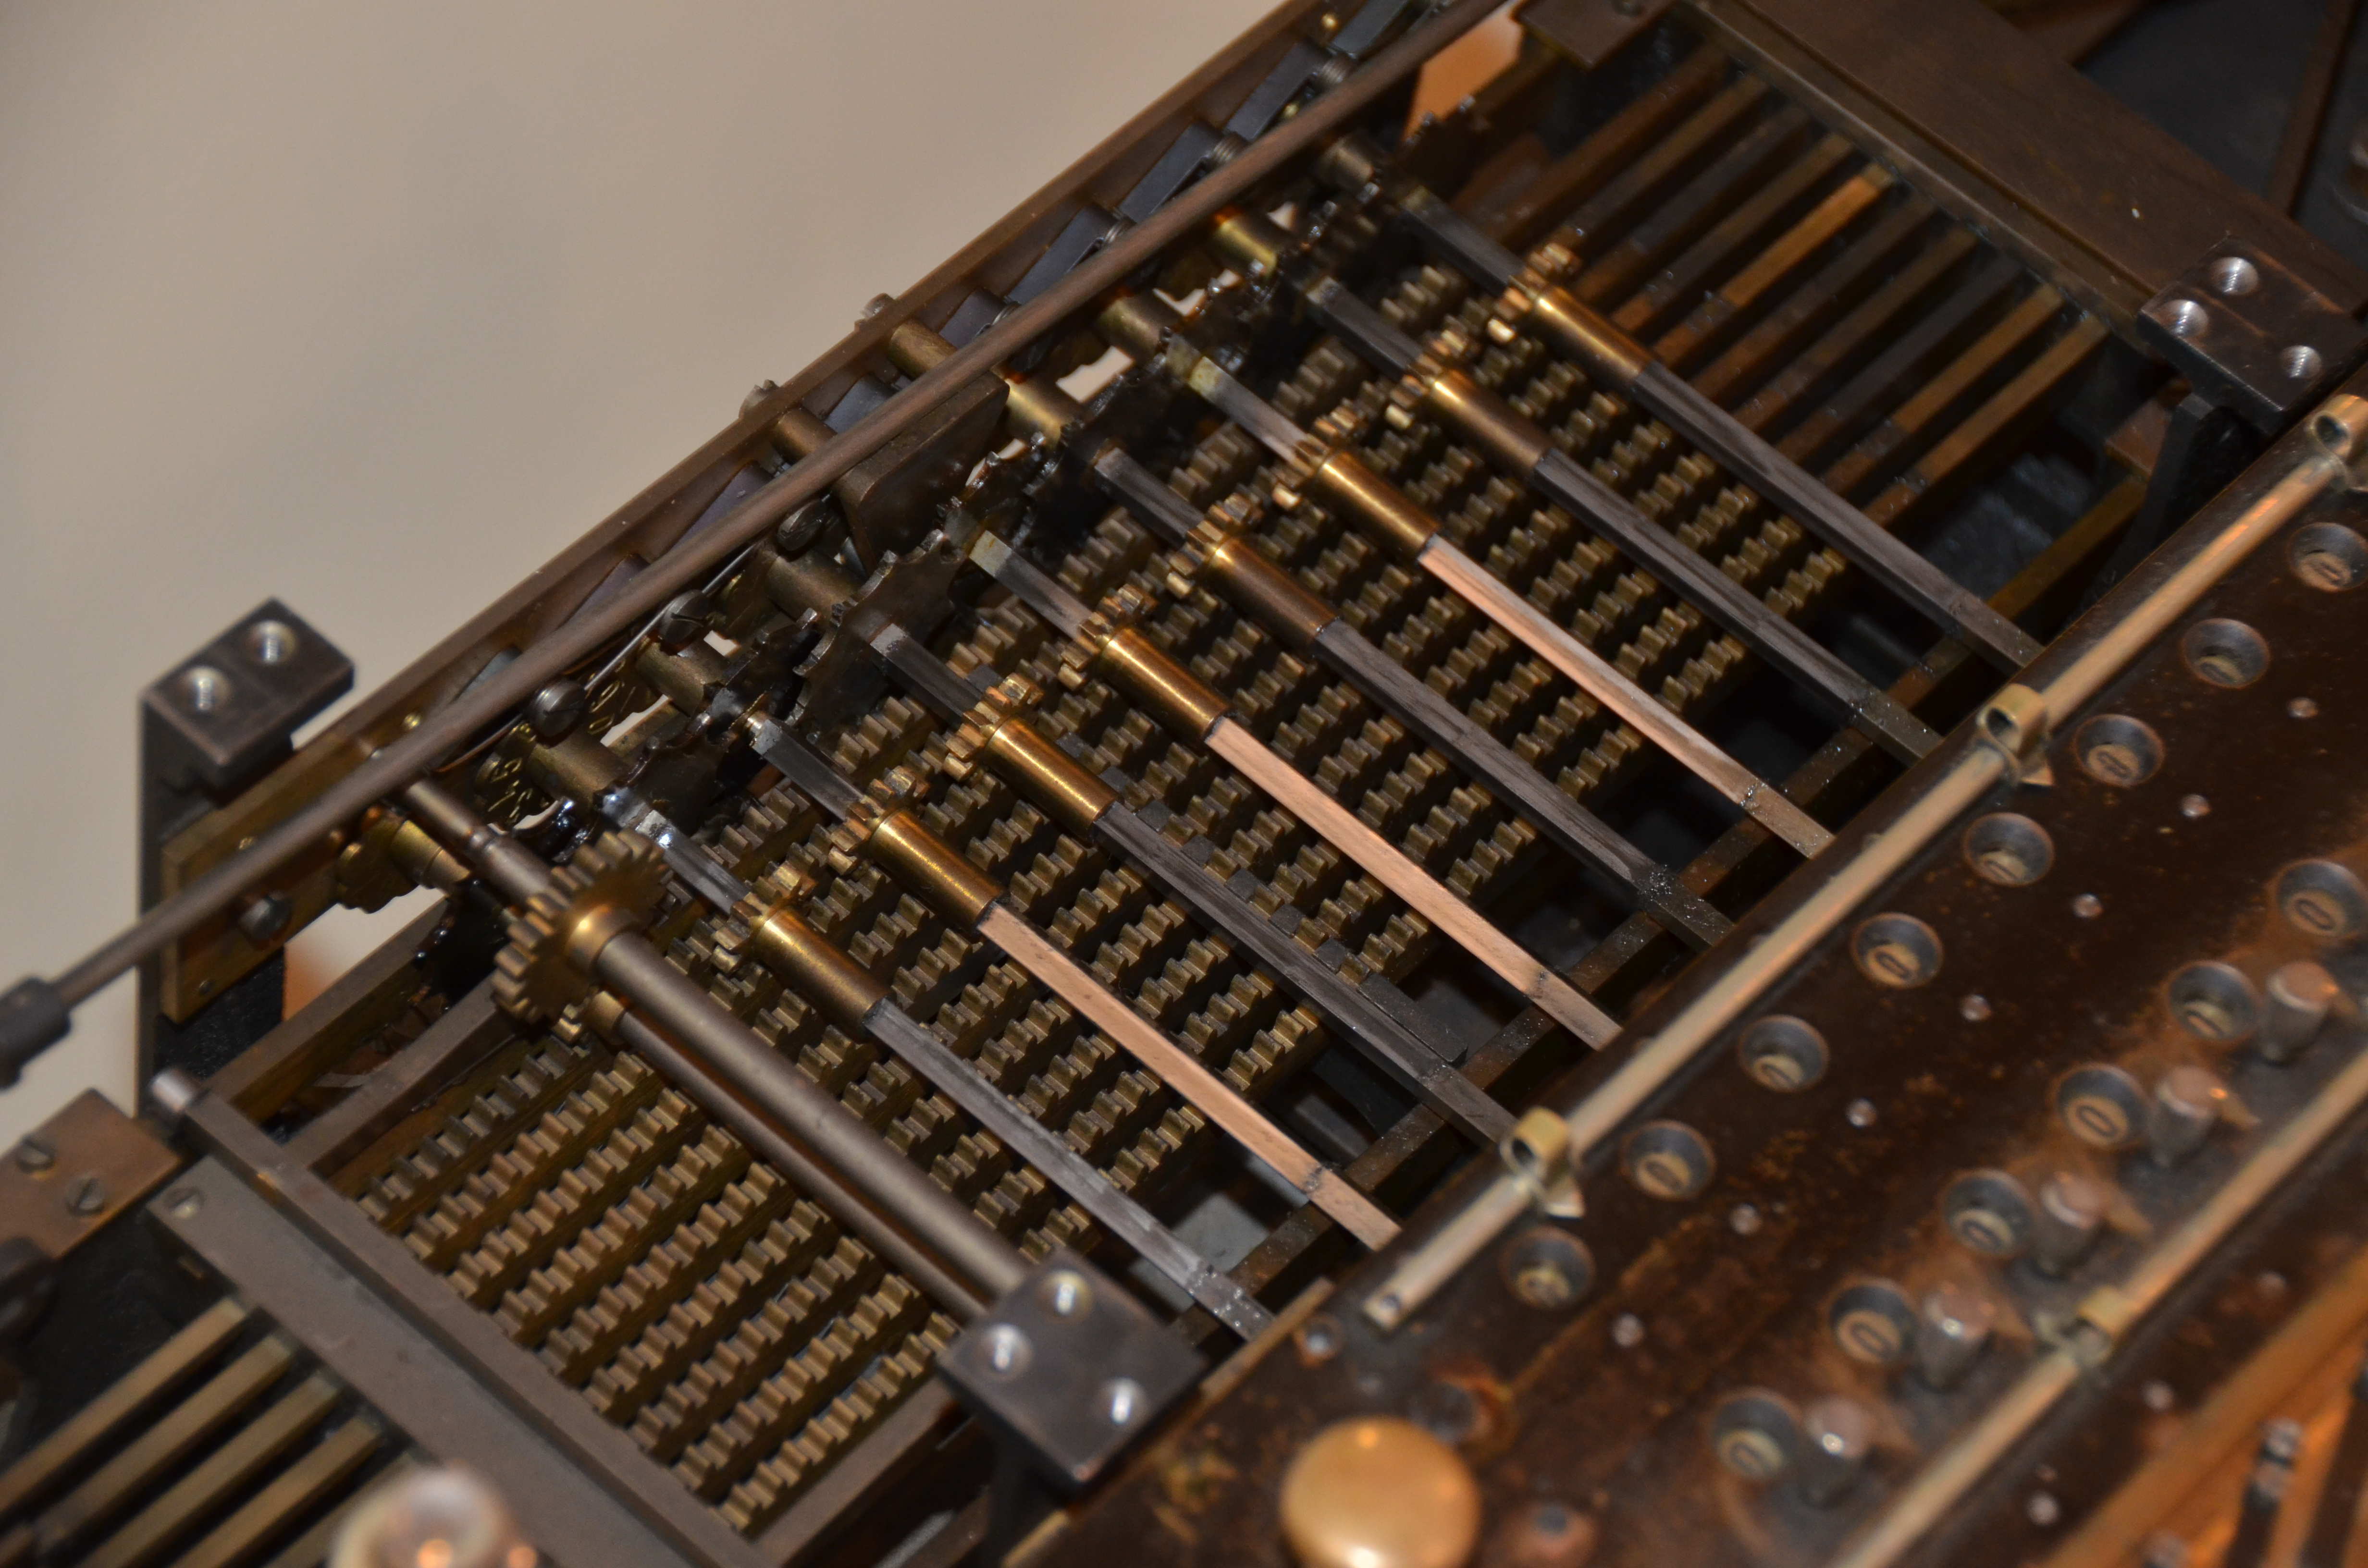
Multiplication Lookup
The Millionaire machine is one of only a small handful that can perform multiplication in one machine cycle or crank. Most machines use repeated additions for multiplications. This requires multiple cycles of the machine. The Millionaire does not need more that one cycle because it has a mechanical multiplication lookup table.
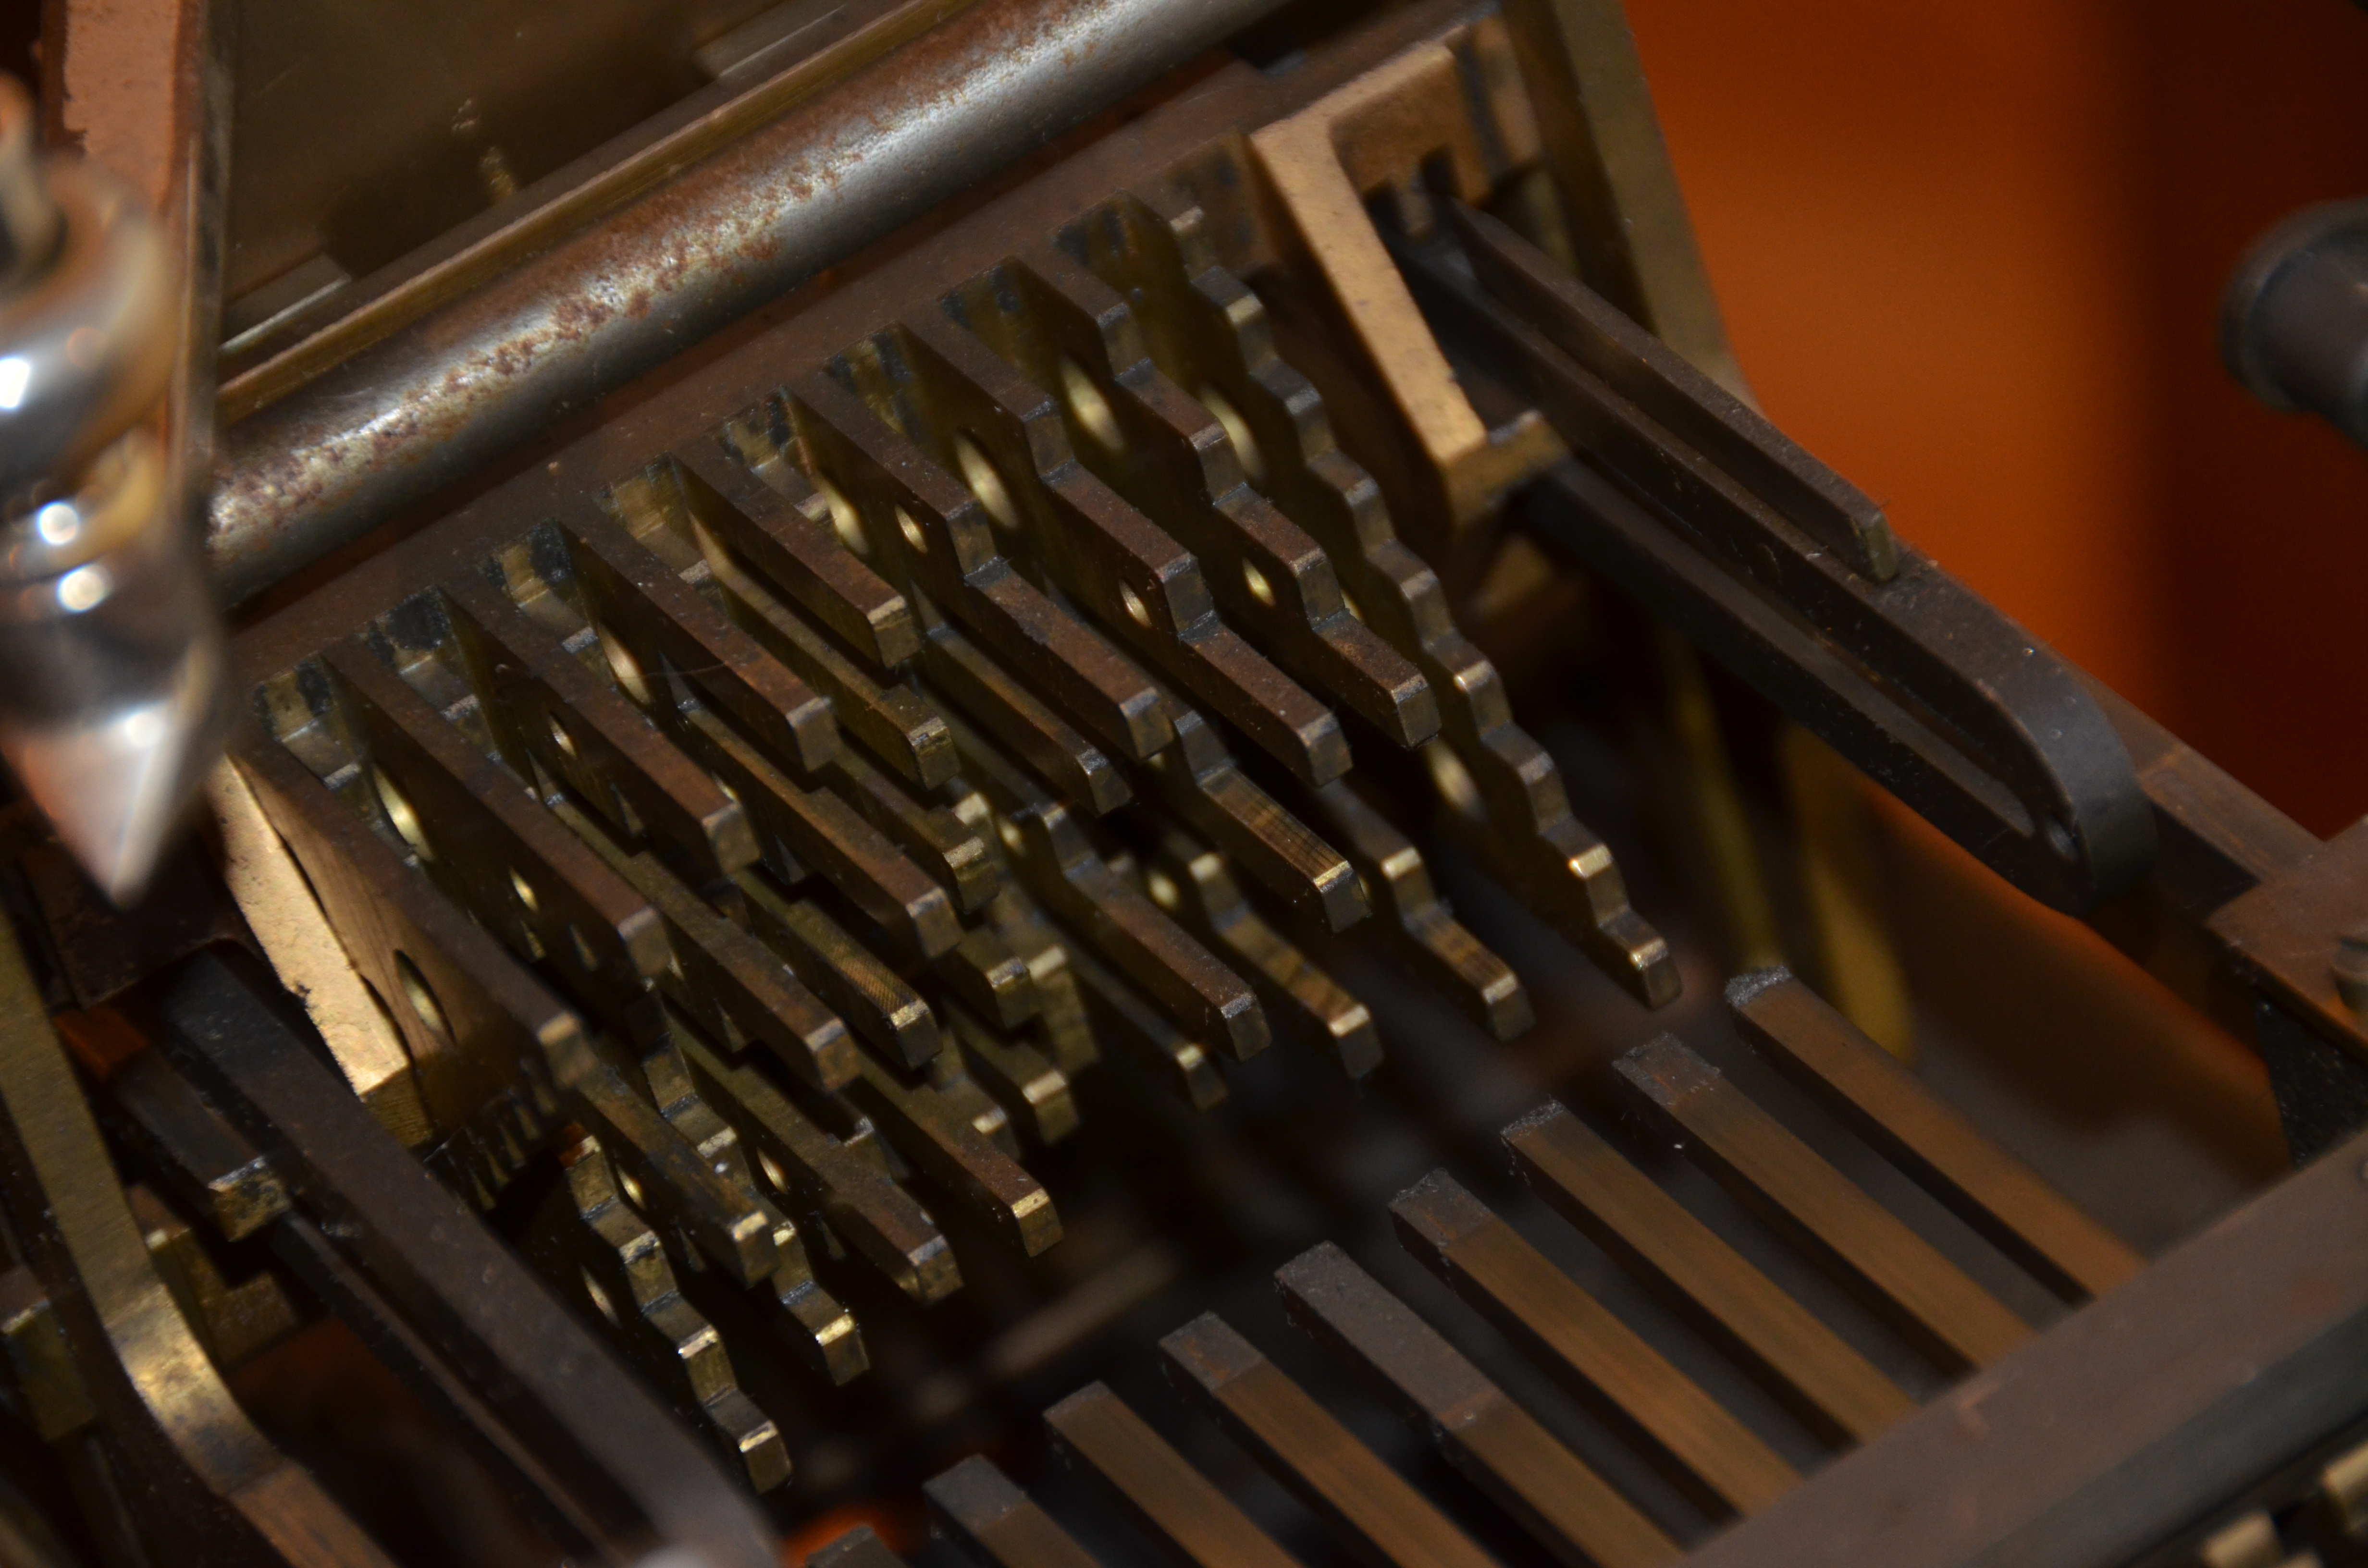
The table has been milled into a block of brass (pictured above). It’s easiest to understand how it works with a number table.
| 9 | 8 | 7 | 6 | 5 | 4 | 3 | 2 | 1 | |
|---|---|---|---|---|---|---|---|---|---|
| 1 | 9 0 | 8 0 | 7 0 | 6 0 | 5 0 | 4 0 | 3 0 | 2 0 | 1 0 |
| 2 | 8 1 | 6 1 | 4 1 | 2 1 | 0 1 | 8 0 | 6 0 | 4 0 | 2 0 |
| 3 | 7 2 | 4 2 | 1 2 | 8 1 | 5 1 | 2 1 | 9 0 | 6 0 | 3 0 |
| 4 | 6 3 | 2 3 | 8 2 | 4 2 | 0 2 | 6 1 | 2 1 | 8 0 | 4 0 |
| 5 | 5 4 | 0 4 | 5 3 | 0 3 | 5 2 | 0 2 | 5 1 | 0 1 | 5 0 |
| 6 | 4 5 | 8 4 | 2 4 | 6 3 | 0 3 | 4 2 | 8 1 | 2 1 | 6 0 |
| 7 | 3 6 | 6 5 | 9 4 | 2 4 | 5 3 | 8 2 | 1 2 | 4 1 | 7 0 |
| 8 | 2 7 | 4 6 | 6 5 | 8 4 | 0 4 | 2 3 | 4 2 | 6 1 | 8 0 |
| 9 | 1 8 | 2 7 | 3 6 | 4 5 | 5 4 | 6 3 | 7 2 | 8 1 | 9 0 |
The columns are each slider input in one column of the input. Each digit in the table corresponds to the “steps” milled into the piece. Each slider moves a gear up or down along a shaft that connects to the register.
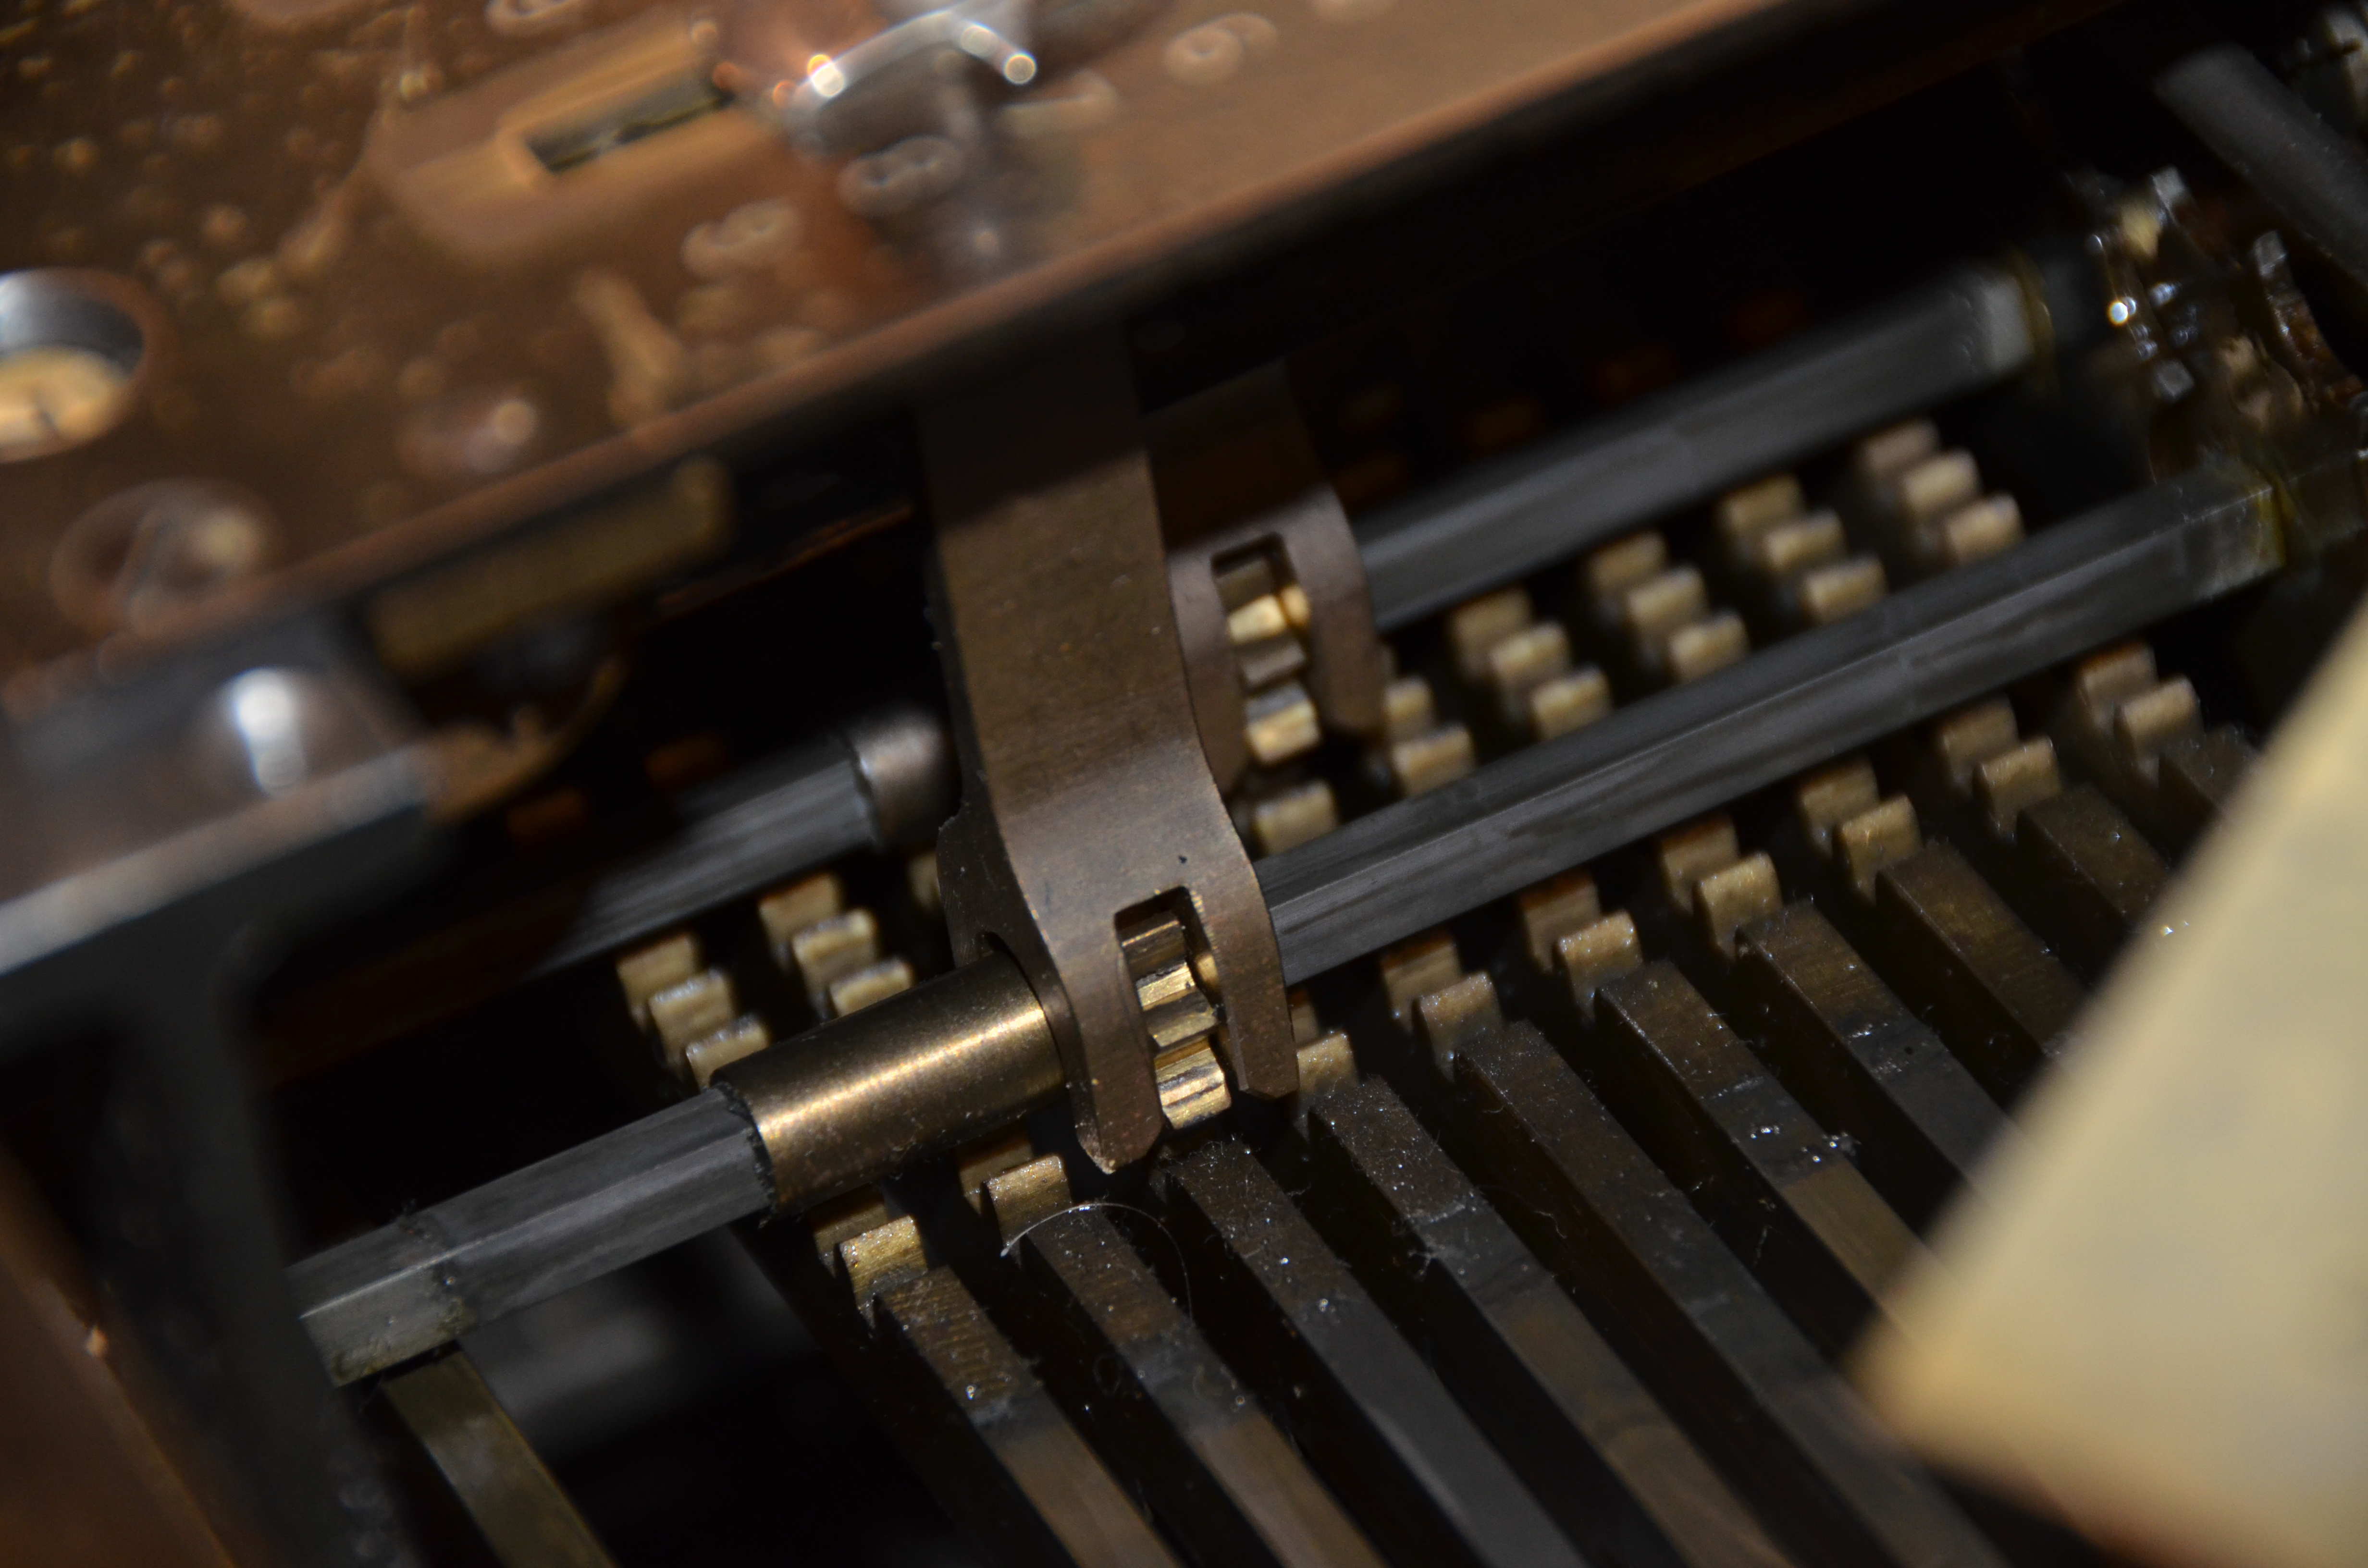
Below this, there are 10 toothed shafts that correspond to digits 0-9. These shafts interact with the multiplier lookup piece. When the machine is cycled, the multiplier piece is pushed against the shafts twice. If the multiplier is lever is set to one, the multiply piece is shifted upwards to it’s one position (row 1 in the table). The multiplier piece comes forwards and pushes the shafts a certain amount. Lets assume the multiplier is 1 and input is set to 9. This is column #9 and row #1 in the table. The multiplier is pushed forward against the shafts so that the second digit in the milled piece is pressed against the shaft. This is the right most digit in each cell in the table. It’s 0, so that means the shaft for 9s in the input is not pushed any. The carriage is then shifted right, and the multiplier piece is shifted right, so that the left step interacts with the shafts (the left digit in each cell). In this case, it’s nine. The shaft is pushed nine places when the multiplier comes forwards again. This puts a 9 in the correct place in the accumulator.
Let’s say the input is set to 9, and the multiplier set to 9. Column #9 in the table and row 9. The multiplier comes forward and interacts with the right or tens part of the milled piece, which is 8, and pushes the shaft 8 places, putting 8 into the accumulator. The carriage shifts left, then the multiplier piece shifts right and presses the left or ones side up against the shafts, in this case 1 place. This puts a one in the accumulator, gives us a correct answer of 81.
This explains why the multiplication lever has to be set to 1 for addition and subtraction. In addition and subtraction, the carriage does not move. Which means any number other than 1, the ones digit will be added to the same column instead of the next one like in multiplication. So if the machine is set to addition, and 5 is in the input, and the multiply lever is set to 3, first 1 would be added to the accumulator with the first meshing of the multiply plate, but since the carriage isn’t moving, next 5 would be added to the same place in the accumulator. And that would yield 6, definitely not the correct answer.
Videos
Demo of the machine in manual and motorized mode. Also shows operation with covers and outer panels removed.
And also a quick video on how to operate the machine!
Details
Locking Pins
The calculator has two pins stored in the lid. These pins are used when moving the calculator. One keeps the carriage from moving and the other keeps the multiplier mechanism secure.
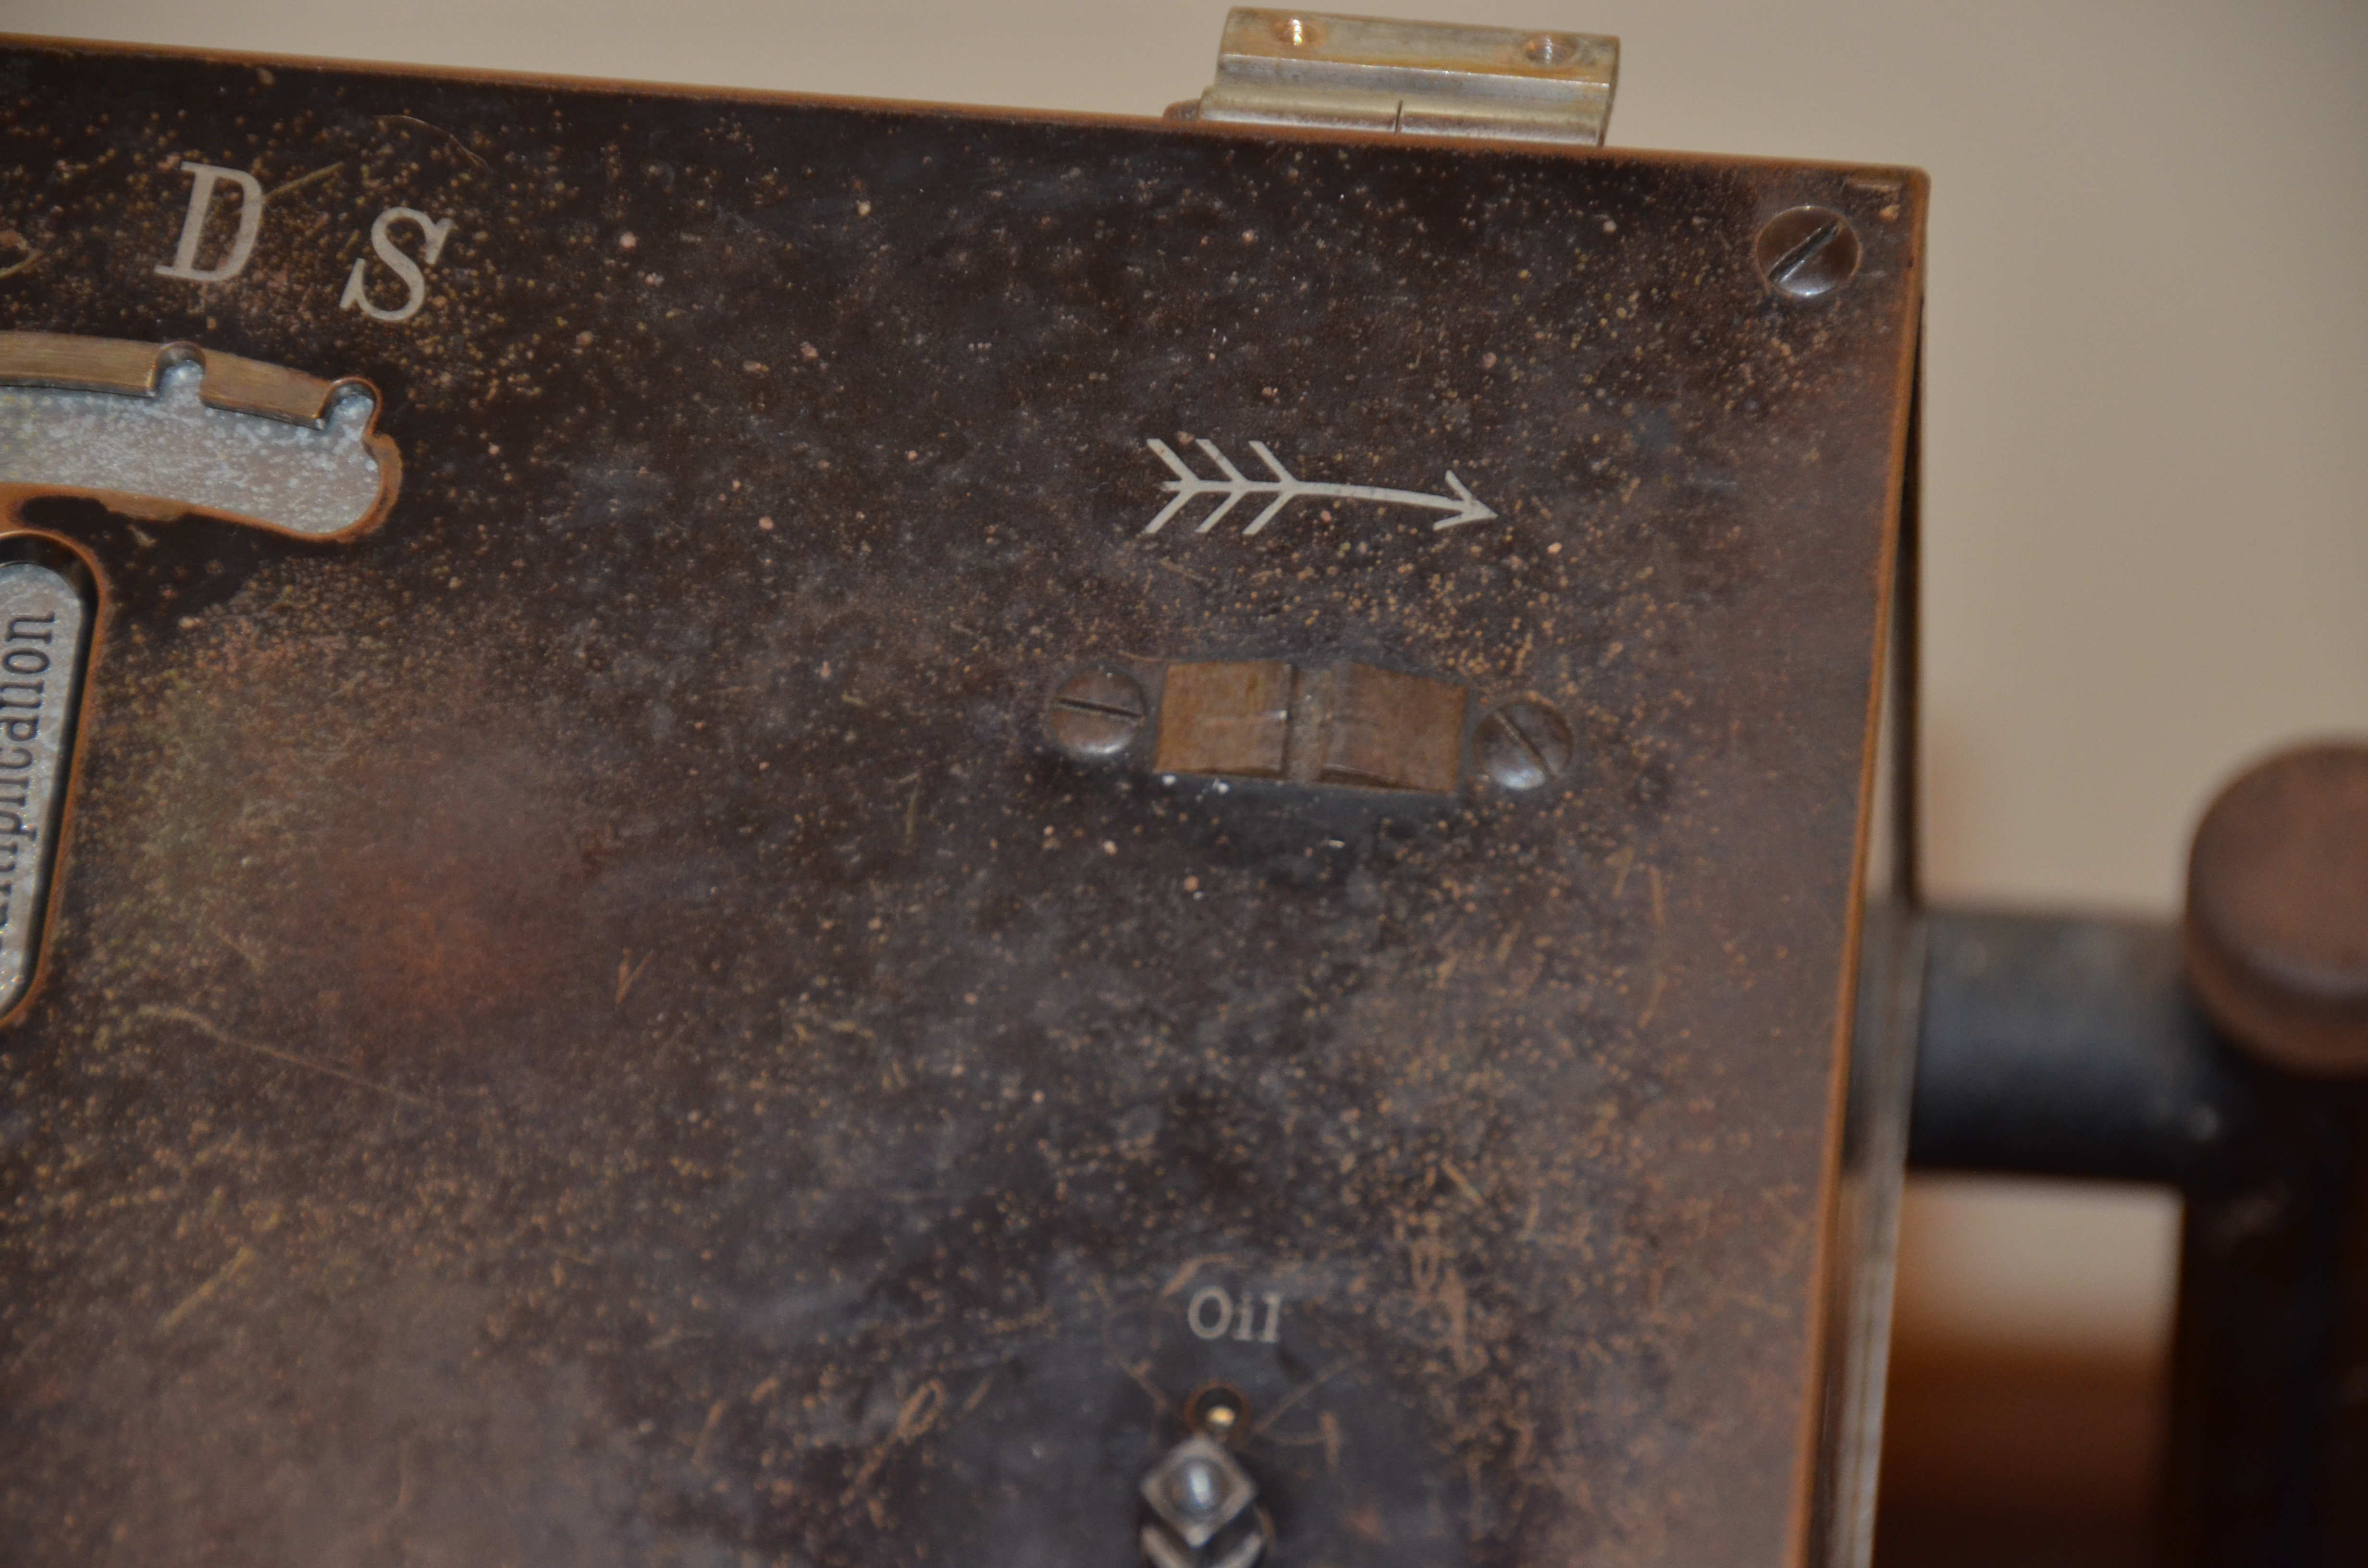
Writing and Plaques
The machine has very stylish writing and extra details, like an arrow indicating which direction to turn, and even an oiling hole labeled “Oil” underneath the crank. The carriage also has markers for the counter and division.
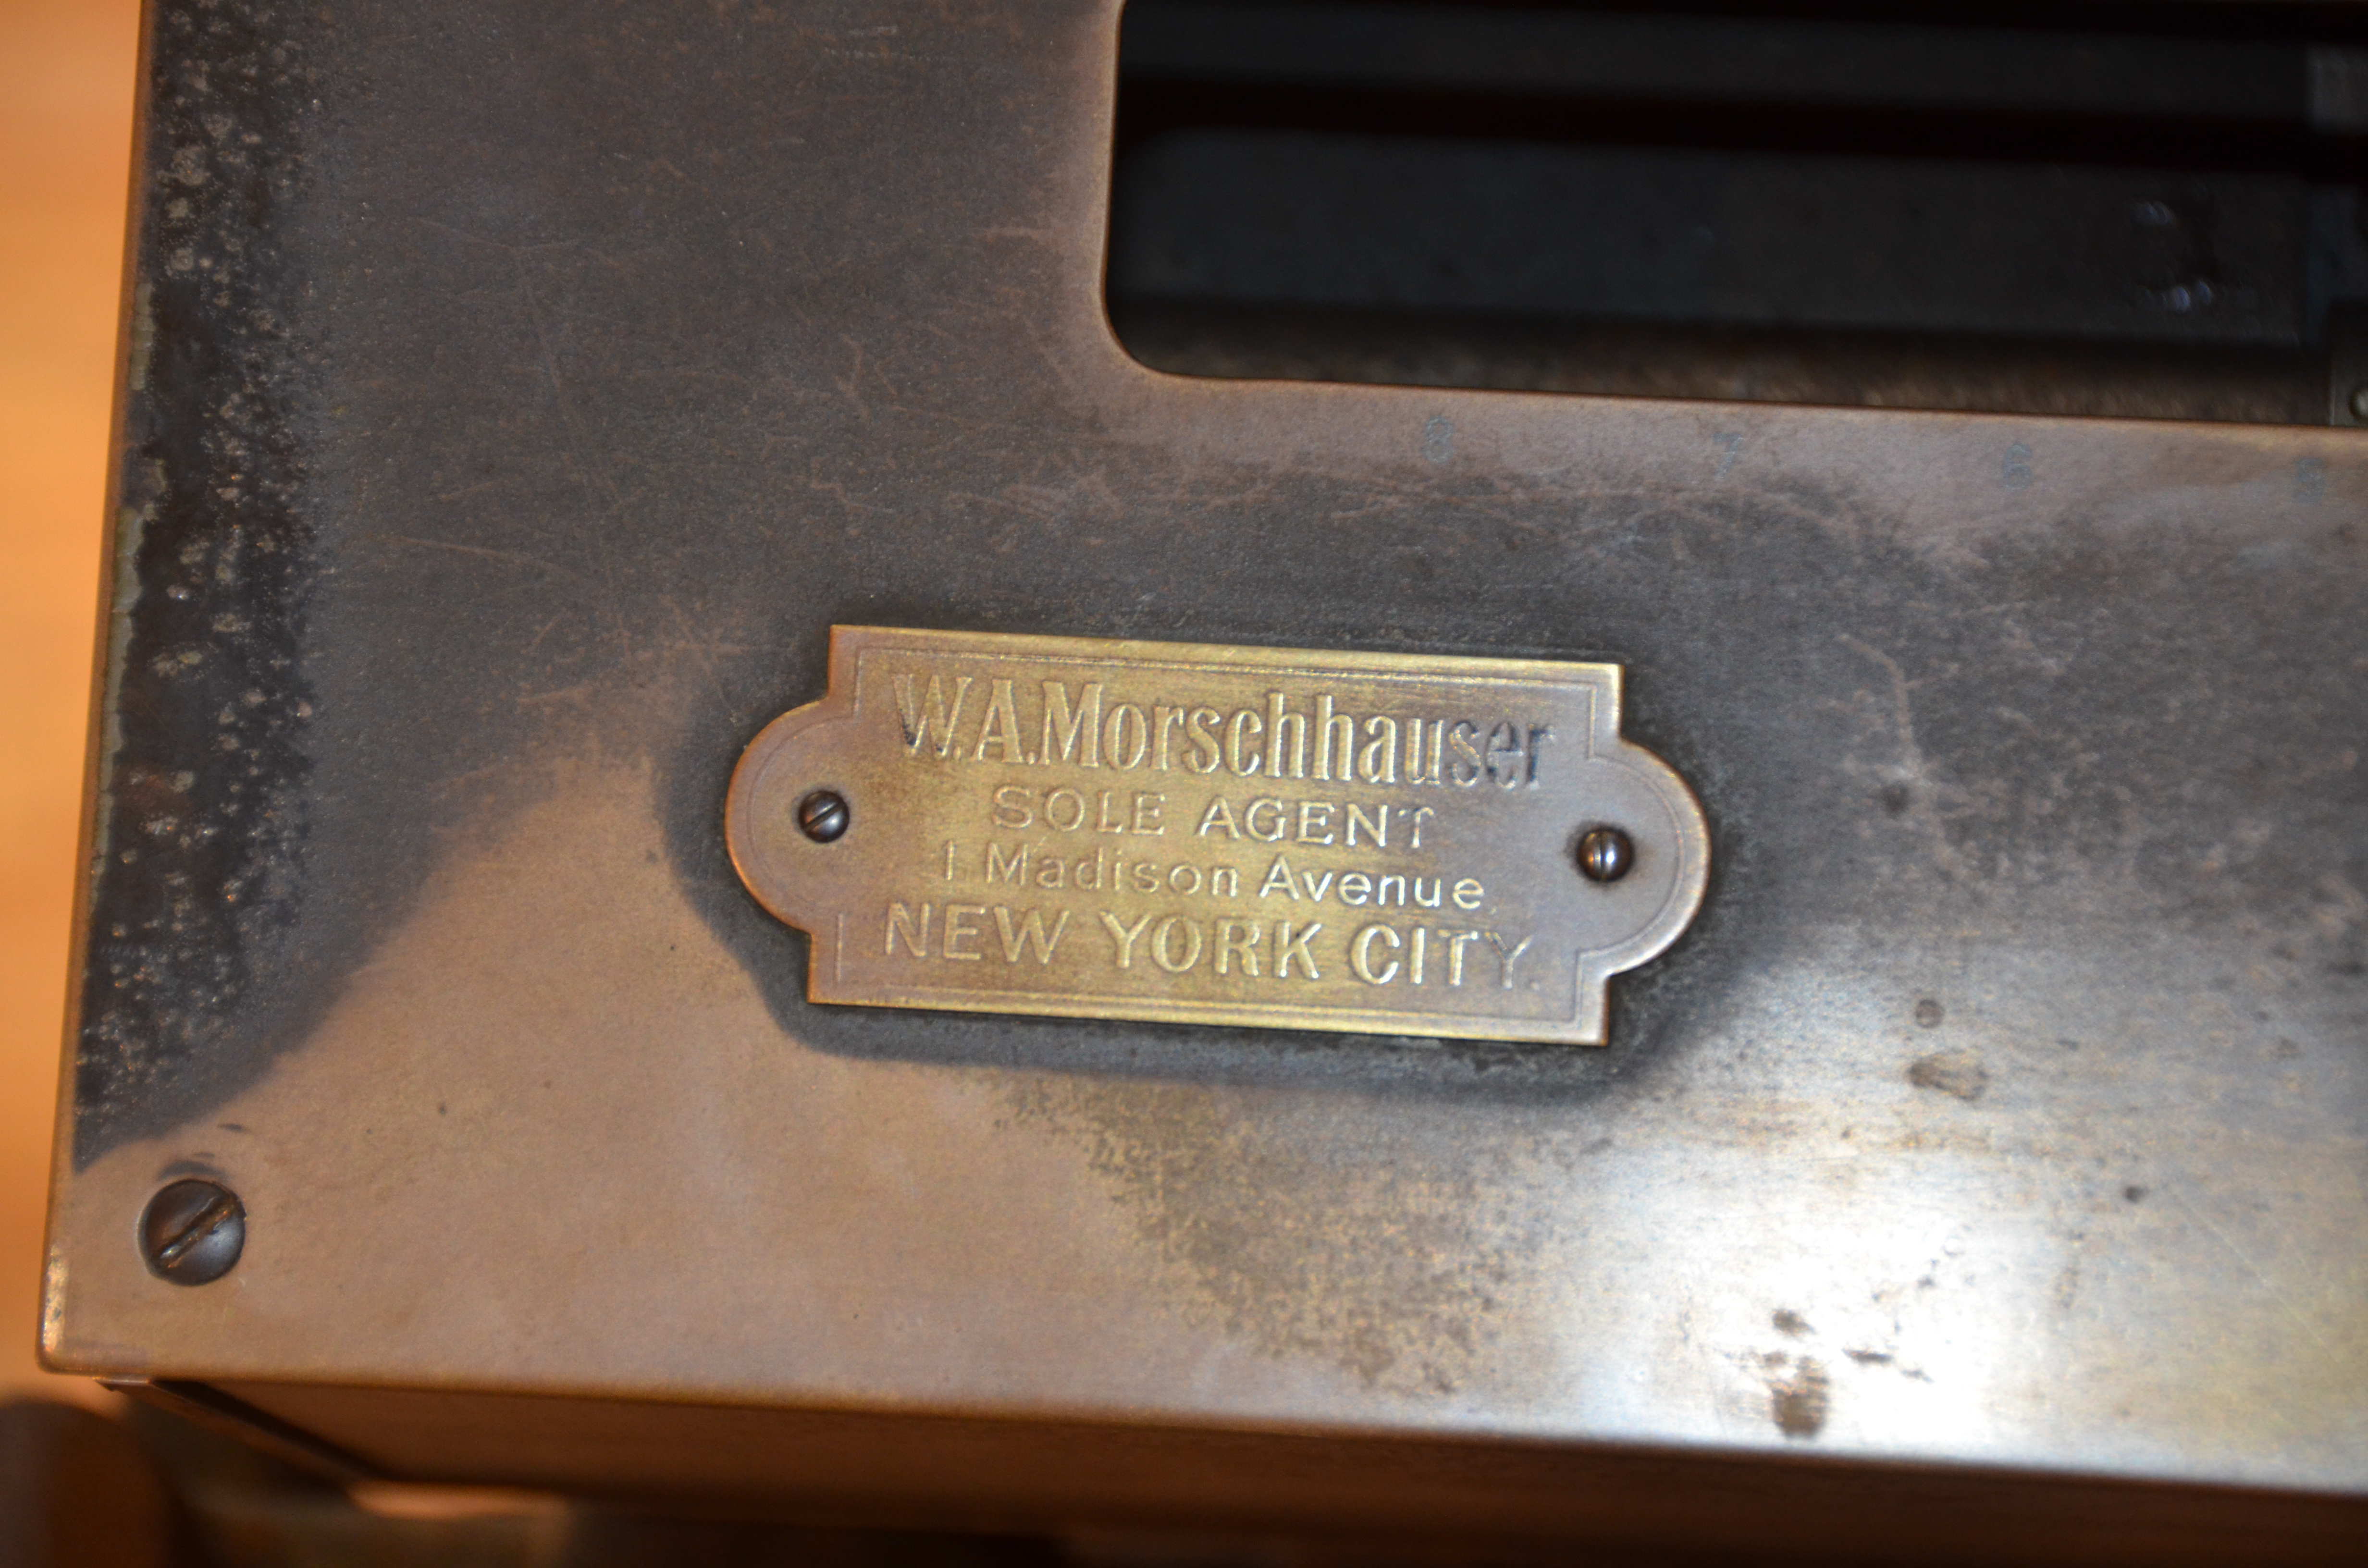
The machine also has 2 plaques on bottom of the lower top plate with Egli’s name and the distributer.
Instructions
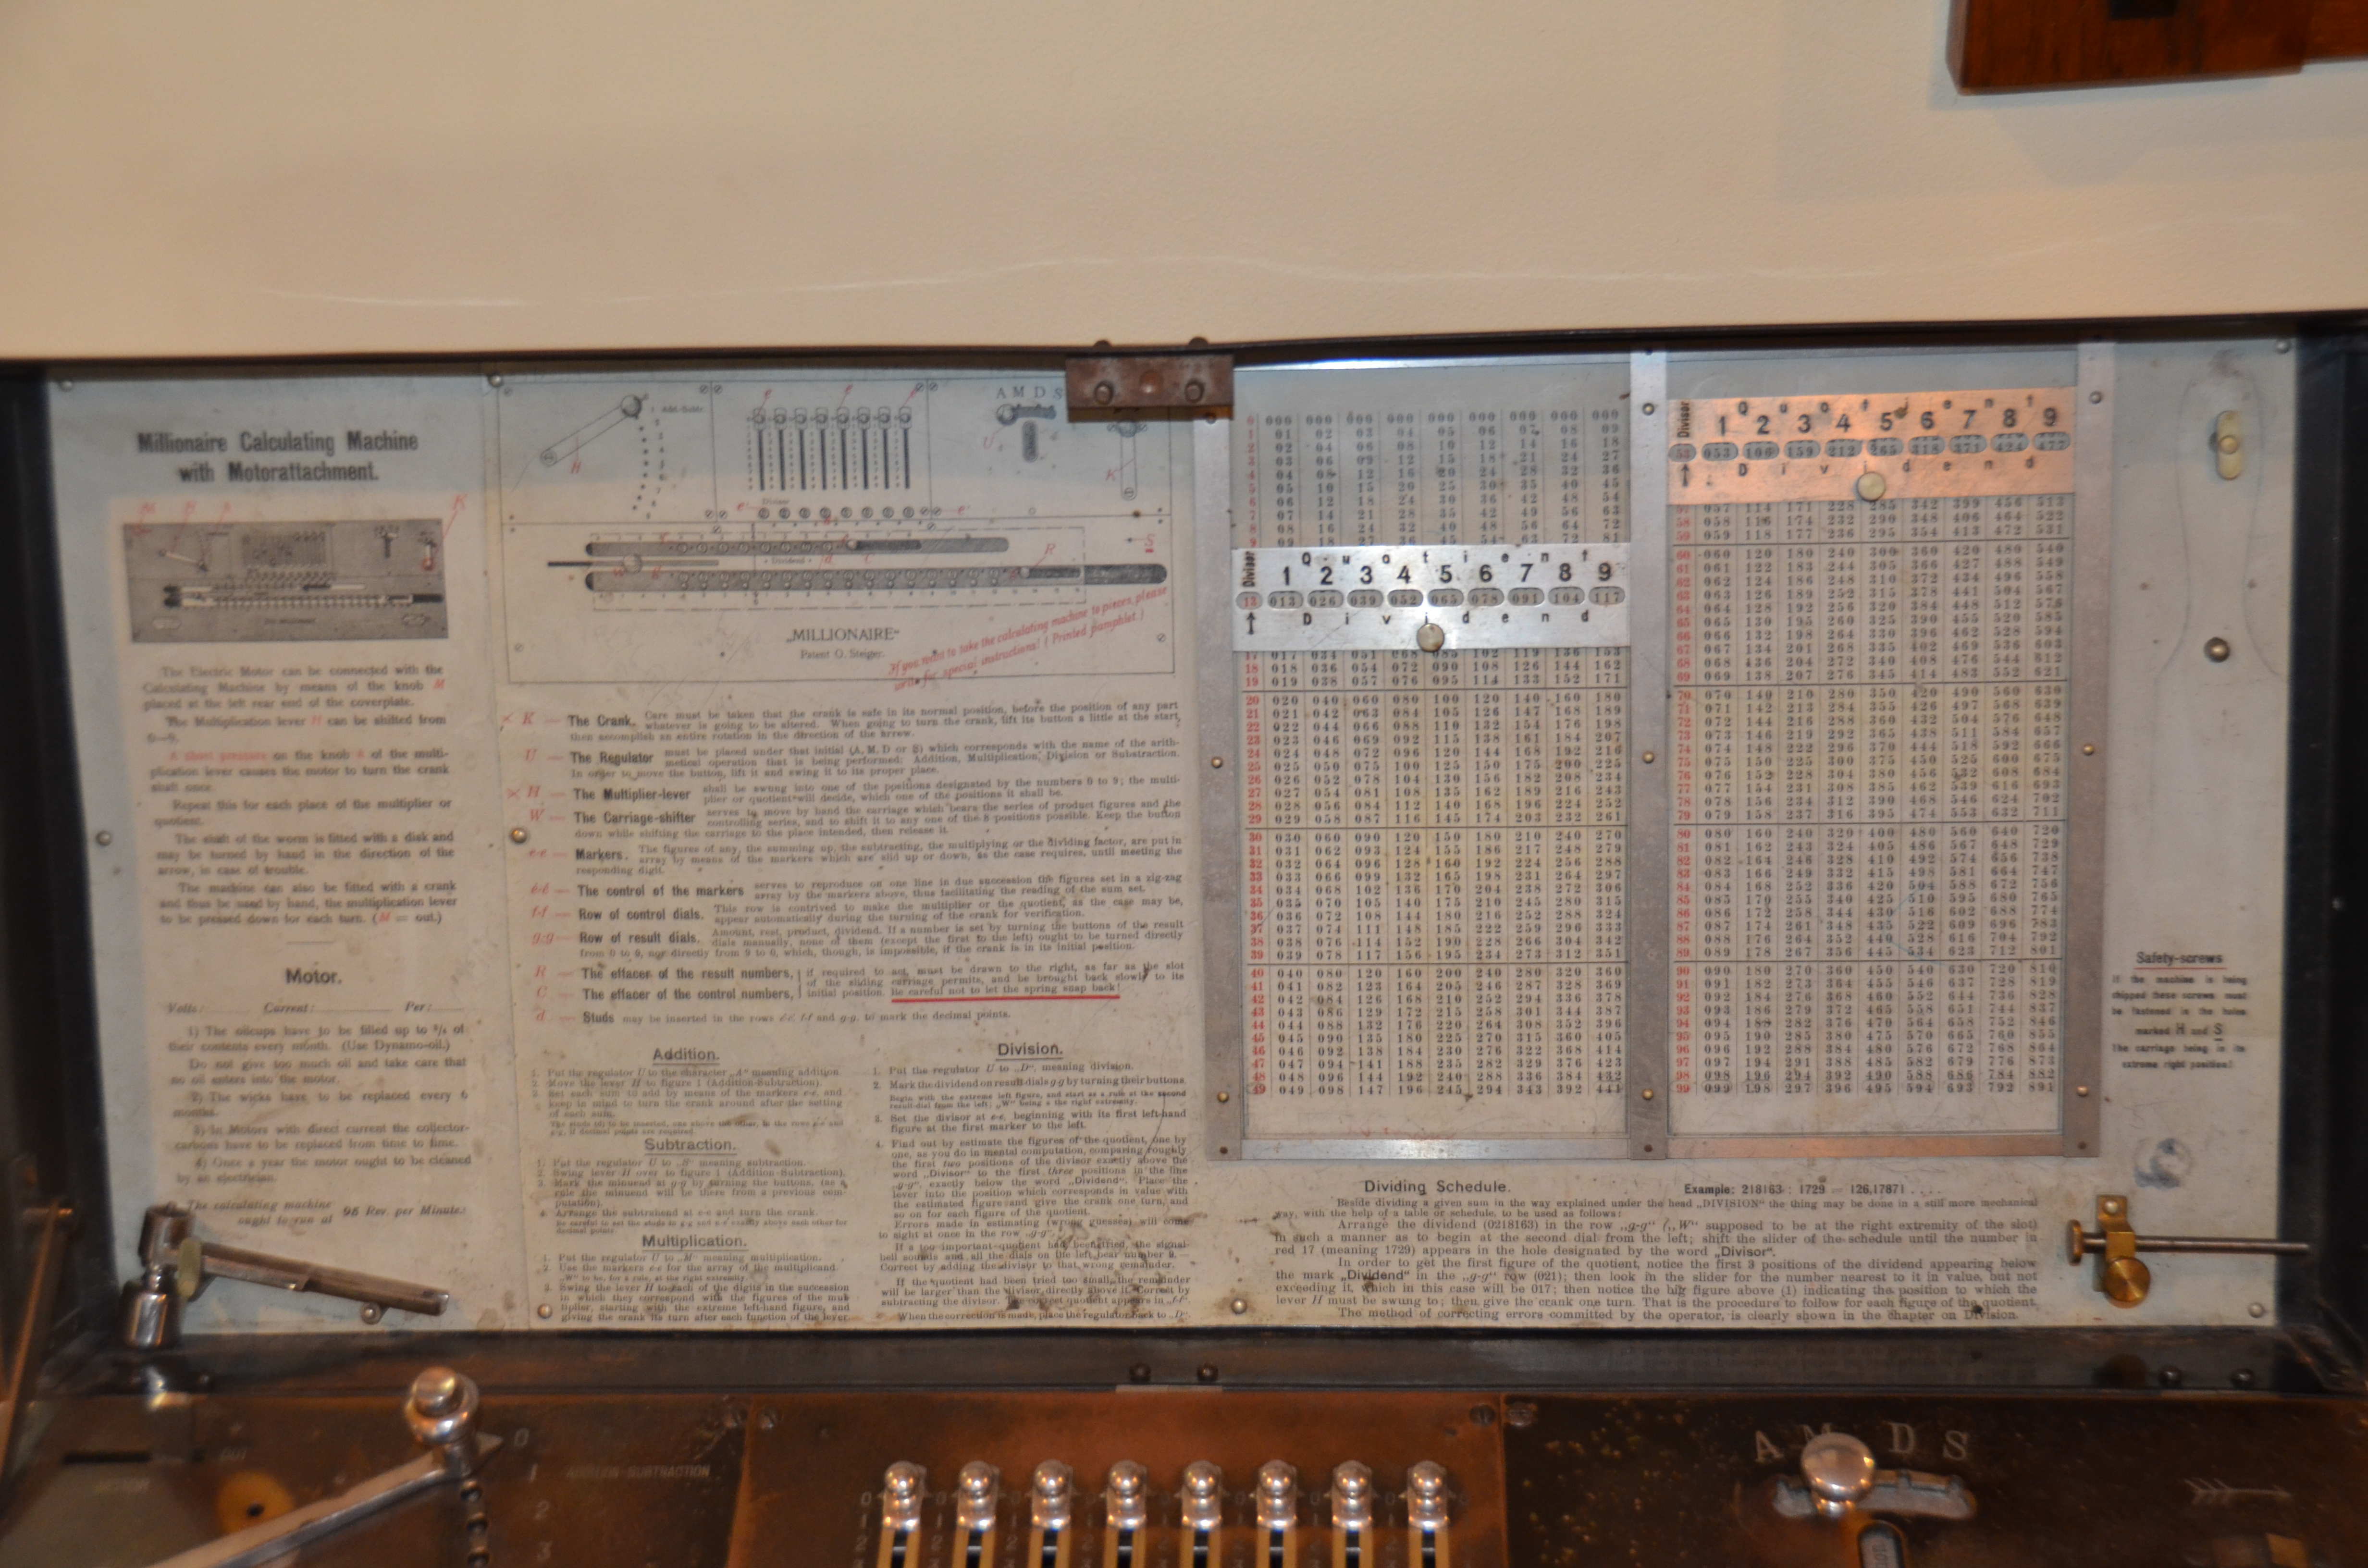
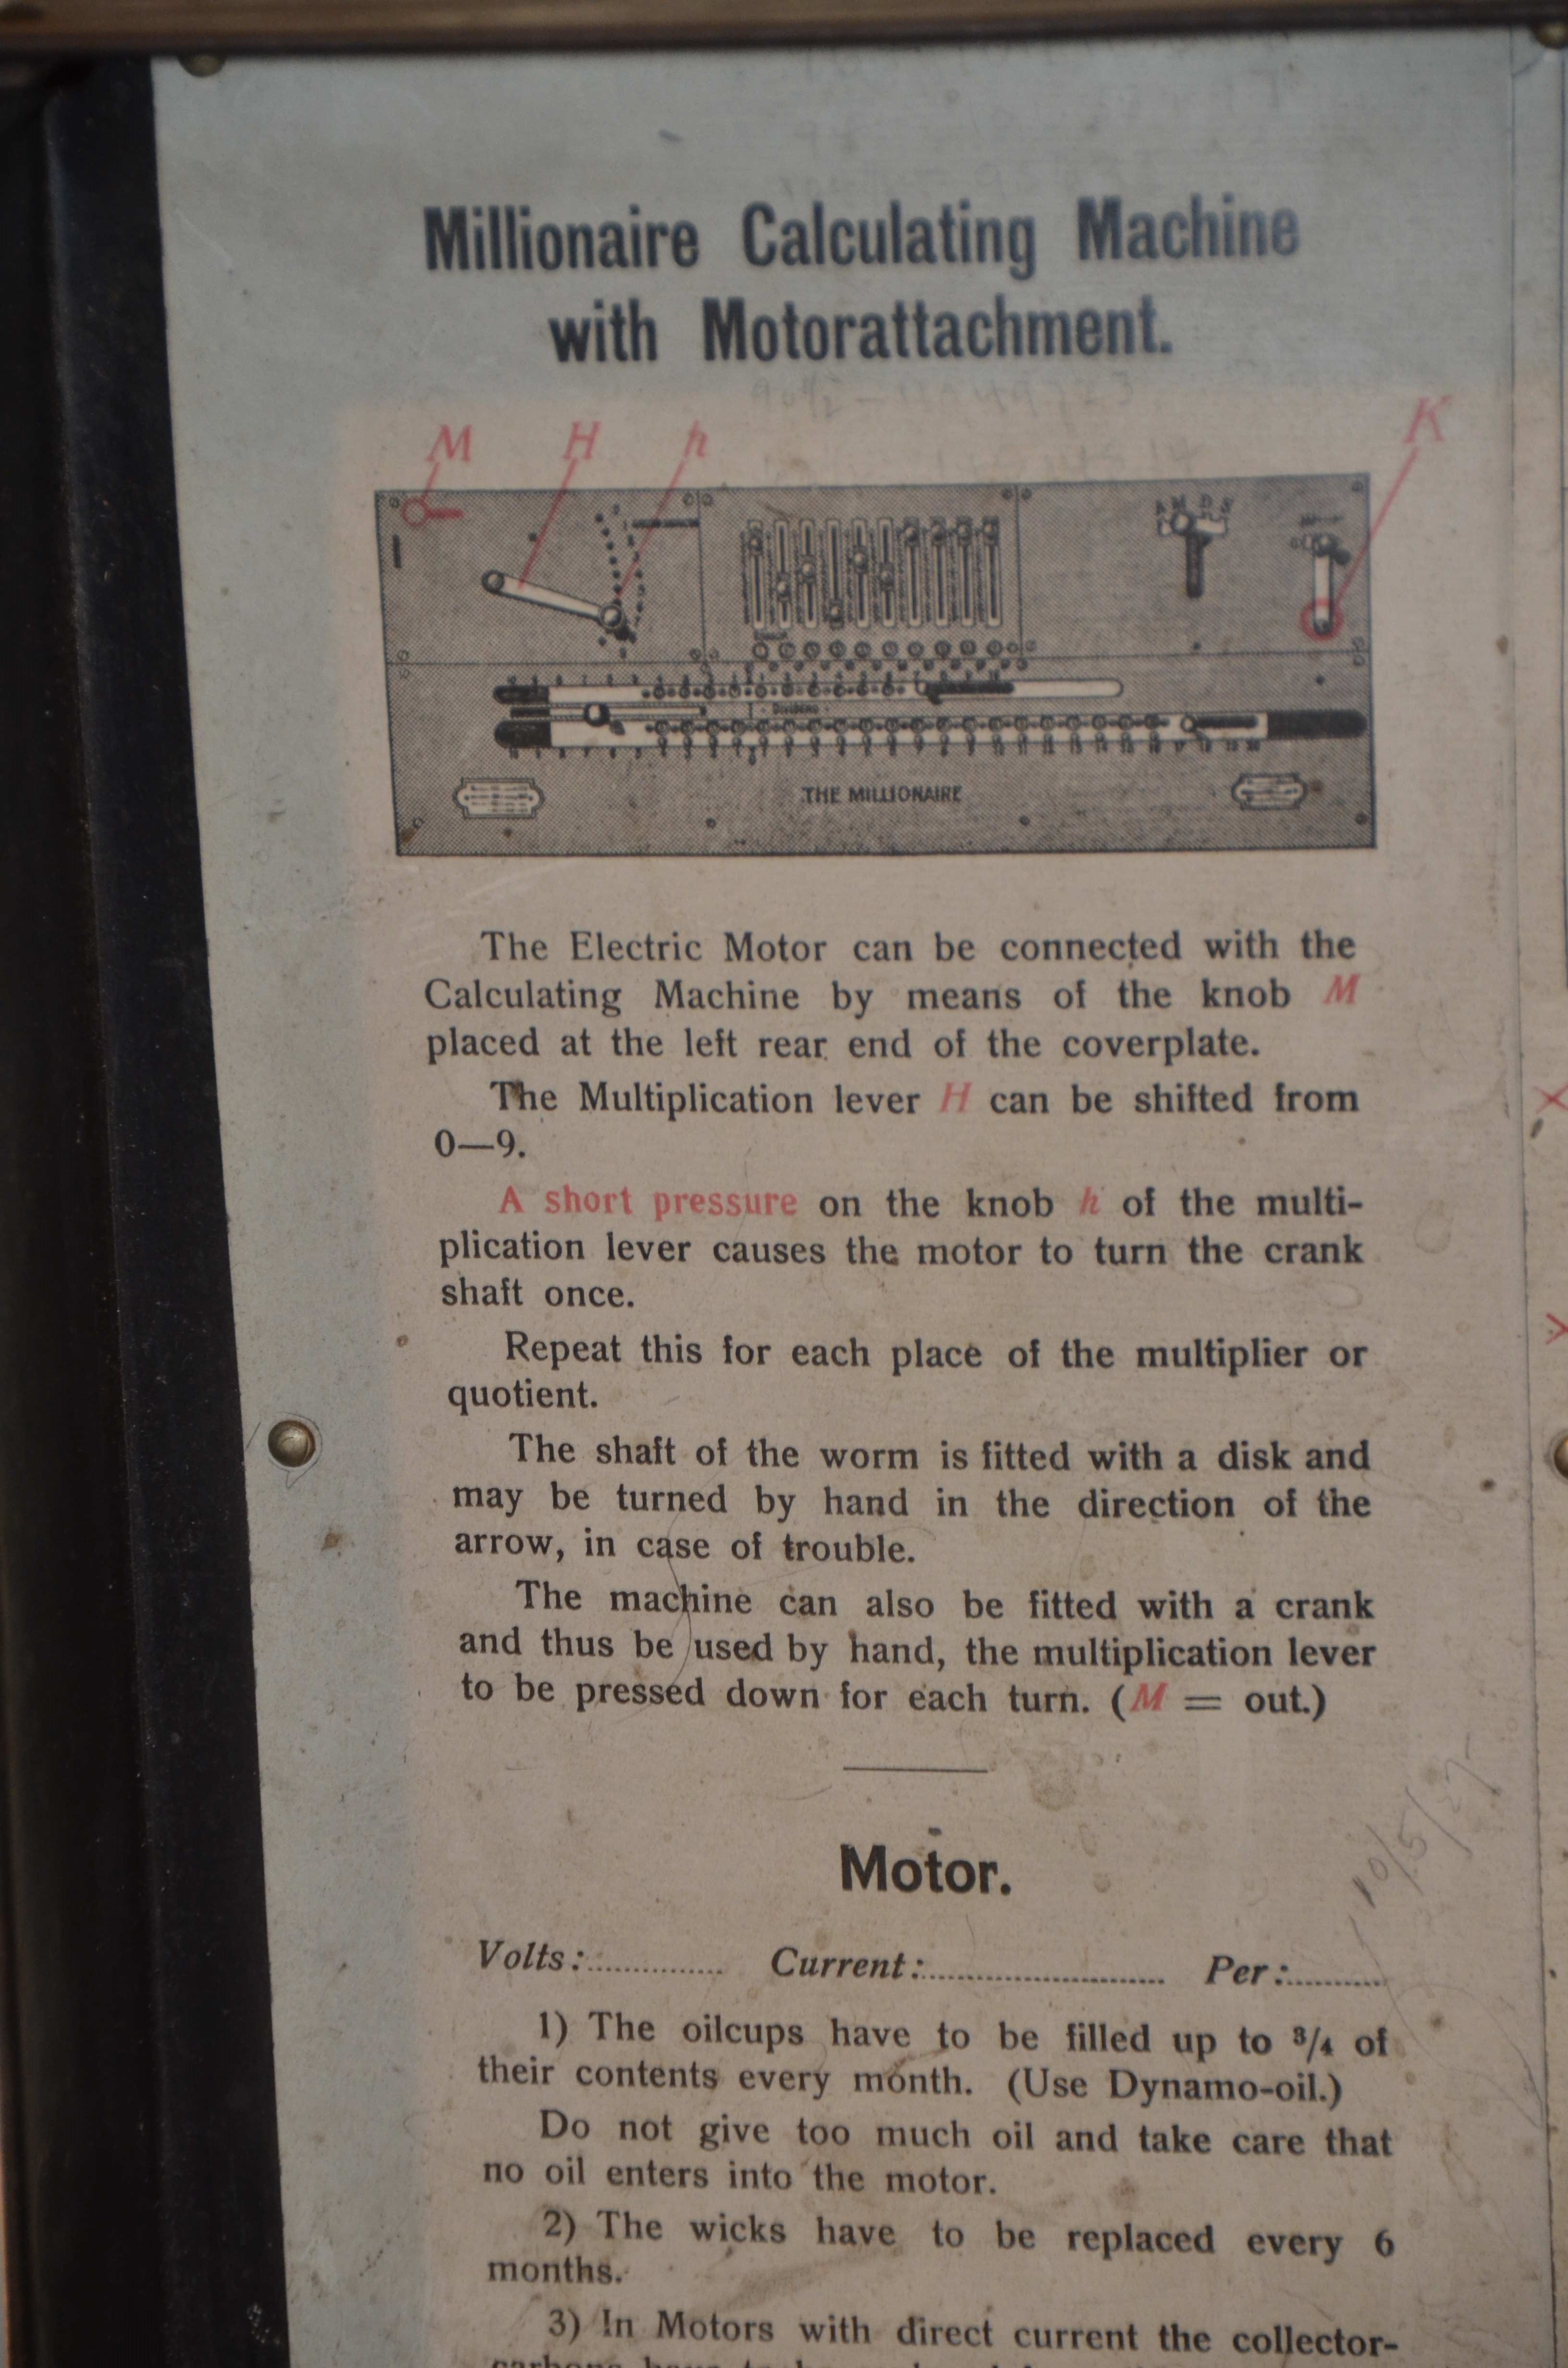
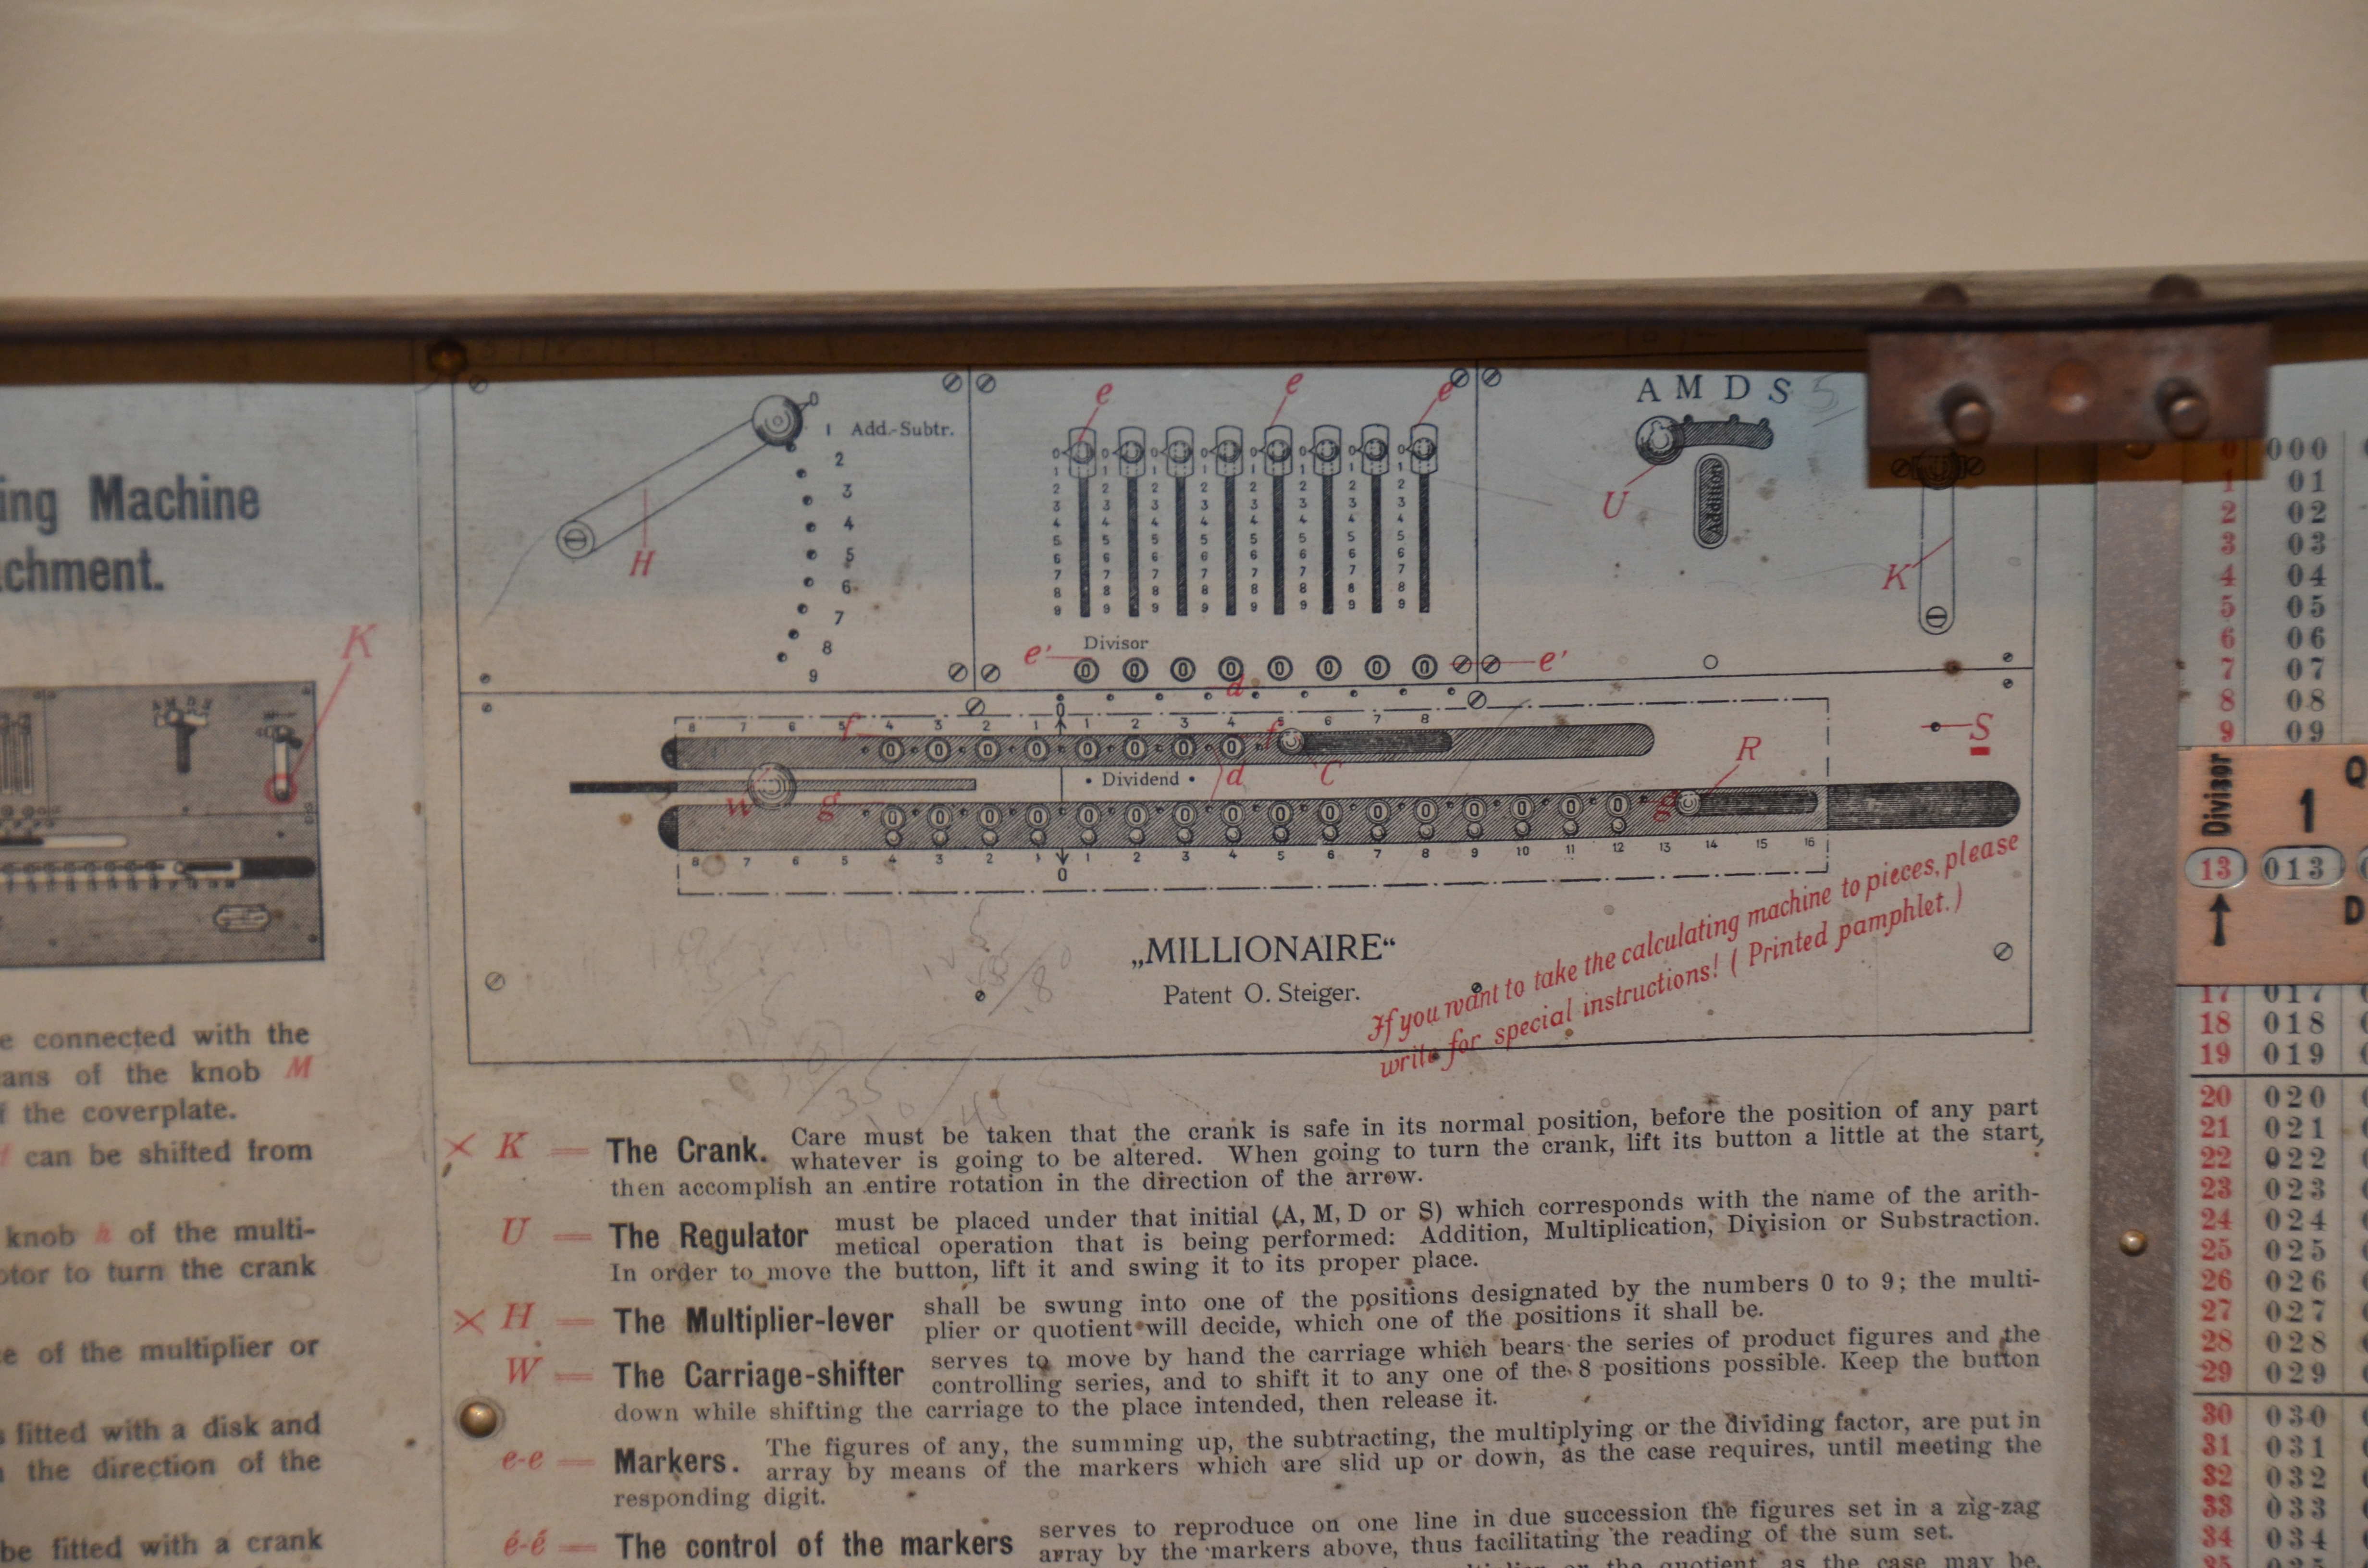
Detailed instructions of operation and even maintenance can be found inside the lid of the machine. Along with a table to aid in division.
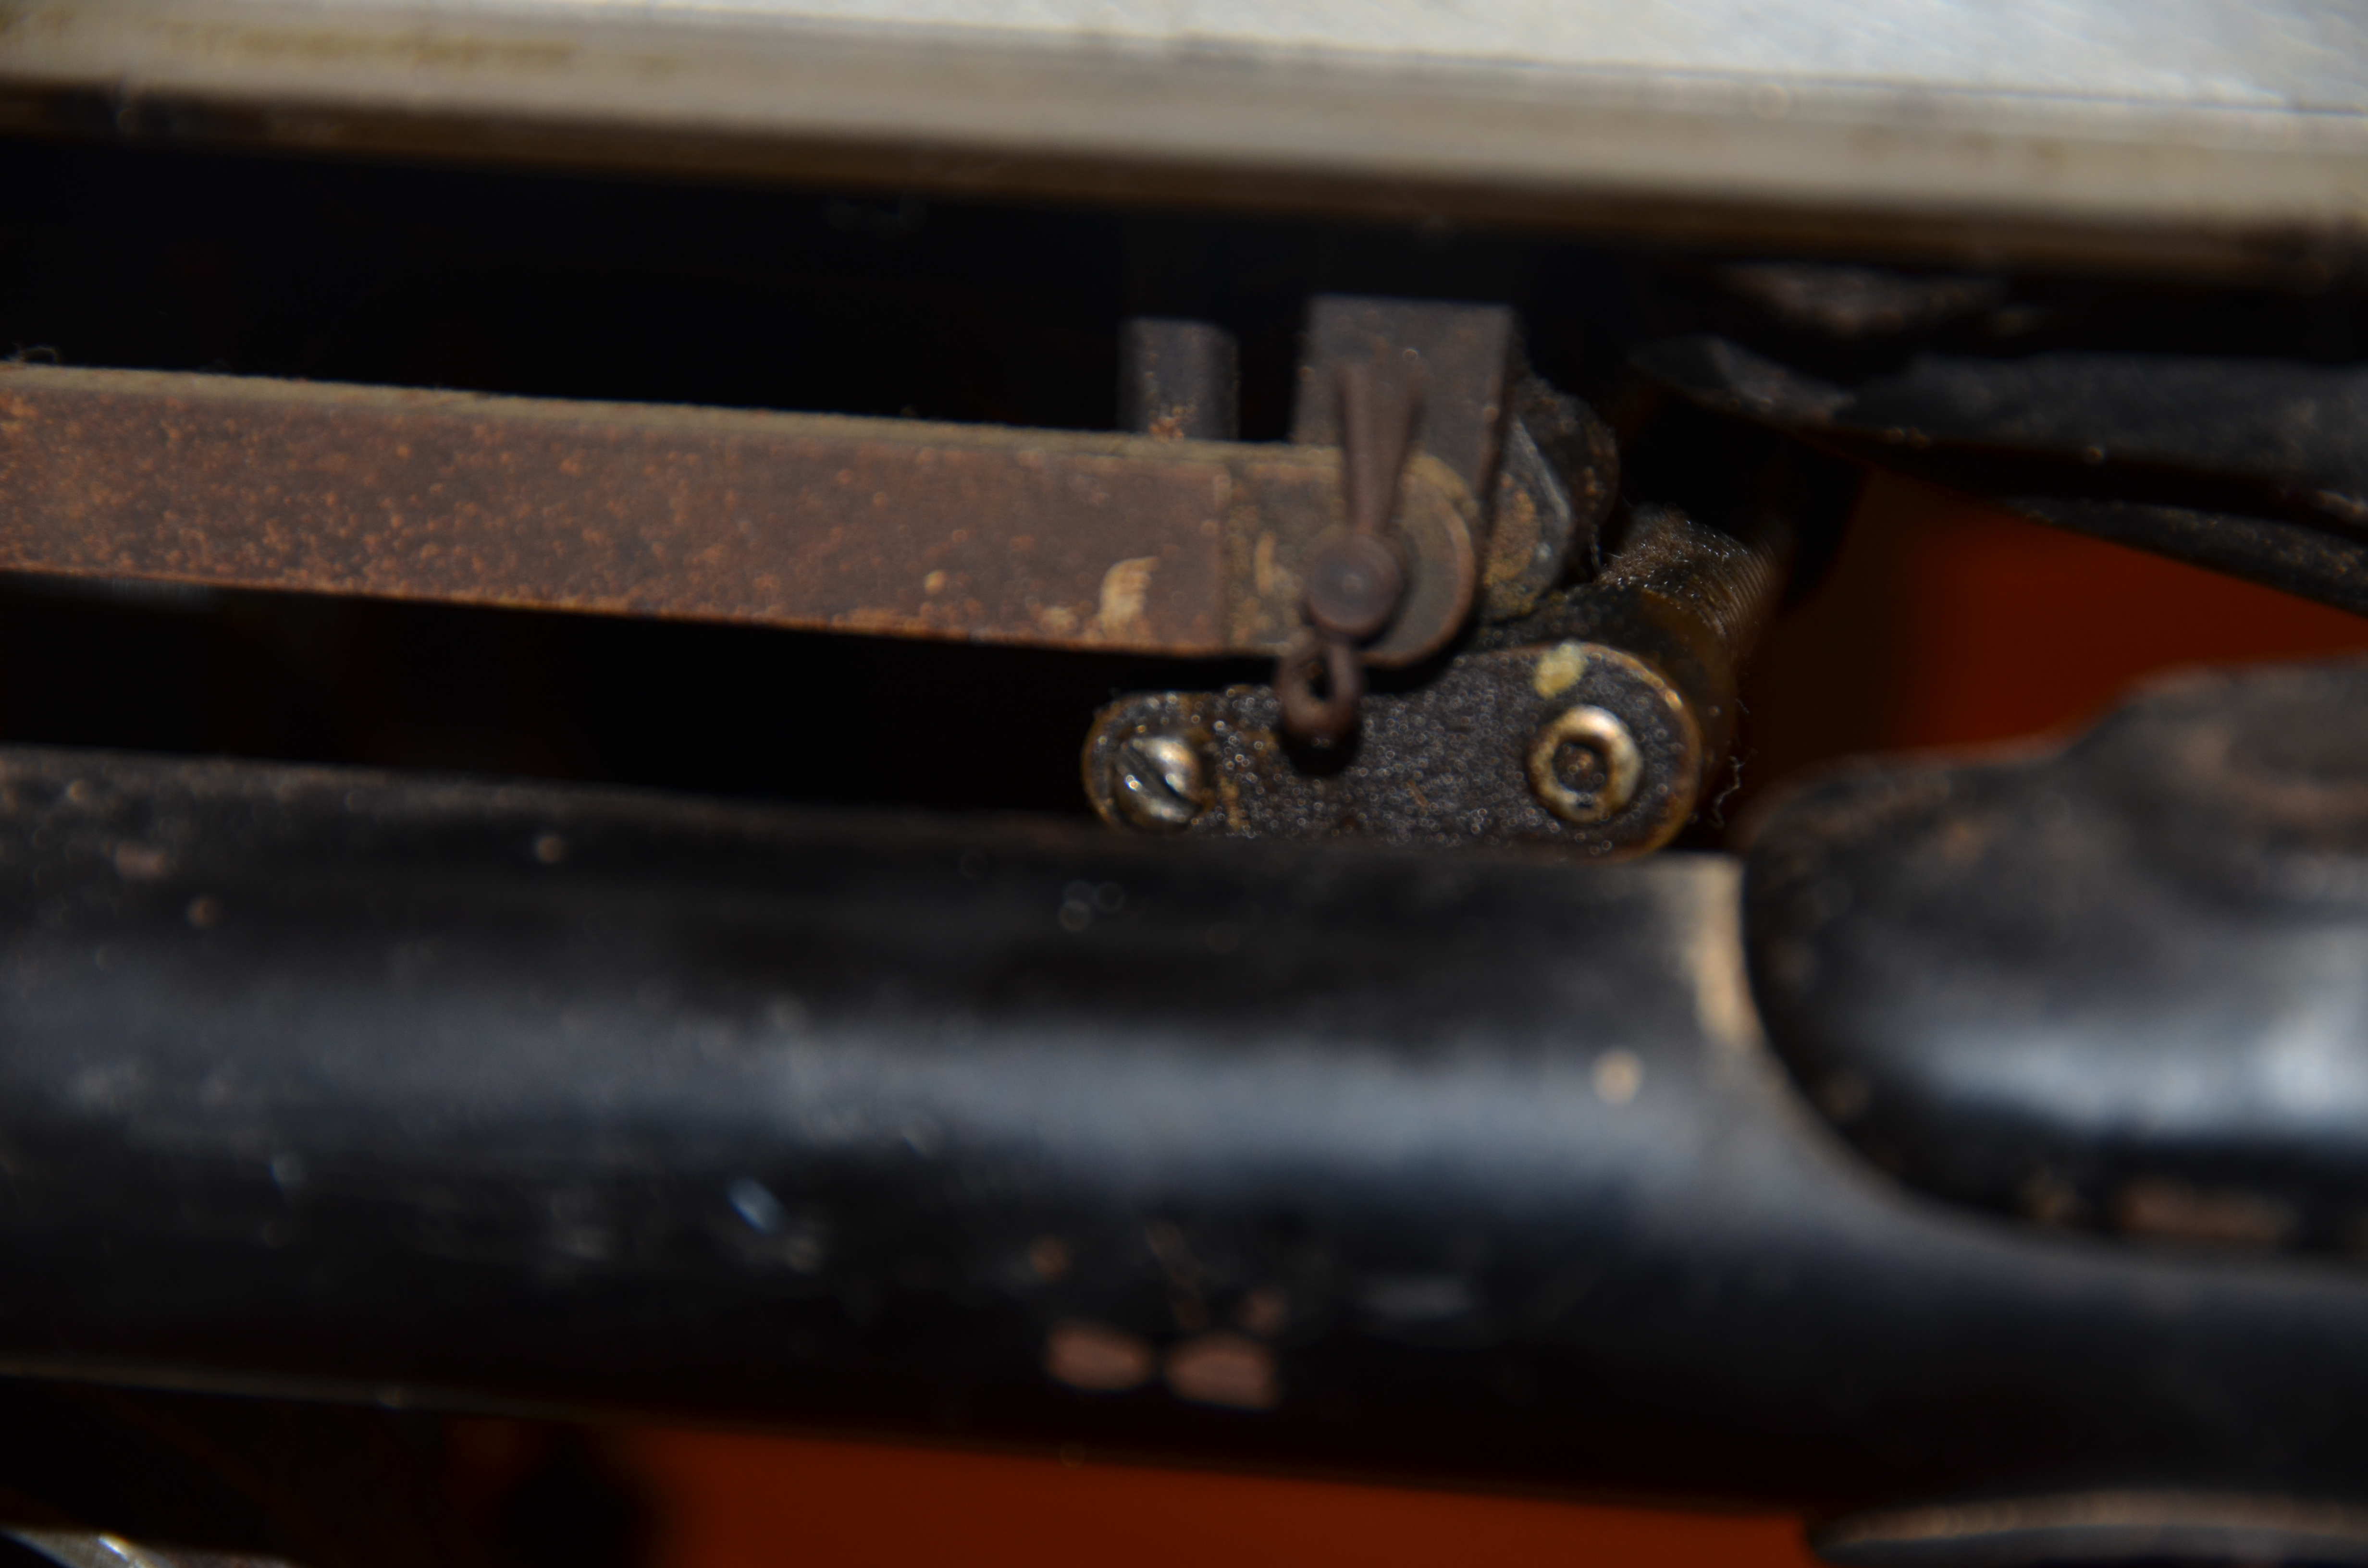
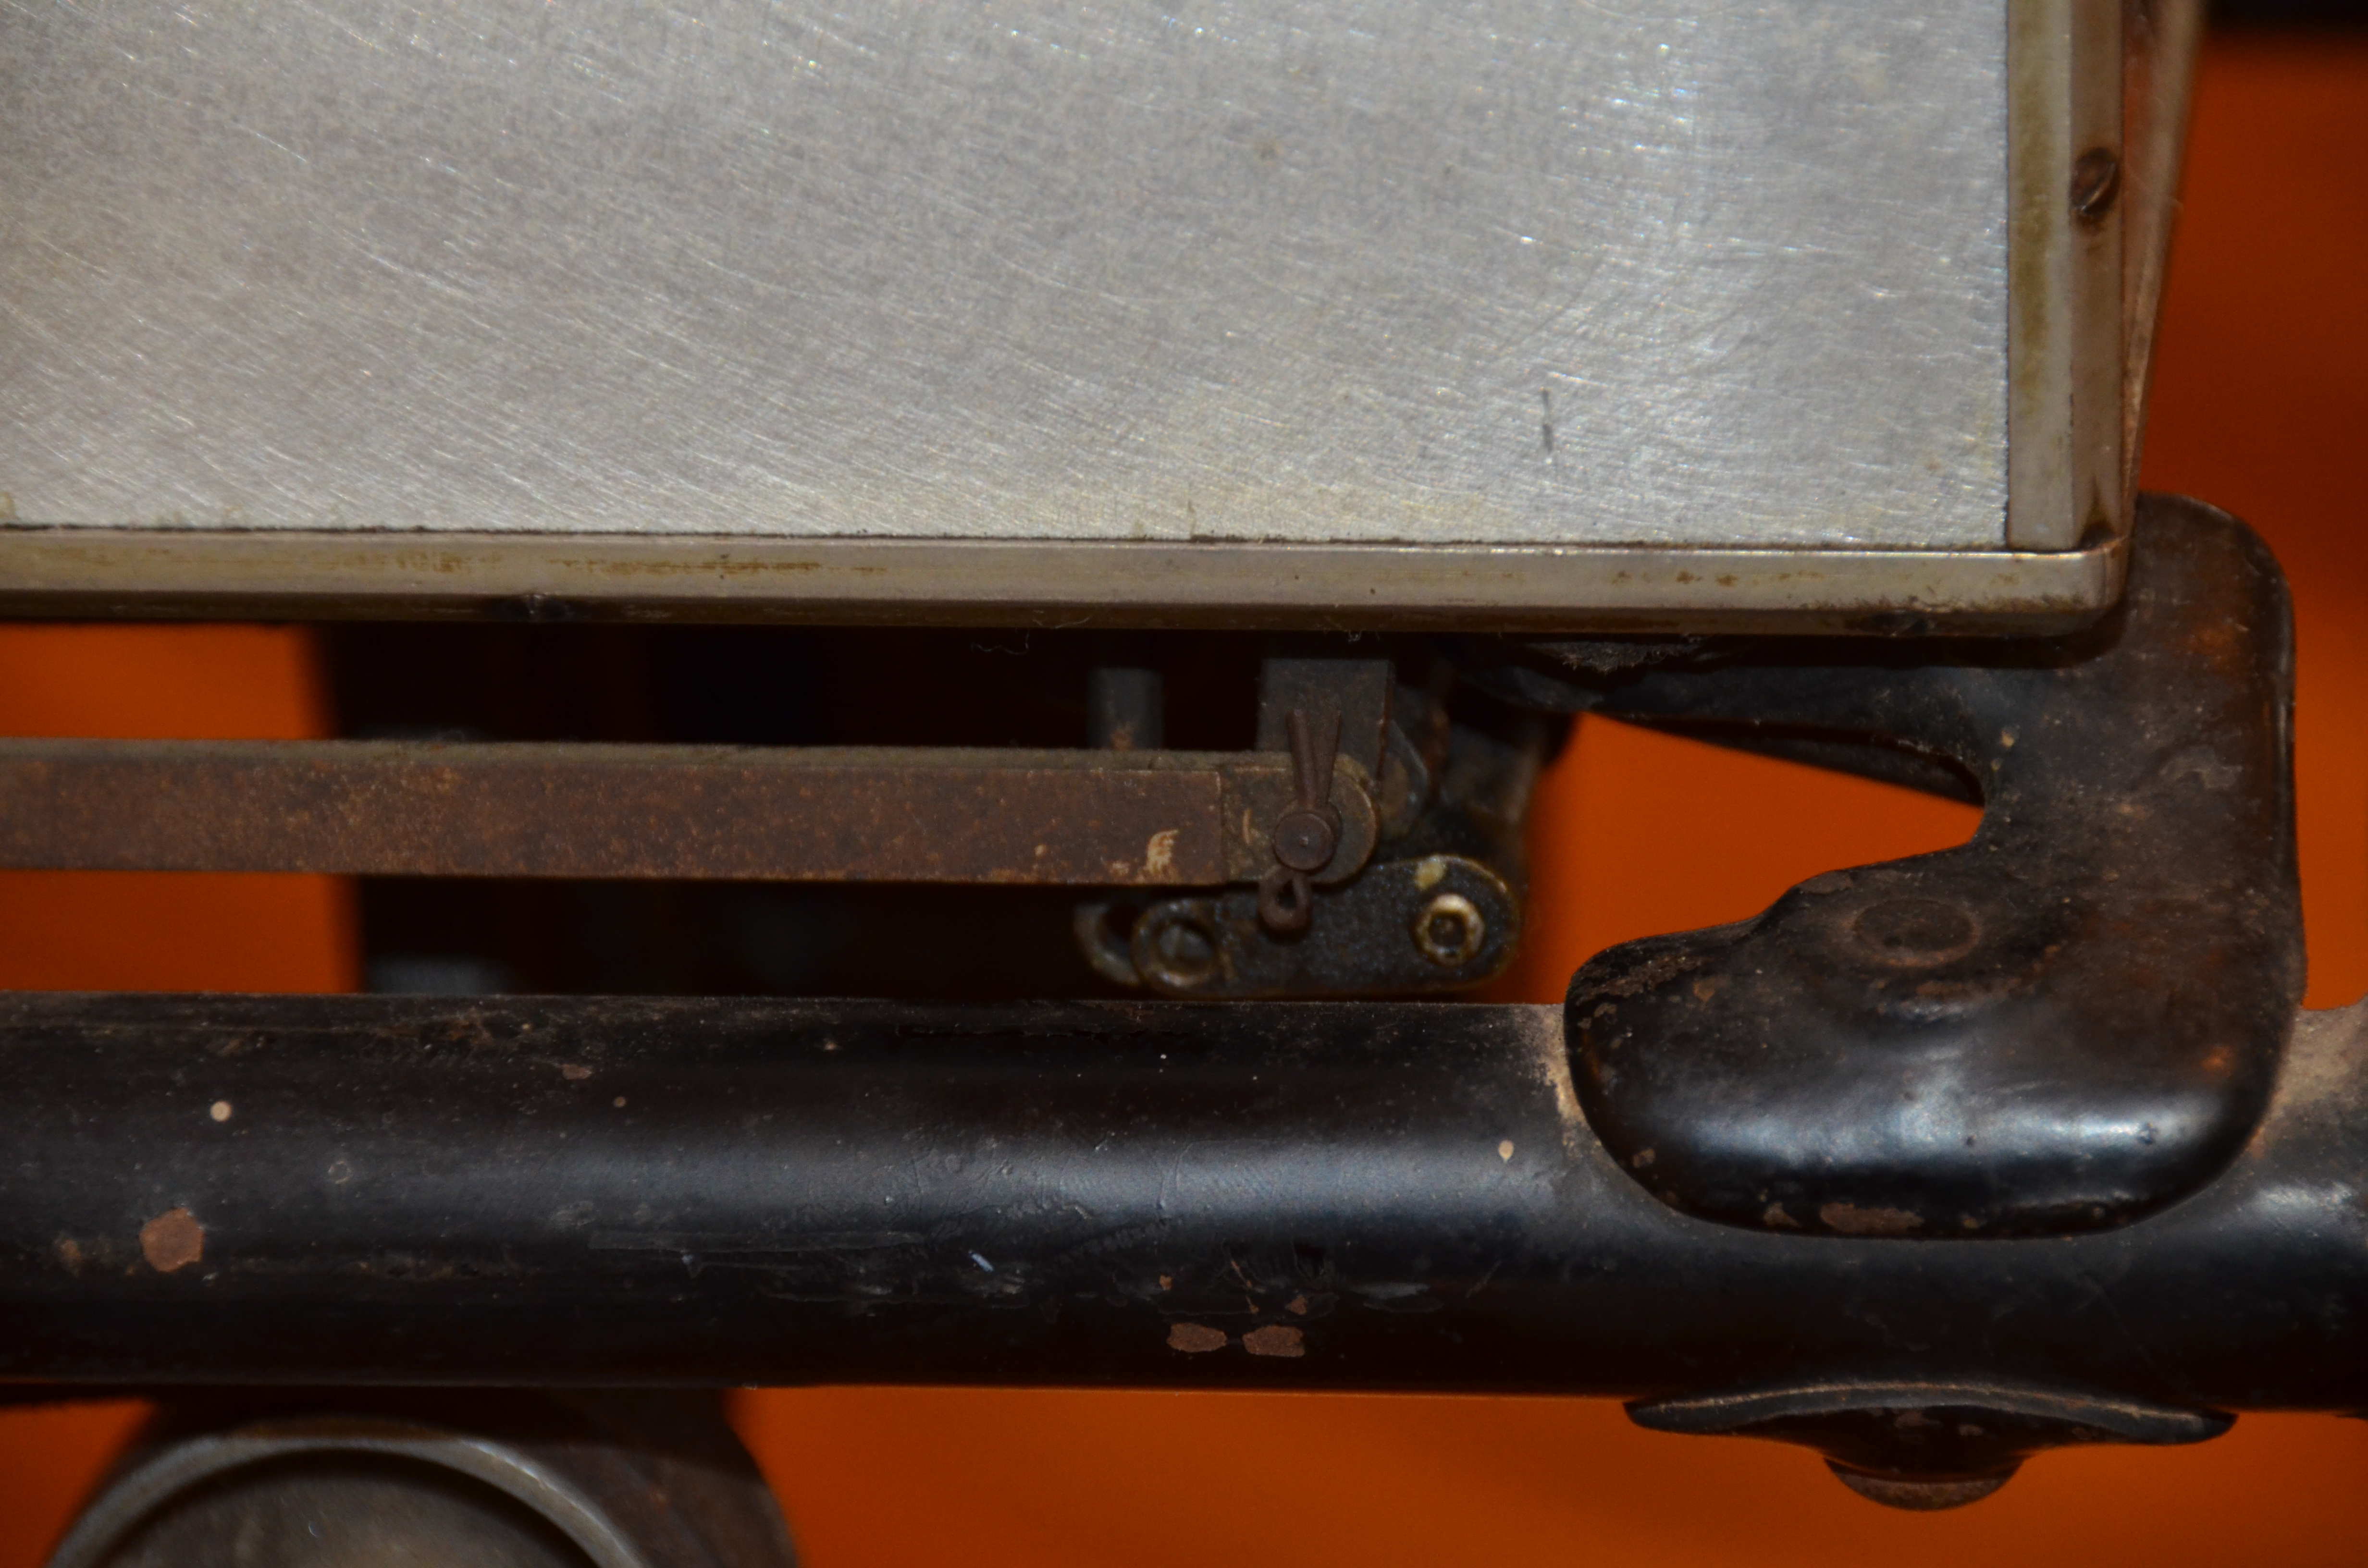
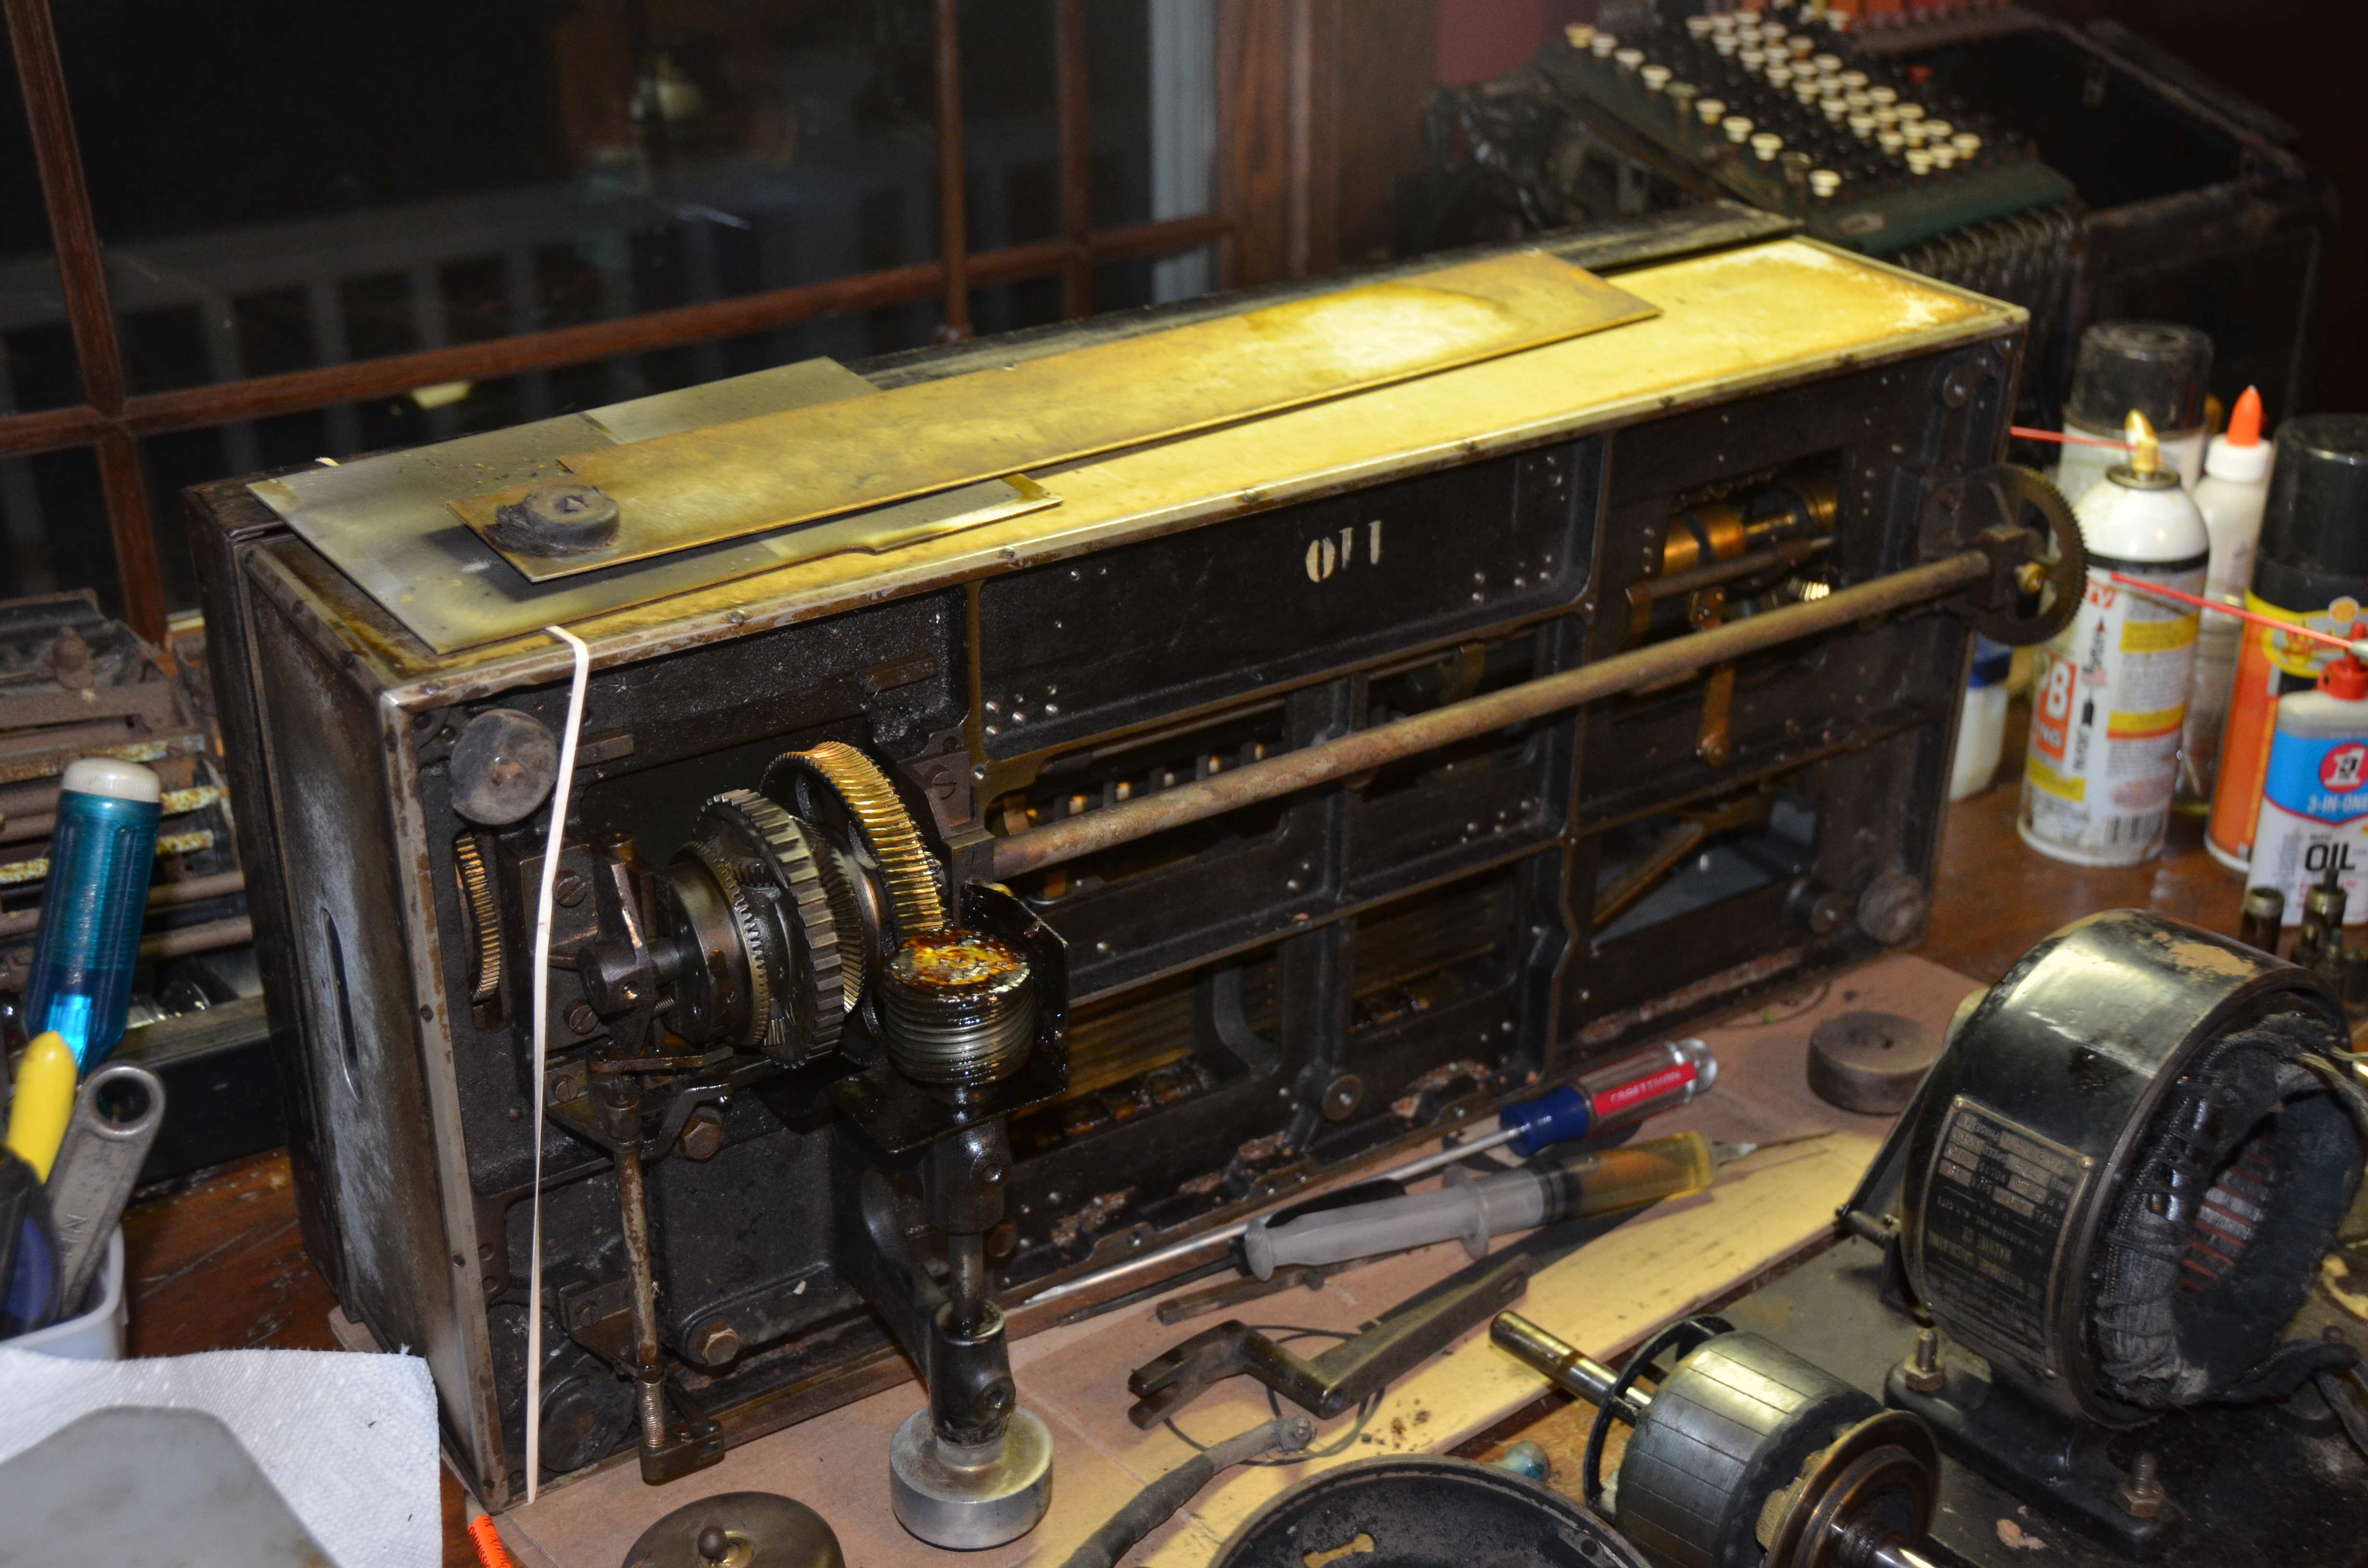
Before Cleaning and Repairs
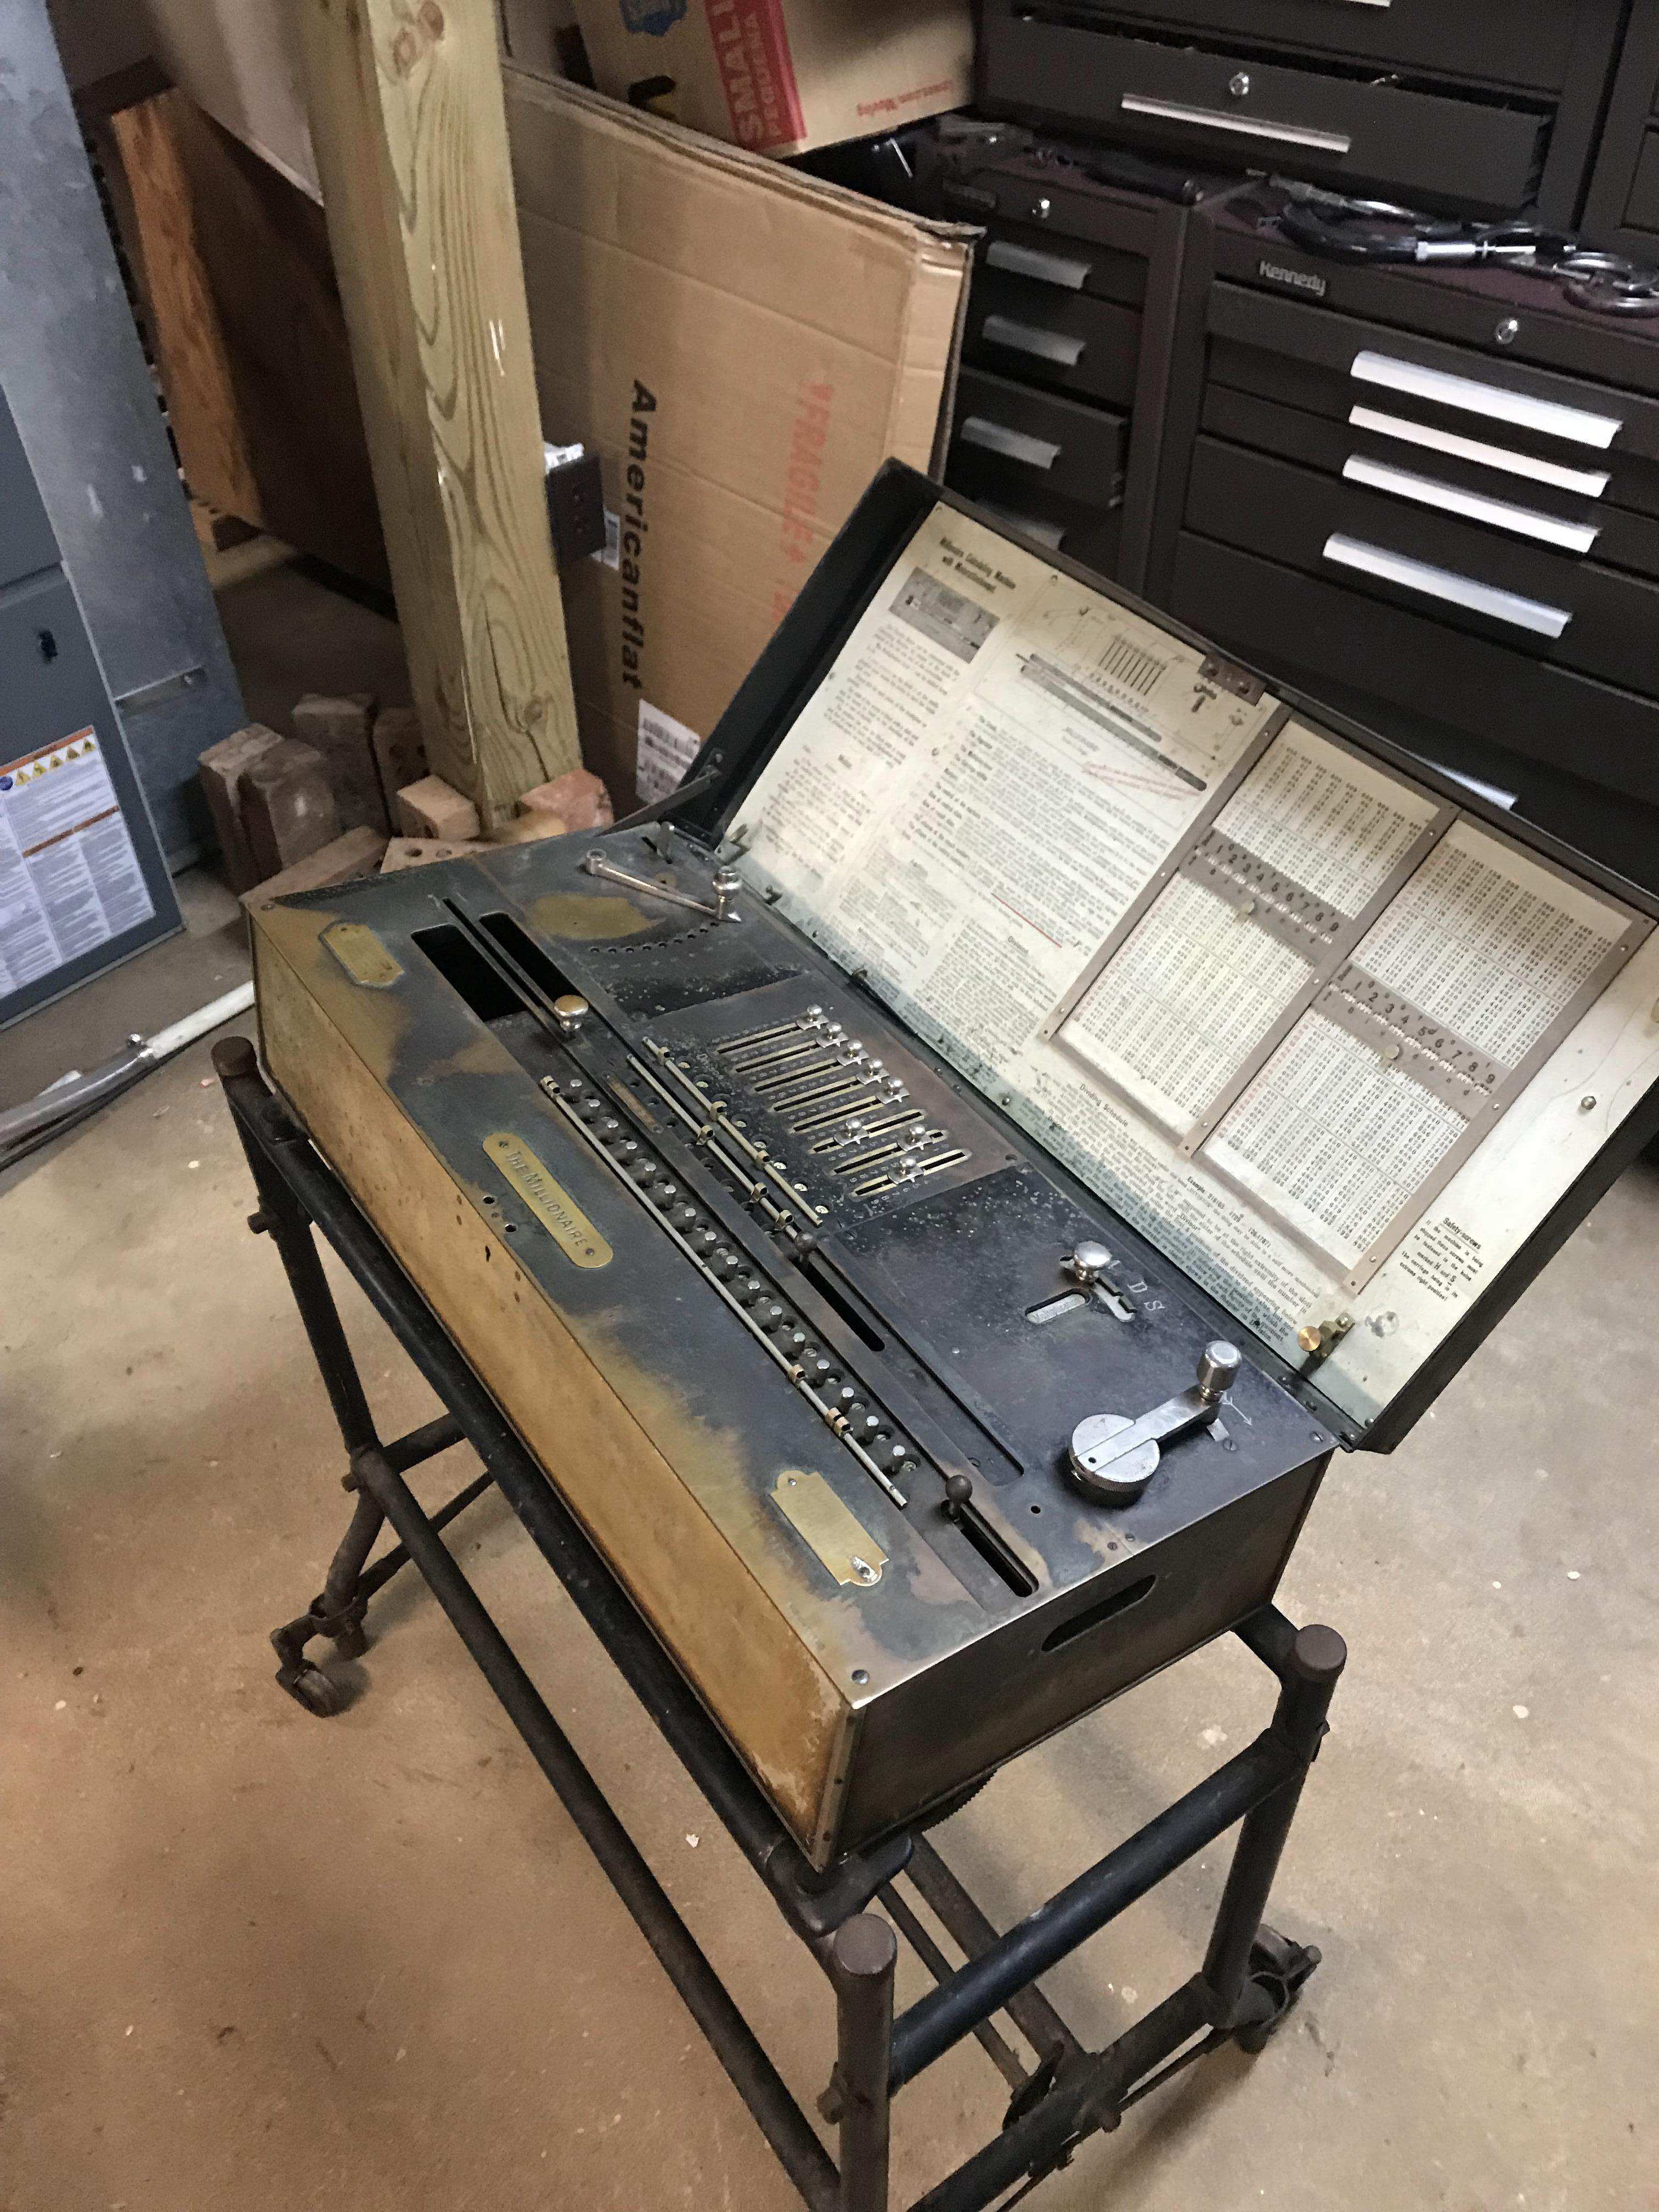
These are pictures taken of the machine when it was picked up. The calculator it’s self was on the stand backwards. It was working via the crank, but it was very tight. The power cord was mostly gone and other wiring was in pretty bad shape and was completely redone. A century of dust, oil, and dried grease were thoroughly cleaned from the outer and inner parts of the machine, and then it was reassembled.
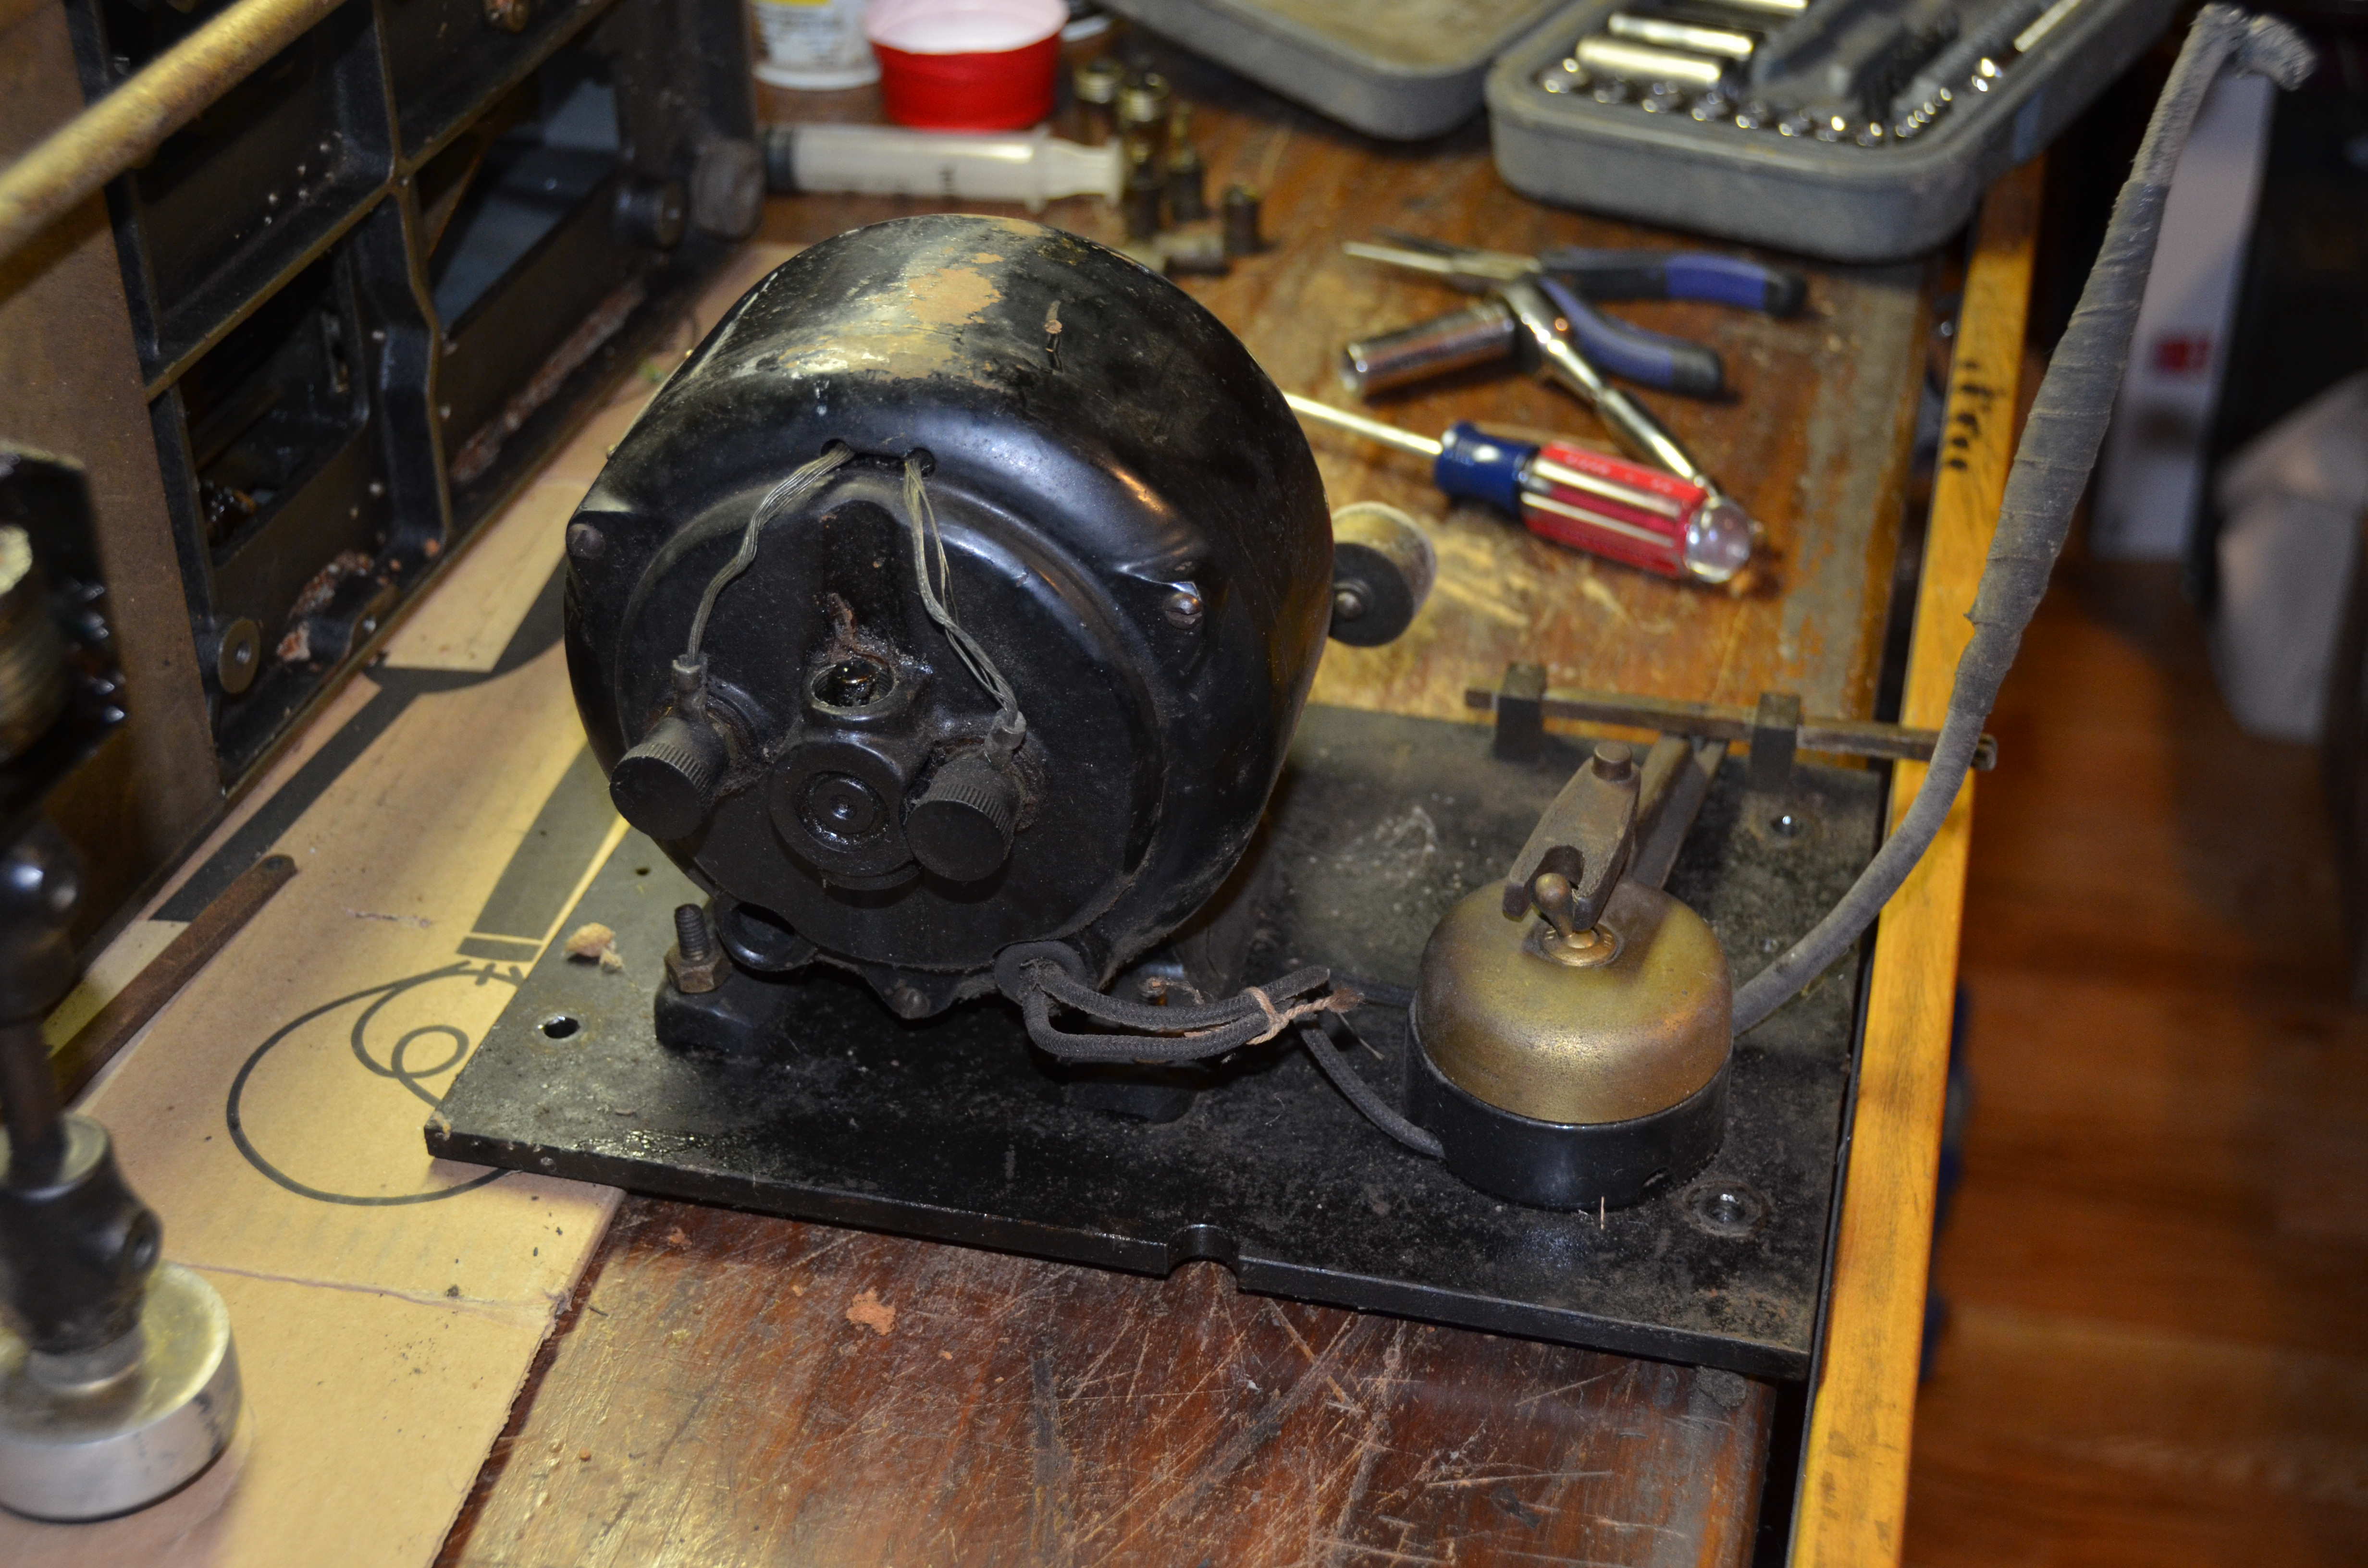
The motor was also taken apart and thoroughly cleaned, then everything was rewired.
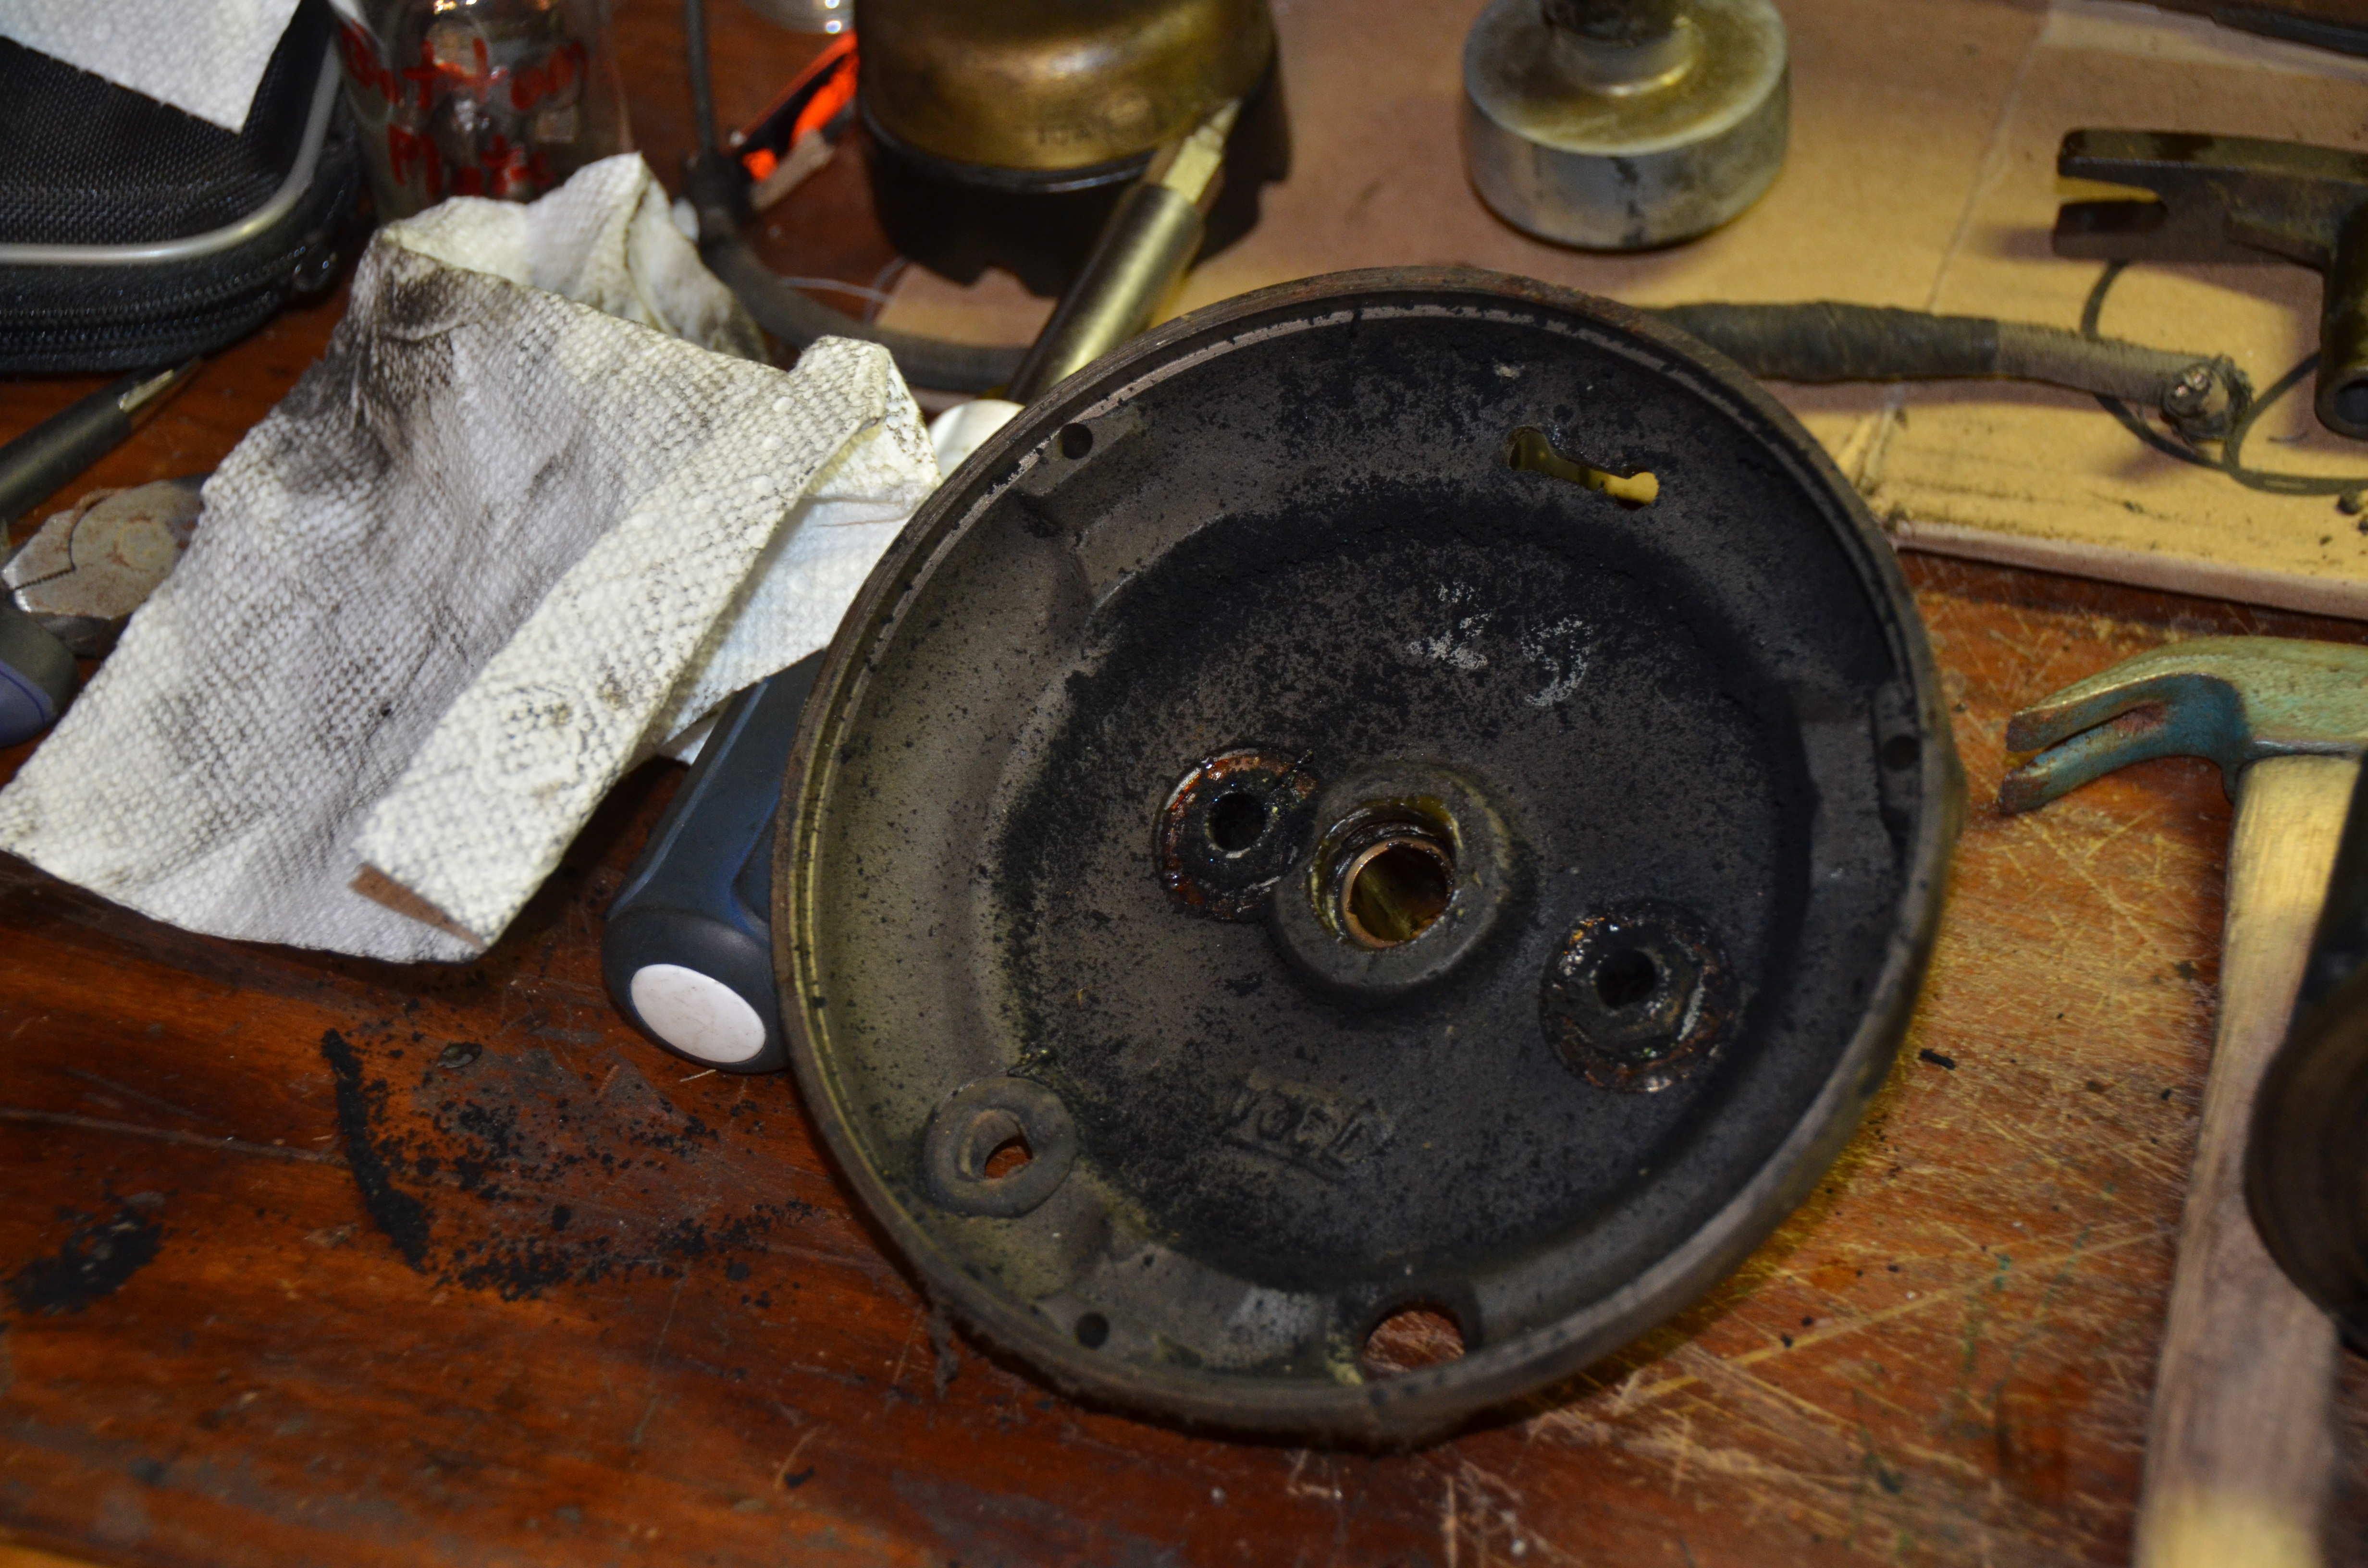
Surprisingly, some of the old grease was still moist and not hardened.
The workspace. (With a work-in-progress electric Burroughs Class 2 peeking over the calculator in the background)
Links and Sources
https://www.madas.ch/?page_id=5978
https://www.johnwolff.id.au/calculators/Egli/Egli.htm
https://history-computer.com/inventions/millionaire-calculator-machine-the-complete-history/